background image

70

DNP Imagingcomm America Corporation

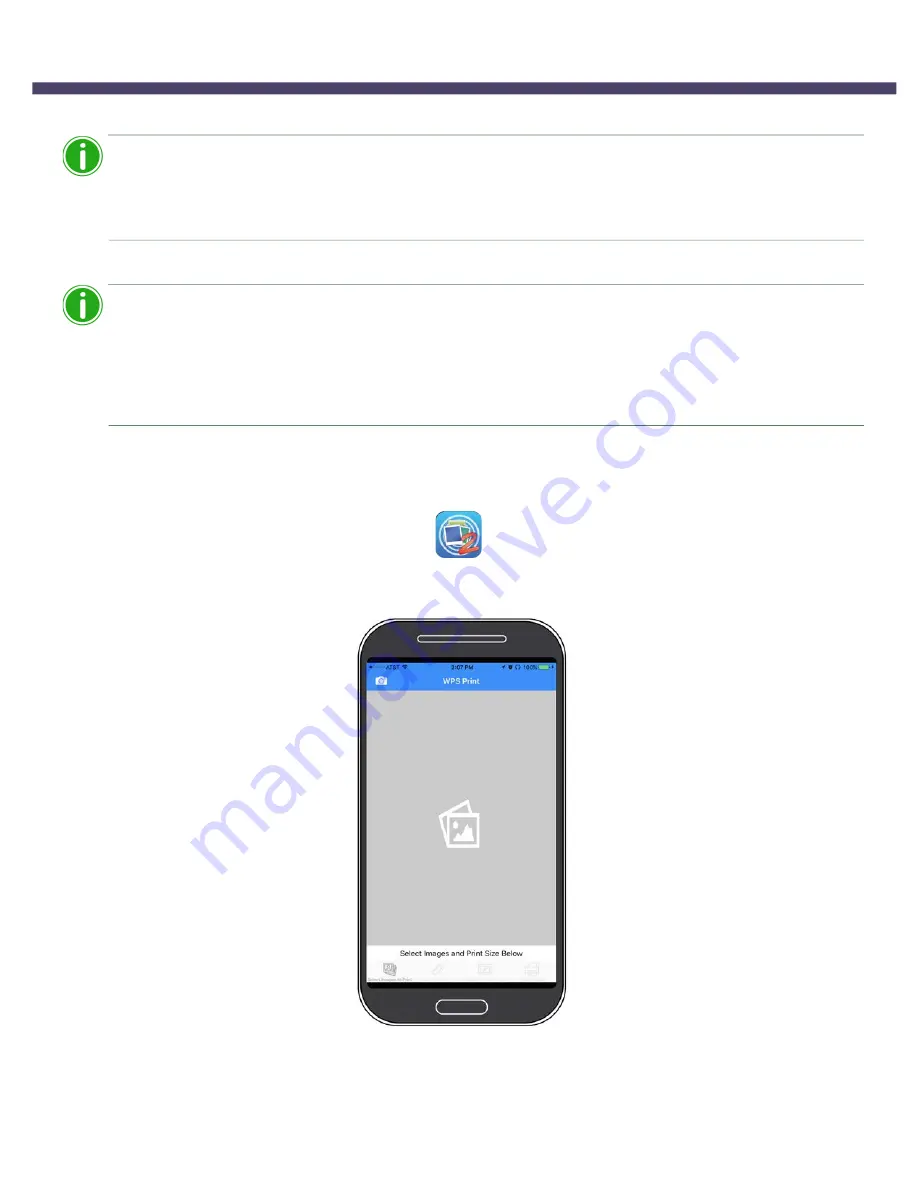
Printing from Apple Devices using the WPS Print 3 App

WPS Pro User Guide

Printing from Apple Devices using the WPS Print 3 App

Note

When using this app, the images you take are saved in an album in your photo gallery or camera 

roll. If you have the image archiving functionality turned ON, and a micro SD card plugged into the 

WPS Pro device, your images are also saved to the micro SD card.

1.

Connect to the Wi-Fi signal created by WPS Pro.

Note

IMPORTANT

The WPS Pro Wi-Fi login credentials have changed for version 3:

SSID: 

WPS3__xx

Password: 

DNP2WPS3 

(All CAPS)

The WiFi SSID is 

WPS3_xx

, where 

xx

 is the 

unique ID 

for your WPS Pro®. 

2.

When prompted, type the following password: 

DNP2WPS3

3.

Wait two minutes for your device to connect to the wireless network before opening the app.

4.

On your mobile device, open the 

WPS Print 3 

app. 

5.

The WPS Print 3 app opens to the home screen and is now ready for use.

Содержание WPS PRO

Страница 1: ...WIRELESS PRINT SERVER WPS Pro 2020 DNP Imagingcomm America Corporation ALL RIGHTS RESERVED REV 09 27 2020 PN DOC U WPS PRO R01 User Guide ...

Страница 2: ...nter Status 16 Print Queue 17 Print Review 17 Info Panel 18 Performance Storage 18 Maintenance Menu 19 Settings Menu 20 Print Status 20 QW410 Support 21 Works with AirPrint 21 Enable AirPrint 21 AirPrint with iOS 22 AirPrint with macOS 24 AirPrint with Android 27 Printing Borders with AirPrint 30 Shoot To Print with FlashAir 30 Pairing FlashAir Card with the WPS Pro 31 Transferring Images via Flas...

Страница 3: ... Transfer 66 Printing Errors 67 6 Using Apple Mobile iOS Devices with WPS Pro Using Apple Devices for Web Transfers Mobile Apps 69 Configuring Apple Devices for Web Transfers Mobile Apps 69 Printing from Apple Devices using the Share Sheet Option 69 Printing from Apple Devices using the WPS Print 3 App 70 Using Apple Mobile iOS Devices for FTP Transfers 72 Configuring Apple Devices for FTP Transfe...

Страница 4: ...ring Image Archiving 94 Changing the Test Print Setting 96 Changing the Default Language 97 About the WPS Pro Region Setting 97 Changing the Printing Settings 98 Changing the Printing Size Options 98 Changing the Print Finish 102 Changing the Print Pooling Settings 103 Changing the High Density Printing Mode 104 Configuring FTP Settings 105 Configuring FTP 105 Configuring Partial Matte 106 Configu...

Страница 5: ...iguring Partial Matte 125 Configuring Borders 126 Changing the Number of Copies Printed 127 Selecting the Printer Queue 128 Selecting Borders 129 Configuring the Networking Options 130 Configuring WebPut 130 Configuring OTA 131 Configuring Name Services 132 Configuring Airprint 133 Configuring Firmware Options 134 Configuring Firmware 134 Configuring Firmware Updates 135 ...

Страница 6: ...re and all of its component parts At the Licensor s sole discretion the Licensor may from time to time provide You with updates to the Software Any such updates shall become part of the Software licensed to You hereunder and subject to all of the terms and conditions of this Software License Agreement DISCLAIMER OF WARRANTIES The Licensor expressly disclaims any and all warranties relative to the ...

Страница 7: ...y Print are registered trademarks of Dai Nippon Printing Company LTD Apple the Apple logo iPad and iPhone are trademarks of Apple Inc registered in the U S and other countries App Store is a service mark of Apple Inc Amazon is a trademark of Amazon com Inc or its affiliates Android and Google Play are trademarks of Google Inc SD SDHC and SDXC are trademarks or registered trademarks of SD 3C LLC in...

Страница 8: ...product do not mix with general household waste There is a separate collection system for used electronics products in accordance with legislation under the WEEE Directive For details please consult with your dealer PIPO Technology Co Ltd hereby declares that this Wireless Print Server is in compliance with the essential requirements and other relevant provisions of Directive 1999 5 EC For details...

Страница 9: ...p www dnpphoto eu en Niniejszym PIPO Technology Co Ltd oświadcza że Wireless Print Server jest zgodne z zasadniczymi wymaganiami oraz innymi stosownymi postanowieniami Dyrektywy 1999 5 WE Szczegółowe informacje znaleźć można pod następującym adresem URL http www dnpphoto eu en PIPO Technology Co Ltd declara que este Wireless Print Server está conforme com os requisitos essenciais e outras disposiç...

Страница 10: ...as user names and directory paths When entering directory paths and so forth the word in italics should not be typed but should be replaced by the appropriate text Italic text also introduces new words and is occasionally used for emphasis in text Monospace Distinguishes information that is displayed on the screen as well as the text that you should enter Important Safety Instructions Safety is pa...

Страница 11: ...DNP Imagingcomm America Corporation 11 Important Safety Instructions WPS Pro User Guide ...

Страница 12: ...of new features in this version of WPS Pro Support for QW410 Works with AirPrint Shoot to Print via FlashAir SD card Simple Web Submission New User Interface Printer Firmware Check Speed Improvements Additional Print Sizes WPS Pro Wi Fi Login Note IMPORTANT The WPS Pro Wi Fi login credentials have changed for version 3 SSID WPS3__xx Password DNP2WPS3 All CAPS The WiFi SSID is WPS3_xx where xx is t...

Страница 13: ...nding your WPS Pro ID Method 1 Top Right Corner of Console To find the unique identifier for your device look in the top right corner as shown here Method 2 Test Print If Test Prints are enabled simply look at the SSID on the Test Print Test prints are printed when the WPS Pro boots up ...

Страница 14: ...14 DNP Imagingcomm America Corporation Method 3 Tap DNP Logo WPS Pro User Guide Method 3 Tap DNP Logo Tap the DNP logo in the bottom right corner to reveal the info panel ...

Страница 15: ... Corporation 15 WPS Pro User Interface WPS Pro User Guide WPS Pro User Interface The WPS Pro 3 0 software has a new look and a few new features Review this section of the document and get acquainted with the interface changes ...

Страница 16: ...unt for the printer Media Type Type of media loaded in your printer Paper Type Type size of the paper loaded into your printer Life Counter Total prints that have been produced by the connected printer in the printer s lifetime Firmware Version The version of the printer software installed on that printer Color Data Version The color data version loaded on the printer Serial Number Your device s s...

Страница 17: ...images that are transferred to the WPS Pro from the client device s The images are displayed from top left to bottom right sorted by the most recently transferred file first Tap the arrows to navigate through the transferred images Print Review You may click the images on the Print Queue and re print the images ...

Страница 18: ... in the bottom right corner will reveal the network and software version information Performance Storage The status bars in the bottom left corner of the WPS Pro display performance and storage information P Processor Load U USB Drive Space A WPS Pro Internal Drive Space C Camera FlashAir Drive Space ...

Страница 19: ...se only Save SD Card Utility to USB See FlashAir SD Card Utility section Shutdown WPS Pro Powers off your WPS Pro Clear Image Queue Clears the image queue on the WPS Pro and deletes files stored on the WPS Pro internal drive Clear FlashAir History See Managing FlashAir Transfers section Set Time and Date Set the time and date on your WPS Pro ...

Страница 20: ...r Guide Settings Menu The settings menu in version 3 has added sections for the new features and also includes the same options as version 2 Print Status This screen provides you with information about the print jobs and gives you access to the notification history ...

Страница 21: ...hing in at less than 13lbs and its compact size of only 8 W x 7 75 H x 9 5 D the QW410 is perfect for mobile photo booth operations The new photo printer is our smallest and lightest printer to date For more information on the QW410 printer visit http dnpphoto com See Supported Print Sizes for more information Works with AirPrint Print to the WPS Pro using AirPrint with a MacOS or iOS Print from A...

Страница 22: ...iOS WPS Pro User Guide AirPrint with iOS 1 Connect your iOS device to the WPS Pro WIFI hotspot WPS__XX 2 Use the password DNP2WPS3 3 Find an image on your iOS device 4 Use the Sharesheet button to print you will need to scroll down to find the print icon ...

Страница 23: ...he print s Note Each print size will show up as a separate printer using AirPrint 6 Set your options for copies and black and white optional Attention IMPORTANT WPS Pro only support up to five 5 copies of an image to be printed at one time To print more than five 5 copies of an image you need to resend the image ...

Страница 24: ...begin printing Note It may take up to 30 seconds for the images to transfer to the WPS Pro and begin printing depending on the file size and proximity of the device to the WPS Pro hotspot AirPrint with macOS 1 Connect your Mac to the WPS Pro WIFI hotspot WPS__XX 2 Use the password DNP2WPS3 3 Select the image s you wish to print on your Mac 4 Select File Print ...

Страница 25: ...DNP Imagingcomm America Corporation 25 AirPrint with macOS WPS Pro User Guide 5 Select Add Printer 6 Find the desired printer and print size in the list ...

Страница 26: ...26 DNP Imagingcomm America Corporation AirPrint with macOS WPS Pro User Guide 7 Click Add 8 Your Mac will setup the Printer ...

Страница 27: ...S Pro User Guide 9 Click Print AirPrint with Android Note AirPrint is only compatible with Android versions 9 and up on the WPS Pro 1 Connect your Android device to the WPS Pro WIFI hotspot WPS__XX 2 Use the password DNP2WPS3 3 Find an image on your Android device ...

Страница 28: ... Corporation AirPrint with Android WPS Pro User Guide 4 Use the Share button to print Note Methods for printing will vary depending on your Android device manufacturer Screenshots below may not represent your version of Android ...

Страница 29: ...Note Each print size will show up as a separate printer using AirPrint 6 The AirPrint image s will display on the on screen print queue and begin printing Note It may take up to 30 seconds for the images to transfer to the WPS Pro and begin printing depending on the file size and proximity of the device to the WPS Pro hotspot ...

Страница 30: ...e borders with AirPrint you must set the border in the HFP Hot Folder settings Shoot To Print with FlashAir Print directly from a camera via Wi Fi Requires a Toshiba FlashAir Card Tested with Toshiba FlashAir card models W 02 W 03 W 04 No tethering cable required needed ONE FlashAir card can be paired with the WPS Pro at a time ...

Страница 31: ...ide Pairing FlashAir Card with the WPS Pro Windows Users For Windows users there is a SD Card Utility available on the WPS Pro in the maintenance area You will need a USB drive to copy the file from the WPS Pro to your Windows PC Note The USB Drive MUST be formatted as FAT32 1 Tap the Gear icon ...

Страница 32: ...32 DNP Imagingcomm America Corporation Pairing FlashAir Card with the WPS Pro WPS Pro User Guide 2 Tap Save SD Card Utility to USB ...

Страница 33: ...DNP Imagingcomm America Corporation 33 Pairing FlashAir Card with the WPS Pro WPS Pro User Guide 3 When prompted insert the USB Drive into USB Slot 4 ...

Страница 34: ...34 DNP Imagingcomm America Corporation Pairing FlashAir Card with the WPS Pro WPS Pro User Guide 4 Wait for the file transfer to complete see prompts below then remove the USB Drive from your WPS Pro ...

Страница 35: ... Windows PC and extract WPS_SDRecovery_1 2 0 zip to your PC 6 Insert the FlashAir card you wish to pair into your Windows PC 7 Run WPS_SDRecovery_1 2 0 exe from the folder where you extracted the files to your PC 8 Type in the 2 digit WPS Pro ID into the form 9 Click SET 10 Your FlashAir card is now ready to pair with the WPS Pro ...

Страница 36: ... CONFIG file in the SD card directory using Finder YORSDCARD SD_WLANU 3 Note You may need to show hidden files if you cannot see the file by pressing Command Shift Dot 4 Edit the file with TextEdit and copy these values into the document 5 Change APPSSID to your WPS Pro SSID Ex WPS3__f5 Note There are 2 UNDERSCORES after WPS3 then your WPS Pro Id 6 Once finished put the FlashAir card in your camer...

Страница 37: ...his mode will automatically transfer all new photos from the FlashAir card to the WPS Pro and print the images DPOF Mode The WPS Pro will ONLY transfer and print the images with the DPOF tag Please refer to your camera s user manual for DPOF image tagging Enable Borders Enable the borders by tapping On The WPS Pro will print the selected border on the images transferred via FlashAir Print Queue Ch...

Страница 38: ...ill see a Camera Connected message on the WPS Pro console Note It may take up to 60 seconds for the WPS Pro to recognize and pair with the FlashAir card If you do not see this message try the SD Card Utility again If you continue to have issues please see the troubleshooting section below The C meter indicates that your FlashAir card is connected to the WPS Pro and the amount of free space left on...

Страница 39: ...t an image is transferring and will display that image in the print queue on the console FlashAir History The All New mode Shoot to Print creates a history file to determine which files on the card are considered New to be printed To reset the FlashAir history and allow photos from your FlashAir card to be transferred to the WPS Pro and printed again 1 Tap the Gear icon 2 Tap Clear Flash Air Histo...

Страница 40: ...m America Corporation Troubleshooting FlashAir Card Issues WPS Pro User Guide 3 Select Ok Troubleshooting FlashAir Card Issues You MUST be using a Toshiba FlashAir W 02 W 03 W 04 card for the WPS Pro to transfer images ...

Страница 41: ...Pro User Guide 1 If you are having trouble pairing your FlashAir card with the WPS Pro try running the SD Card Utility and click the Repair button 2 Select the Drive letter for your FlashAir card and the Toshiba version number 3 If issues persist reboot your WPS Pro 4 Click Restore ...

Страница 42: ...omm America Corporation Troubleshooting FlashAir Card Issues WPS Pro User Guide 5 Press Enter on your keyboard for both of these prompts 6 Optional Name the FlashAir Card Otherwise click ENTER 7 Once complete click OK ...

Страница 43: ...ve Simple Web Submission Upload images via a simple web page with by enabling the Simple Web Submission setting No apps are required Any device with a web browser can transfer images to the WPS Pro 1 Connect your device to the WPS Pro Wi Fi hotspot WPS__XX 2 Use the password DNP2WPS3 3 Access the web page at http 192 168 43 1 sws html 4 Choose your image 5 Click Upload ...

Страница 44: ...iguration will print out a QR Code that will direct users to the WPS Pro simple uploader Printer Firmware Check If your printer firmware is older than the latest firmware as of August 14 2020 the WPS Pro will update the firmware on your DNP printer To enable or disable the firmware checks go to the Firmware settings on your WPS Pro Note The WPS Pro only performs the DNP firmware update check when ...

Страница 45: ...ight 4 5x8 4 5x8 Media QW410 4 5x8 2436 1408 4 5x4 5sq Square QW410 4 5x4 5sq 1408 1408 4 5x4 1 2 Panel QW410 4 5x4 1236 1408 4 5x6 Partial QW410 4 5x6 1886 1408 2x4 5x4s 2 Strip QW410 2x4 5x4s 2436 1408 4x4 5x2s 4 Strip QW410 4x4 5x2s 2436 1408 DS620 Print Size Print Setting Queue Name Width Height 4x6 4x6 Media DS620 4x6 1844 1240 2x6 2 2 Strip DS620 2x2x6s 1844 1240 DS620 Print Size Print Setti...

Страница 46: ...th Height 5x7 5x7 Media DS40 5x7 2138 1548 3 5x5 Partial DS40 3 5 x 5 1548 1088 3 5x5 1 2 Panel DS40 3 5x5 1548 1088 2x3 5x5s 2 Strip DS40 2x3 5x5s 2176 1548 DS40 Print Size Print Setting Queue Name Width Height 6x8 6x8 Media DS40 6x8 2436 1844 6x6sq Square DS40 6x6sq 1844 1836 4x6 1 2 Panel DS40 4x6 1844 1240 2x2x6s 2 Strip DS40 2x2x6s 1904 1300 2x6x4s 4 Strip DS40 2x6x4s 2498 1844 2x4x6 2 Strip ...

Страница 47: ...are DS820 8x8sq 2448 2436 DS820 Print Size Print Setting Queue Name Width Height 8x12 8x12 Media DS820 8x12 3636 2448 4x8 Partial DS820 4x8 2448 1236 4x8x2s 2 Strip DS820 4x8x2s 2502 2448 4x8x3 3 Strip DS820 4x8x3 2488 3768 5x8 Partial DS820 5x8 2448 1536 5x8x2s 2 Strip DS820 5x8x2s 2502 2448 7x8 Partial DS820 7x8 2448 1836 8x9 Partial DS820 8x9 2448 2736 6x8 Partial DS820 6x8 2448 1836 6x8x2s 2 S...

Страница 48: ...DS820 only available in designated sales regions DS820A only available in designated sales regions QW410 Manage your system wirelessly Use the WPS Pro mobile apps to manage your network and printers while you re on the move With the WPS Print 2 Application you can print from compatible iOS or Android mobile devices In many cases you can even print from within other photo apps by using the share fu...

Страница 49: ...d up to two 2 USB ports if you are connecting only one printer you are going to use only one USB port For more information please Setting Up the WPS Pro System on page 53 One new feature of your new WPS Pro device is an 8 touchscreen display From this display you can see the DNP printer s attached to the device how much media is left in each attached printer any pending print jobs and up to 5 of t...

Страница 50: ... Pro system is comprised of the following software applications which are loaded on the WPS Pro console Note Need to re open an app Press the Apps button on your console and select the app from the listed open applications If the application is not listed press the Home button touch the top right corner of the screen and select the app from the application menu Applications for normal daily use WP...

Страница 51: ... 10 Mac OS X 10 6 and later iPhone iPad iOS 8 or later Android Version 4 4 KitKat or later Supported Printers DS40 DS80 RX1 RX1 HS DS620 DS620A DS820 DS820A QW410 Printer Media Sizes DS40 any media size supported by the printer DS80 any media size supported by the printer RX1 any media size supported by the printer RX1 HS any media size supported by the printer DS620 DS620A any media size supporte...

Страница 52: ...mm America Corporation 52 4 Installation Your WPS Pro box contains your WPS Pro unit and a power cable Use the diagram below to find the ports you will need when using your system Figure 1 WPS Pro Back View of Ports ...

Страница 53: ...ered ON they will not be detected when connected to the WPS Pro device 2 Plug the power cable into a properly grounded power outlet and into the WPS Pro power port on the back of the device Figure 2 WPS Pro Power Port 3 Connect the printer s to the USB ports on the back and side of the WPS Pro device If you are connecting only one 1 printer to the device connect the printer USB cable to the lower ...

Страница 54: ...rs Wait three minutes before you try to connect any input devices to the WPS Pro network When the WPS Pro powers on the device s touchscreen display shows the booting process and the time remaining until the WPS Pro is ready for use Attention When you start or restart the WPS Pro device it takes about three 3 minutes before the device is ready for use 6 Once the WPS Pro has started the WPS Status ...

Страница 55: ...America Corporation 55 Setting Up the WPS Pro System WPS Pro User Guide While using your WPS Pro system make sure that the WPS Status app is displayed on the console when you are ready to print Figure 4 WPS Status App ...

Страница 56: ...WPS Pro Wireless Network The WPS Pro acts as its own wireless network for your input devices and printers 1 From your computer or mobile device connect to the WPS Pro Wi Fi network Note IMPORTANT The WPS Pro Wi Fi login credentials have changed for version 3 SSID WPS3__xx Password DNP2WPS3 All CAPS The WiFi SSID is WPS3_xx where xx is the unique ID for your WPS Pro 2 When prompted type the followi...

Страница 57: ...outer or network hub At this time you cannot bridge the WPS Pro device wirelessly to an existing network Turning Off the WPS Pro There are times when you need to turn off your WPS Pro For example after you ve made updates to the Configuration screen you need to turn off the WPS Pro for the updates to take effect Follow these steps to turn off your WPS Pro Note Before you shut down your WPS Pro dev...

Страница 58: ...58 DNP Imagingcomm America Corporation Turning Off the WPS Pro WPS Pro User Guide 2 Touch the Shutdown WPS Pro option 3 Your WPS Pro console will now powered OFF ...

Страница 59: ...system status 2 Using Android Devices for FTP Transfers FTP transfers allow you to print through the WPS Pro network using your favorite camera and photo editing applications on your mobile device WPS Pro supports printing from Wi Fi enabled Android and mobile devices i e smartphones and tablets using a FTP client application WPS Pro also allows you to connect five 5 input transfer devices simulta...

Страница 60: ...id Devices using the Share Option Use the following procedure to print from your device By downloading the WPS Print 2 mobile application you can print from within any photo app that uses standard share sheet functionality 1 If you haven t already download the WPS Print 3 app to your mobile device 2 Connect to the Wi Fi signal created by WPS Pro Note IMPORTANT The WPS Pro Wi Fi login credentials h...

Страница 61: ...functionality turned ON and an micro SD card plugged into the WPS Pro device your images are also saved to a micro SD card 1 Connect your mobile device to the Wi Fi signal created by WPS Pro Note IMPORTANT The WPS Pro Wi Fi login credentials have changed for version 3 SSID WPS3__xx Password DNP2WPS3 All CAPS The WiFi SSID is WPS3_xx where xx is the unique ID for your WPS Pro 2 When prompted enter ...

Страница 62: ...a Corporation Printing from Android Devices using the WPS Print 3 App WPS Pro User Guide 6 At the WPS Print home screen press the blue button to open your image options 7 Select either the Camera or Gallery option from the menu ...

Страница 63: ... to use If necessary accept any app permissions If you have multiple photo applications on your phone you may have to choose a gallery each time you load images Select your image Depending on your gallery application you may be able to select more than one image at a time To do this click and hold an image until check marks appear on the images Then select the images you want to print and press Do...

Страница 64: ...oto Size from the drop down list You can select any size that is allowed by your attached printer 14 Use the Quantity scroll wheel to select your print quantities 15 Press the Print button to print your images Your images are transmitted wirelessly from your Android device to the WPS Pro Print times can vary depending on your image size distance from the Wi Fi device and signal strengths 16 Press ...

Страница 65: ...used when transferring images from a mobile device to the WPS Pro for printing To do this you must have a FTP client application installed on your mobile device Be sure your FTP client application allows for binary data transfer as that is the data type WPS Pro supports Configuring Android for FTP Transfers You can configure mobile FTP client applications to allow you to use this transfer method f...

Страница 66: ...y Please note that WPS Pro only prints JPEG and PNG file formats Printing from Android Devices Using FTP Transfer Use the following steps to print images from your Android phone tablet 1 Select your WPS Pro device from the Settings icon This is located in the Wi Fi portion of the Settings screen Note IMPORTANT The WPS Pro Wi Fi login credentials have changed for version 3 SSID WPS3__xx Password DN...

Страница 67: ...image did not print so you can try to reprint the image Figure 6 Example error sheet 1 If you receive this error try to reprint the image If the image doesn t print the second time verify your network connections then try again Note WPS Pro has been built for JPEG and PNG files with an RGB color space Make sure your images are in one of these formats before sending them to the WPS Pro for printing...

Страница 68: ...2 Using Apple Mobile iOS Devices for FTP Transfers FTP transfers allow you to print through the WPS Pro network using your favorite camera and photo editing applications on your mobile device WPS Pro supports printing from Wi Fi enabled iOS mobile devices i e smartphones and tablets using a FTP client application WPS Pro also allows you to connect five 5 input transfer devices simultaneously Your ...

Страница 69: ...Tunes store WPS Status app WPS Print 3 app Printing from Apple Devices using the Share Sheet Option Use the following steps to print images from your iPad iPhone 1 If you haven t already download the WPS Print 3 app to your mobile device 2 Connect to the Wi Fi signal created by WPS Pro Note IMPORTANT The WPS Pro Wi Fi login credentials have changed for version 3 SSID WPS3__xx Password DNP2WPS3 All...

Страница 70: ...WPS Pro device your images are also saved to the micro SD card 1 Connect to the Wi Fi signal created by WPS Pro Note IMPORTANT The WPS Pro Wi Fi login credentials have changed for version 3 SSID WPS3__xx Password DNP2WPS3 All CAPS The WiFi SSID is WPS3_xx where xx is the unique ID for your WPS Pro 2 When prompted type the following password DNP2WPS3 3 Wait two minutes for your device to connect to...

Страница 71: ... select the printer print size finish type and image quantity Press the Print button to print your image s 8 To print images using your photo gallery Press the Select Images to Print option at the bottom of the screen Select your image Depending on your gallery application you may be able to select more than one image at a time To do this click and hold an image until check marks appear on the ima...

Страница 72: ...hen transferring images from a mobile device to the WPS Pro for printing To do this you must have a FTP client application installed on your mobile device Be sure your FTP client application allows for binary data transfer as that is the data type WPS Pro supports Configuring Apple Devices for FTP Transfers Note Only use this procedure when setting up your WPS Pro device for the first time After y...

Страница 73: ... network you can now print your images wirelessly Please note that WPS Pro only prints JPEG and PNG file formats To print your images using your iPad or iPhone see Printing from Apple Devices using the Share Sheet Option on page 69 Printing from Apple Devices using FTP Transfers Use the following steps to print images from your iPad iPhone If you have not already configured your device to connect ...

Страница 74: ...i Fi login credentials have changed for version 3 SSID WPS3__xx Password DNP2WPS3 All CAPS The WiFi SSID is WPS3_xx where xx is the unique ID for your WPS Pro 2 When prompted type the following password DNP2WPS3 3 Select your image or images Note The image s you are printing must be stored locally on your device and NOT in the cloud 4 Click the Share Sheet 5 Touch the Print button 6 Select the pri...

Страница 75: ... America Corporation 75 Printinting from Apple Devices using AirPrint WPS Pro User Guide 10 Your image s are printed and the image is displayed on your console s print queue Your image may take 10 20 seconds to print ...

Страница 76: ...image did not print so you can try to reprint the image Figure 8 Example error sheet 1 If you receive this error try to reprint the image If the image doesn t print the second time verify your network connections then try again Note WPS Pro has been built for JPEG and PNG files with an RGB color space Make sure your images are in one of these formats before sending them to the WPS Pro for printing...

Страница 77: ...er to use WPS Pro Using Windows PC with the Hot Folder Print Options HFP Using Hot Folder Printer folders you can transfer images in bulk or individually by copying and pasting the images into the hot folder printers on the WPS Pro device Before you begin printing check your WPS Pro console and make sure the WPS Status app is running In order to process the images it receives the WPS Pro console m...

Страница 78: ...nts at a time to the print folder Configuring a Windows PC for HFP Use the following steps to print images from your PC 1 From your computer select your WPS Pro device Note IMPORTANT The WPS Pro Wi Fi login credentials have changed for version 3 SSID WPS3__xx Password DNP2WPS3 All CAPS The WiFi SSID is WPS3_xx where xx is the unique ID for your WPS Pro 2 When prompted type the following password D...

Страница 79: ...ges and paste them into the print size folder in the Hot Folder Printers folder Note If possible only copy and paste your image If you cut and paste your image when you have automatic archiving turned OFF your images will not be saved on the WPS Pro device 4 Your photos are sent from your PC to the WPS Pro and are printed Printing Errors If you have issues when printing images an error sheet will ...

Страница 80: ...ou can transfer images in bulk or individually by copying and pasting the images into the hot folder printers on the WPS Pro device Note Your photos are sent from your Mac to WPS Pro and are printed WPS Pro also allows you to connect five 5 input transfer devices simultaneously Your input transfer device s can be a maximum of 30 feet away from WPS Pro and still send the print job successfully Befo...

Страница 81: ...nd for integration with third party software often via FTP to the hot folder HFP transfers work best on Mac computers however some tablets do have HFP transfer capability Hot folder printing allows you to load larger quantities of prints at a time to the print folder Note Transferring more than nine 9 images using the HFP method can result in a transfer error Error 43 Contact Tech Support for more...

Страница 82: ...re and edit functions found in standard applications like Photoshop Lightroom iPhoto etc 1 If you have not already configure your Mac to use WPS hot folder printing See Configuring a Mac for HFP Printing on page 81 2 Open the Hot Folder Printers folder you created 3 Open a second finder window and browse to the images you want to print 4 Copy the images and paste them into the print size folder in...

Страница 83: ...mage did not print so you can try to reprint the image Figure 10 Example error sheet 6 If you receive this error try to reprint the image If the image doesn t print the second time verify your network connections then try again Note WPS Pro has been built for JPEG and PNG files with an RGB color space Make sure your images are in one of these formats before sending them to the WPS Pro for printing...

Страница 84: ...s on page 85 If your digital camera is Wi Fi enabled or you have a Wi Fi adapter for you camera you can send images to your mobile device and then print from the mobile device to the WPS network Recommended solution 2 Using Digital Cameras for FTP Transfers on page 86 If you have a digital camera that has an option for FTP transfer you can also use this option with the WPS Pro network While some c...

Страница 85: ...e Printing from Digital Cameras Using a Mobile Device Once you ve set up your digital camera to transfer images to your mobile device it s easy to send images to your device for printing Once you ve transferred the images use the same steps as Printing from Android Devices using the WPS Print 3 App on page 61 or Printing from Apple Devices using the WPS Print 3 App on page 70 to print your images ...

Страница 86: ...on If you are prompted to enter a transfer option select Binary If you select ASCII your images will not print correctly 4 Click Save to save your settings 5 If you have not already connect to the WPS Pro Wi Fi network 6 Return to the FTP client application and click the Login button to connect to WPS Pro Note If the login was successful a dialog box is displayed confirming the connection 7 Once c...

Страница 87: ...e For example a 4x6 border would be 4 x6 vertical and 6 x4 horizontal You can also use the following pixel sizes 4x6 1200x1800 pixels 5x7 1500x2100 pixels 6x8 1800x2400 pixels Resolution 300 dpi Color Mode RGB only Background Image Space Must have a transparent background or image space The area where the image will appear cannot be colored in Image Compression No compression allowed No LZW etc In...

Страница 88: ...xplorer window Be sure you are not opening an internet browser 3 Type 192 168 43 1 in the address bar This accesses the WPS Pro directories 4 Open the Borders directory 5 Browse to the print size for the borders you created 6 Copy the border folder you created earlier with both border files in it and paste that folder in the print size folder Note Within each border folder a configuration file XML...

Страница 89: ...ser Guide Enabling Borders Once you have created your borders and added them to the appropriate folders you can easily enable these borders from your WPS Pro s touchscreen display Just follow these steps 1 From your WPS Pro touchscreen touch the Configuration button ...

Страница 90: ... Corporation Enabling Borders WPS Pro User Guide The WPS Pro Configuration screen is displayed 2 Under the correct file transfer section either FTP HFP depending on your file transfer preferences locate the Enable Borders option ...

Страница 91: ...using your WPS Pro system with a DS620A printer and you have 6x8 ribbon and paper installed You have included border files in your 4x6 print size folder and you have enabled borders using the WPS Pro Configuration screen on your device s touchscreen display If you make 6x8 prints no borders will appear You must create and install border files in your 6x8 print size folder as well I can t enable di...

Страница 92: ...oot your WPS Pro device to make sure the changes were saved Is your border file named correctly Did you use the correct border file parameters when creating the file Are your borders saved inside a border folder for the print size you need If borders are only printing for one orientation make sure you have installed both borders on your device and that both files were created properly If you are s...

Страница 93: ...in this chapter if you are trying to customize a setting for your specific needs All changes must be made exactly as stated in the following procedures Changes that are not made in accordance with these procedures can void your warranty and cause damage to your WPS Pro device If you have questions about procedures in this chapter please contact Technical Support or your sales representative Using ...

Страница 94: ...tion Settings Use the general configuration settings to change your archive settings default language and initial test print settings Configuring Image Archiving You can archive your images to a micro SD card once you have printed them WPS Pro is set to archive your images by default Note If you turn OFF the archiving functionality your images are deleted from the WPS Pro device once they have bee...

Страница 95: ...rchive option 3 Using the radio buttons set archiving images to either OFF or ON 4 Scroll to the bottom of the page and touch the Save Configuration button 5 Upon touching the Save Configuration button the software restarts 6 After three minutes reconnect to the WPS Pro Wi Fi network If you have initial test prints turned ON reconnect once your test image prints ...

Страница 96: ...e slot your images will not be saved Changing the Test Print Setting When the WPS Pro starts a test image is automatically printed Use this procedure to enable or disable that setting 1 Under the General section of the WPS Pro Configuration screen locate the Init Test Print option 2 Using the radio buttons set test images to either OFF or ON 3 Scroll to the bottom of the page and touch the Save Co...

Страница 97: ...y the languages that are available in your sales region are displayed on the WPS Pro Configuration screen For more information please contact your sales representative 3 Scroll to the bottom of the page and touch the Save Configuration button 4 Upon touching the Save Configuration button your device restarts 5 After three minutes reconnect to the WPS Pro Wi Fi network If you have initial test prin...

Страница 98: ...ct aspect ratio for your print media This is especially important when dealing with strip cuts or square cuts For example if you send an image that is sized for a 4x6 aspect ratio print to a printer that has 2x6 strips as the default print size the print will be cut down the middle not resized to print on part of the paper Changing the Printing Size Options There are a few printing options that ca...

Страница 99: ...America Corporation 99 Changing the Printing Size Options WPS Pro User Guide 3 Strip Printing Allows 5x7 prints to be cut into three 2x5 strips 4 Strip Printing Allows 6x8 prints to be cut into four 2x6 strips 5 7 6 8 ...

Страница 100: ...n panel Square Size Printing Allows printing of square images such as 5x5 6x6 and 8x8 Refer to the printer chart on page 70 for more information on whether the above printing size options are available with your media type To change the settings use the procedure below Make only one printing size change at a time If you need to make more than one printing size change repeat the procedure 6 8 6 6 ...

Страница 101: ...s your default print size be sure to change the print queue setting under your transfer type See either Configuring FTP Settings on page 105 or Configuring HFP Settings on page 111 for details on changing your print queue 3 Scroll to the bottom of the page and touch the Save Configuration button 4 Upon touching the Save Configuration button the software restarts 5 After three minutes reconnect to ...

Страница 102: ...a matte finish 1 Under the Printing section of the WPS Pro Configuration screen locate the Printing section 2 Find the Matte option and change the radio button to ON or OFF 3 Scroll to the bottom of the page and touch the Save Configuration button 4 Upon touching the Save Configuration button your device restarts 5 After three minutes reconnect to the WPS Pro Wi Fi network If you have initial test...

Страница 103: ...r even media consumption You must have the same model of printers and they must have the same output size e g 4 x6 media in one and 6 x8 media set to 4 x6 output in the other 1 Under the Printing section of the WPS Pro Configuration screen locate the Printing section 2 Scroll to the bottom of the page and touch the Save Configuration button 3 Upon touching the Save Configuration button your device...

Страница 104: ...note that this option only applies to DS820 printers 1 Under the Printing section of the WPS Pro Configuration screen locate the Printing section 2 Find the Matte option and change the radio button to ON or OFF 3 Scroll to the bottom of the page and touch the Save Configuration button 4 Upon touching the Save Configuration button your device restarts ...

Страница 105: ...nsfer as that is the data type WPS Pro supports Use this section to set up your FTP setting for your WPS Pro network Configuring FTP Enables or disables the FTP transfer option Only enable FTP if you are planning on using that transfer option If you disable the FTP transfer option be sure to enable the HFP transfer option 1 Under the FTP section of the WPS Pro Configuration screen locate the Enabl...

Страница 106: ...isables the partial matte print finish option 1 Under the FTP section of the WPS Pro Configuration screen locate the Enable Partial Matte option 2 Change the radio button to ON or OFF 3 Scroll to the bottom of the page and touch the Save Configuration button 4 Upon touching the Save Configuration button your device restarts ...

Страница 107: ...der the FTP section of the WPS Pro Configuration screen locate the Enable Borders option 2 Change the radio button to ON or OFF 3 Scroll to the bottom of the page and touch the Save Configuration button 4 Upon touching the Save Configuration button your device restarts 5 After three minutes reconnect to the WPS Pro Wi Fi network If you have initial test prints turned ON reconnect once your test im...

Страница 108: ...FTP Copies option 2 Tap the FTP Copies box and select the number of copies from the list You can choose any number between 0 and 49 3 Scroll to the bottom of the page and touch the Save Configuration button 4 Upon touching the Save Configuration button your device restarts 5 After three minutes reconnect to the WPS Pro Wi Fi network If you have initial test prints turned ON reconnect once your tes...

Страница 109: ...default print size you want Note If you are setting the print queue to a 2 cut option be sure you have enabled 2 photo strips for your media size See Changing the Printing Size Options on page 98 for more information 3 Scroll to the bottom of the page and touch the Save Configuration button 4 Upon touching the Save Configuration button your device restarts 5 After three minutes reconnect to the WP...

Страница 110: ... Under the FTP section of the WPS Pro Configuration screen locate the Border Selected option 2 Tap the Border Selected box and select the border you wish to add to your image 3 Scroll to the bottom of the page and touch the Save Configuration button 4 Upon touching the Save Configuration button your device restarts 5 After three minutes reconnect to the WPS Pro Wi Fi network If you have initial te...

Страница 111: ...P Enables or disables the HFP transfer option Only enable HFP if you are planning on using that transfer option If you disable the HFP transfer option be sure to enable the FTP transfer option 1 Under the HFP section of the WPS Pro Configuration screen locate the Enable HFP option 2 Change the radio button to ON or OFF 3 Scroll to the bottom of the page and touch the Save Configuration button 4 Up...

Страница 112: ...isables the partial matte print finish option 1 Under the HFP section of the WPS Pro Configuration screen locate the Enable Partial Matte option 2 Change the radio button to ON or OFF 3 Scroll to the bottom of the page and touch the Save Configuration button 4 Upon touching the Save Configuration button your device restarts ...

Страница 113: ...nder the HFP section of the WPS Pro Configuration screen locate the Enable Borders option 2 Change the radio button option to ON or OFF 3 Scroll to the bottom of the page and touch the Save Configuration button 4 Upon touching the Save Configuration button your device restarts 5 After three minutes reconnect to the WPS Pro Wi Fi network If you have initial test prints turned ON reconnect once your...

Страница 114: ... Tap the HFP Copies box and select the number of copies from the list You can choose any number between 0 and 49 3 Scroll to the bottom of the page and touch the Save Configuration button 4 Upon touching the Save Configuration button your device restarts 5 After three minutes reconnect to the WPS Pro Wi Fi network If you have initial test prints turned ON reconnect once your test image prints 6 No...

Страница 115: ...ll to the bottom of the page and touch the Save Configuration button 4 Upon touching the Save Configuration button your device restarts 5 After three minutes reconnect to the WPS Pro Wi Fi network If you have initial test prints turned ON reconnect once your test image prints 6 The border you have selected is printed on your images Configuring the Windows File Protocol The Windows File Protocol is...

Страница 116: ...our camera s Flash Air SD card Configuring Flash Air Enables or disables the Flash Air transfer option 1 Under the Flash Air section of the WPS Pro Configuration screen locate the Enable option 2 Change the radio button to ON or OFF 3 Scroll to the bottom of the page and touch the Save Configuration button 4 Upon touching the Save Configuration button your device restarts ...

Страница 117: ...using DPOF or if all new images are transferred from the SD card 1 Under the Flash Air section of the WPS Pro Configuration screen locate the Enable option 2 Change the radio button to DPOF or All New 3 Scroll to the bottom of the page and touch the Save Configuration button 4 Upon touching the Save Configuration button your device restarts ...

Страница 118: ...bles the partial matte print finish option 1 Under the Flash Air section of the WPS Pro Configuration screen locate the Enable Partial Matte option 2 Change the radio button to ON or OFF 3 Scroll to the bottom of the page and touch the Save Configuration button 4 Upon touching the Save Configuration button your device restarts ...

Страница 119: ...nder the Flash Air section of the WPS Pro Configuration screen locate the Enable Borders option 2 Change the radio button option to ON or OFF 3 Scroll to the bottom of the page and touch the Save Configuration button 4 Upon touching the Save Configuration button your device restarts 5 After three minutes reconnect to the WPS Pro Wi Fi network If you have initial test prints turned ON reconnect onc...

Страница 120: ...of each print you order 1 Under the Flash Air section of the WPS Pro Configuration screen locate the Copies option 2 Tap the Copies box and select the number of copies from the list You can choose any number between 0 and 49 3 Scroll to the bottom of the page and touch the Save Configuration button 4 Upon touching the Save Configuration button your device restarts ...

Страница 121: ...cate the Queue option 2 Tap the Queue box and select the printer and default print size you want Note If you are setting the print queue to a 2 cut option be sure you have enabled 2 photo strips for your media size See Changing the Printing Size Options on page 98 for more information 3 Scroll to the bottom of the page and touch the Save Configuration button 4 Upon touching the Save Configuration ...

Страница 122: ...borders see Custom Borders on page 87 1 Under the Flash Air section of the WPS Pro Configuration screen locate the Border Selected option 2 Tap the Border Selected box and select the border you wish to add to your image 3 Scroll to the bottom of the page and touch the Save Configuration button 4 Upon touching the Save Configuration button your device restarts 5 The border you have selected is prin...

Страница 123: ... disables the transfer of images through a web page option 1 Under the Simple Web Submission section of the WPS Pro Configuration screen locate the Enable option 2 Change the radio button option to ON or OFF 3 Scroll to the bottom of the page and touch the Save Configuration button 4 Upon touching the Save Configuration button your device restarts ...

Страница 124: ... Mode 1 Under the Simple Web Submission section of the WPS Pro Configuration screen locate the Mode option 2 Change the radio button to Advertise or Quiet 3 Scroll to the bottom of the page and touch the Save Configuration button 4 Upon touching the Save Configuration button your device restarts ...

Страница 125: ...artial matte print finish option 1 Under the Simple Web Submission section of the WPS Pro Configuration screen locate the Enable Partial Matte option 2 Change the radio button option to ON or OFF 3 Scroll to the bottom of the page and touch the Save Configuration button 4 Upon touching the Save Configuration button your device restarts ...

Страница 126: ...ore information on setting up and enabling custom borders see Custom Borders on page 87 1 Under the Simple Web Submission section of the WPS Pro Configuration screen locate the Enable Borders option 2 Change the radio button option to ON or OFF 3 Scroll to the bottom of the page and touch the Save Configuration button 4 Upon touching the Save Configuration button your device restarts ...

Страница 127: ...h print you order 1 Under the Simple Web Submission section of the WPS Pro Configuration screen locate the Copies option 2 Tap the Copies box and select the number of copies from the list You can choose any number between 0 and 49 3 Scroll to the bottom of the page and touch the Save Configuration button 4 Upon touching the Save Configuration button your device restarts ...

Страница 128: ...een locate the Queue option 2 Tap the Queue box and select the printer and default print size you want Note If you are setting the print queue to a 2 cut option be sure you have enabled 2 photo strips for your media size See Changing the Printing Size Options on page 98 for more information 3 Scroll to the bottom of the page and touch the Save Configuration button 4 Upon touching the Save Configur...

Страница 129: ...s see Custom Borders on page 87 1 Under the Simple Web Submission section of the WPS Pro Configuration screen locate the Border Selected option 2 Tap the Border Selected box and select the border you wish to add to your image 3 Scroll to the bottom of the page and touch the Save Configuration button 4 Upon touching the Save Configuration button your device restarts 5 The border you have selected i...

Страница 130: ...ing section of the WPS Pro Configuration screen locate the Enable WebPut option 2 Change the radio button option 3 Scroll to the bottom of the page and touch the Save Configuration button 4 Upon touching the Save Configuration button your device restarts 5 After three minutes reconnect to the WPS Pro Wi Fi network If you have initial test prints turned ON reconnect once your test image prints ...

Страница 131: ...bles over the air transfer protocols 1 Under the Networking section of the WPS Pro Configuration screen locate the Enable OTA option 2 Change the radio button option 3 Scroll to the bottom of the page and touch the Save Configuration button 4 Upon touching the Save Configuration button your device restarts ...

Страница 132: ...r disables over the air transfer protocols 1 Under the Networking section of the WPS Pro Configuration screen locate the Enable Name Service option 2 Change the radio button option 3 Scroll to the bottom of the page and touch the Save Configuration button 4 Upon touching the Save Configuration button your device restarts ...

Страница 133: ...ng Airprint 1 Under the Networking section of the WPS Pro Configuration screen locate the Enable Name Service option 2 Change the radio button option 3 Scroll to the bottom of the page and touch the Save Configuration button 4 Upon touching the Save Configuration button your device restarts ...

Страница 134: ...check for firmware updates Configuring Firmware Enables or disables checking for firmware updates automatically 1 Under the Firmware section of the WPS Pro Configuration screen locate the Check Firmware option 2 Change the radio button option 3 Scroll to the bottom of the page and touch the Save Configuration button 4 Upon touching the Save Configuration button your device restarts ...

Страница 135: ...uring Firmware Updates 1 Under the Firmware section of the WPS Pro Configuration screen locate the Check Firmware option 2 Change the radio button option 3 Scroll to the bottom of the page and touch the Save Configuration button 4 Upon touching the Save Configuration button your device restarts ...

Страница 136: ...4524 Enterprise Drive NW Concord NC 28027 1 855 367 7604 or 724 696 8957 www dnpphoto com www dnpimagingcomm com ...

Отзывы: