


39
Using Expansion CompactFlash Cards
Cha
p
te
r 4
A
d
v
a
nc
ed Se
tt
ing
s
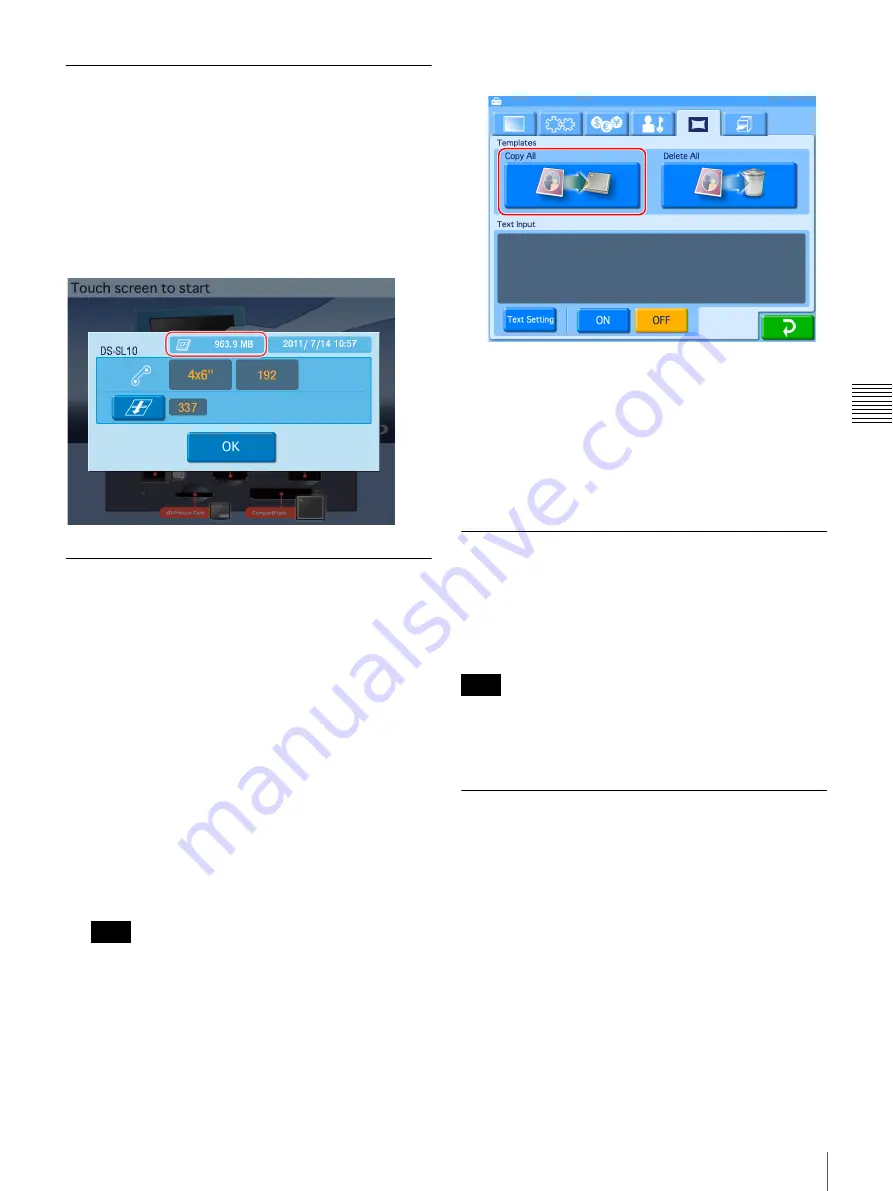
Checking the Remaining Capacity
on the Expansion CompactFlash
Card
You can confirm the remaining capacity on an expansion
CompactFlash card installed on the unit in the
confirmation screen for the remaining ink ribbon. For
details on how to display the confirmation screen for the
remaining ink ribbon, see
.
Copying User Created Data
You can create original promotional images and templates
for border prints, and copy the data for use on this unit.
Use a memory card or USB memory device to copy data
created on a computer onto the expansion CompactFlash
card.
1
Connect a memory card or USB memory device to
your computer.
2
Copy the user created data onto the memory card or
USB memory.
Structure the folders on the memory card or USB
memory device in the same way as the folders on the
expansion CompactFlash card. For details on folder
structure, see
“Directory Structure for Expansion
CompactFlash Folders” on page 37
If a file path consists of more than 200 characters or
includes non-alphanumeric characters, the unit may
not be able to read the file.
3
Confirm that an expansion CompactFlash card is
installed in this unit.
4
Open the Template tab on the administration screen.
5
Touch the [Copy All] button.
6
Insert the memory card or USB memory device on
which the data is copied into the appropriate slot on the
unit.
All of the data is copied from the memory card or USB
memory to the expansion CompactFlash card.
Deleting All Data on the Expansion
CompactFlash Card
You can delete all of the data stored on the expansion
CompactFlash card by touching the [Delete All] button in
the Template tab of the administration screen.
All folders and files stored under the “\DNP\DSSL10”
folder on the expansion CompactFlash card will be
deleted. This includes folders and files that are read-only.
Setting Promotional Images
J
Applicable modes: Full mode, Quick Print
mode
You can display any desired promotional images while the
unit is in the standby state.
Up to five promotional images can be set to be displayed
sequentially.
In addition, when promotional images are set for display,
you can also select whether or not to display the standard
start screen.
Creating promotional images
Use any commercially available photo editing software to
create the promotional images.
Note
Note
Содержание DS-SL10
Страница 75: ......


