


Part 2 - Configuration
40
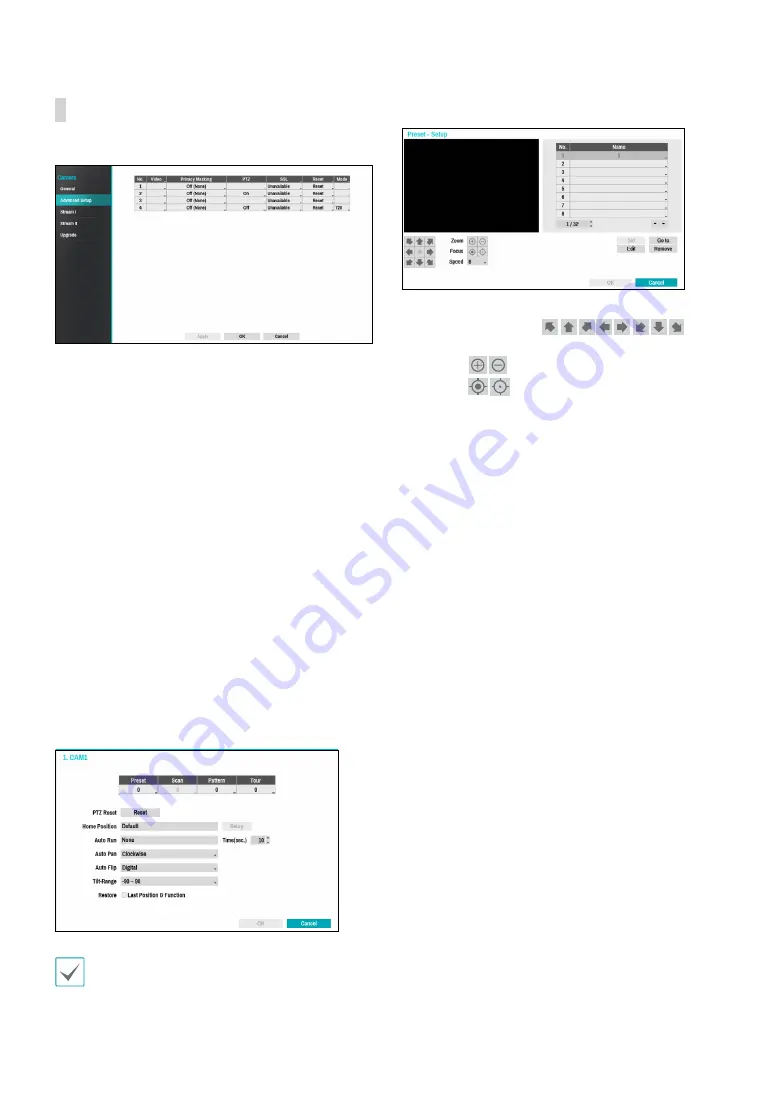
Advanced Setup
Configure security and other advanced camera settings.
●
Video
: Adjust the camera image sensor settings such
as white balance and exposure. Configuration options
may differ depending on the camera model.
●
Privacy Masking
: Enable/disable and configure
privacy masking for the camera.
●
SSL
: Set the camera’s security level as
Unavailable
,
Standard
,
High
, or
Very High
.
Standard
,
High
and
Very High
settings apply SSL (Secure Sockets Layer)
protection to the camera.
●
Reset
: Resets the port or cameras.
–
Factory Reset
: Control the PoE Switch’s port. This
option is available when connecting to Video In/
PoE port or using a DirectIP™ PoE Switch (optional).
Select
PoE Reset
to reboot the camera. It is not
supported by video encoders.
–
Soft Reset
: Reboots the camera.
–
Factory Reset
: Resets the NVR to all its initial
factory settings. It is supported by DirectIP™
cameras only.
●
Mode
: Select a resolution mode. This is supported by
video encoders only.
1
2
3
4
5
6
7
8
9
0
!
Numbers shown below Preset, Scan, Pattern, and
Tour indicate the numbers of configured functions.
1
Preset
Use the buttons below to choose a preset position.
– Directional Buttons
(
):
Used to tilt and pan the camera.
–
Zoom
(
): Zoom in and out.
–
Focus
(
): Adjust camera focus to far or near.
–
Speed
: Specify the camera’s panning and tilting
speed.
●
Set
: Choose a preset number and then enter a name.
This saves the current preset under the specified
preset number and name.
●
Go to
: Select a preset from the list and then click Go
to to move the camera to the selected preset position.
●
Edit
: Used to change the selected preset’s name.
●
Remove
: Used to remove the selected preset.