background image

Part 2 - Remote Setup

11

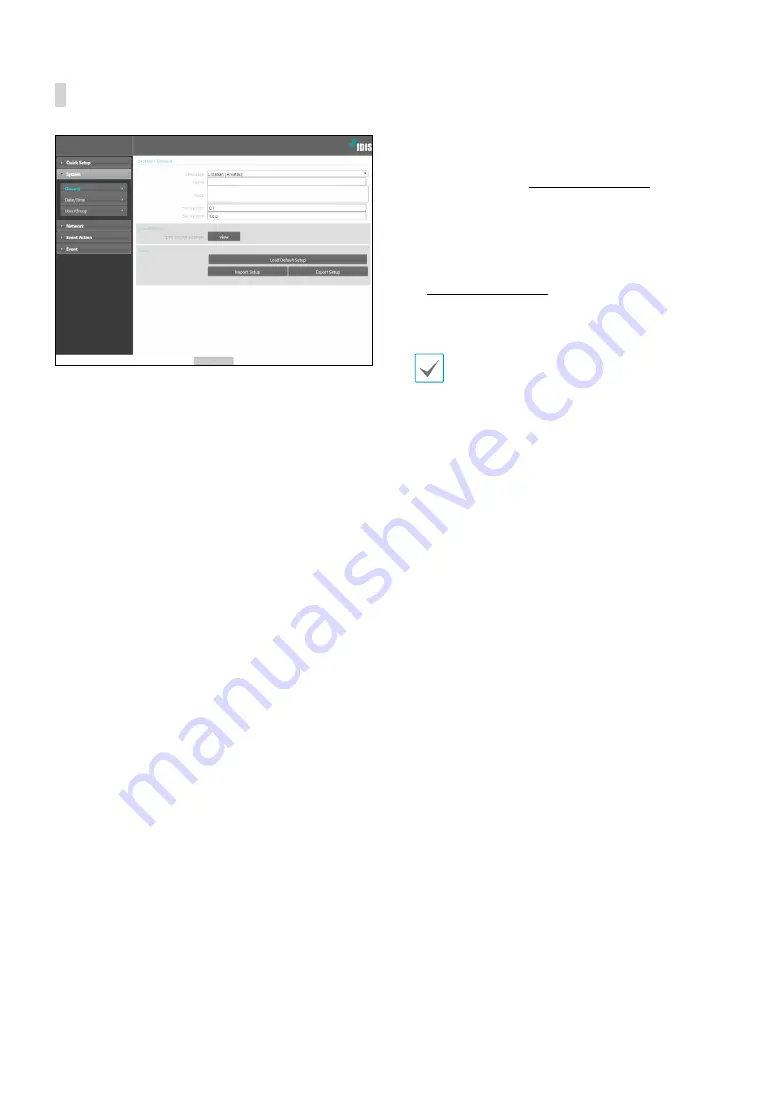
General

 •

Language

: Select the language you wish to use for 

remote setup.

 •

Name

: Enter a name for the alarm box. (Up to 31 

alphanumeric characters, including spaces)

 •

Note

: Enter a description for the alarm box.

 •

HW Version/SW Version

: Indicates the alarm box’s 

hardware and software versions.

 •

Miscellaneous


-

Opensource Licenses:

 Click 

View

 to see the 

information of opensource licenses.

 •

Setup

 -

Load Default Setup

: Restores all settings other 

than Date/Time to their factory defaults. Select 
Include Network Setup to load default network 
settings as well. For more information on network 
setup, refer to the 

Network on page 13

.

 -

Import Setup

: Open a setup file and apply its 

settings to the alarm box. Click on the button and 
then select a setup file. Select Include Network 
Setup to apply the file’s network setup settings. For 
more information on network setup, refer to the 

Network on page 13

.

 -

Export Setup

: Export the current settings as a .dat 

file. Click on the button and then enter a file name.

 •

Load Default Setup

 and 

Import Setup

 options 

are available only to users belonging to the 

Administrator

 group.

 • When applying the settings of a setup file, do 

not select the 

Include Network Setup

 option if 

the network settings contained in the selected 
file is currently being used by a different alarm 
box. Doing so can interfere with establishing a 
connection with the other alarm box.

 • If IP Address, Port, and/or SSL settings have been 

changed, click 

Save

 to apply the current settings, 

and then restart Remote Setup. If you do not 
restart Remote Setup, the changes afterwards will 
not be applied.

Содержание Idis AL-1112

Страница 1: ...Powered by Alarm Box Operation Manual AL 1112...

Страница 2: ...n though explanation about some functions may not be incorporated The manufacturer is not responsible for any problems resulting from the use thereof The information contained herein is subject to cha...

Страница 3: ...le system This will prevent damage to the equipment due to lightning and power line surges If thunder or lightning is common where the equipment is installed use a surge protection device 10 Overloadi...

Страница 4: ...lled waste disposal please separate this from other types of wastes and recycle it responsibly to promote the sustainable reuse of material resources Household users should contact either the retailer...

Страница 5: ...tocol 9 Remote Setup 9 Quick Setup 10 System 10 General 11 Date Time 12 User Group 12 Network 13 IP Address 13 Port 14 Security 14 IEEE 802 1X 15 Event Action 16 Alarm out 16 Event 16 Alarm In 17 Syst...

Страница 6: ...ment Easy connection with network Support PoE and DC AC power Check current alarm status via front LED Accessories Upon unpacking the product check the contents inside to ensure that all the following...

Страница 7: ...h hole Hold the reset switch until the alarm in out LED blinks several times Release the reset switch and all of the encoder s settings are now at the original settings it had when it left the factory...

Страница 8: ...ither 12VDC or 24VAC power supply Connect the two wires of the power adapter to the terminal block 2 pin provided with the alarm box If DC12V is used separate the and GND wires Booting will commence o...

Страница 9: ...e 2 Click on the Setup icon 3 Select Remote Setup from the Setup menu to load the Remote Setup screen Alternatively you can select Network Device from the main screen and then right click to access th...

Страница 10: ...n under the menu to change the corresponding settings Once you have changed the settings click Save to apply the settings Quick Setup Quick Setup allows you to set up System Network and other basic se...

Страница 11: ...arm box Click on the button and then select a setup file Select Include Network Setup to apply the file s network setup settings For more information on network setup refer to the Network on page 13 E...

Страница 12: ...er Group Change remote alarm box control permission settings for users and user groups Add Group Add a new user group Designate a name for the group and then specify control authorities Add User Add a...

Страница 13: ...e network using DHCP Click Save to retrieve IP address and other network settings automatically from the DHCP server DNS Server Enter the DNS server s IP address By using the DNS server you will be ab...

Страница 14: ...ach port number must be unique It is not allowed to use the same port number for more than one function Port numbers of the remote program must be updated whenever the camera s port numbers are change...

Страница 15: ...n the external system depending on the level of security being used This product contains software developed by Open SSL Project for use in Open SSL Toolkit http www openssl org IEEE 802 1X Select the...

Страница 16: ...ct Alarm Out to enable alarm out Dwell Time Designate the alarm out duration When an event occurs alarm out will be generated for the specified duration Schedule Specify the alarm out schedule Alarm o...

Страница 17: ...n Alarm Out Select if you wish to generate an alarm out Event Action settings must be con gured correctly in order to perform event actions System Event Select System Event and configure system event...

Страница 18: ...ime User Group Network Port Security IEEE 802 1X Troubleshooting Problem Check Power LED will not turn on Check the LAN cable Check that the power cable is connected or the NVR has power The system is...

Страница 19: ...el DC Output DC12V 300mA DC5V 300mA Switch Reset Environmental Conditions Operating Temperature 14 F to 122 F 10 C 50 C Booting Temperature 32 F to 122 F 0 C 50 C Operating Humidity 0 90 General Dimen...

Страница 20: ...Part 3 Appendix 20 V1 0 Index C Camera Name 11 D Date Time 12 I IDIS Web port 14 IPFiltering 14 R Remote Port 14 S SSL 15 T Time Sync 12 U User Group 12...

Страница 21: ...IDIS Co Ltd For more information please visit at www idisglobal com...

Отзывы: