Dimplex 82016273 Скачать руководство пользователя страница 1

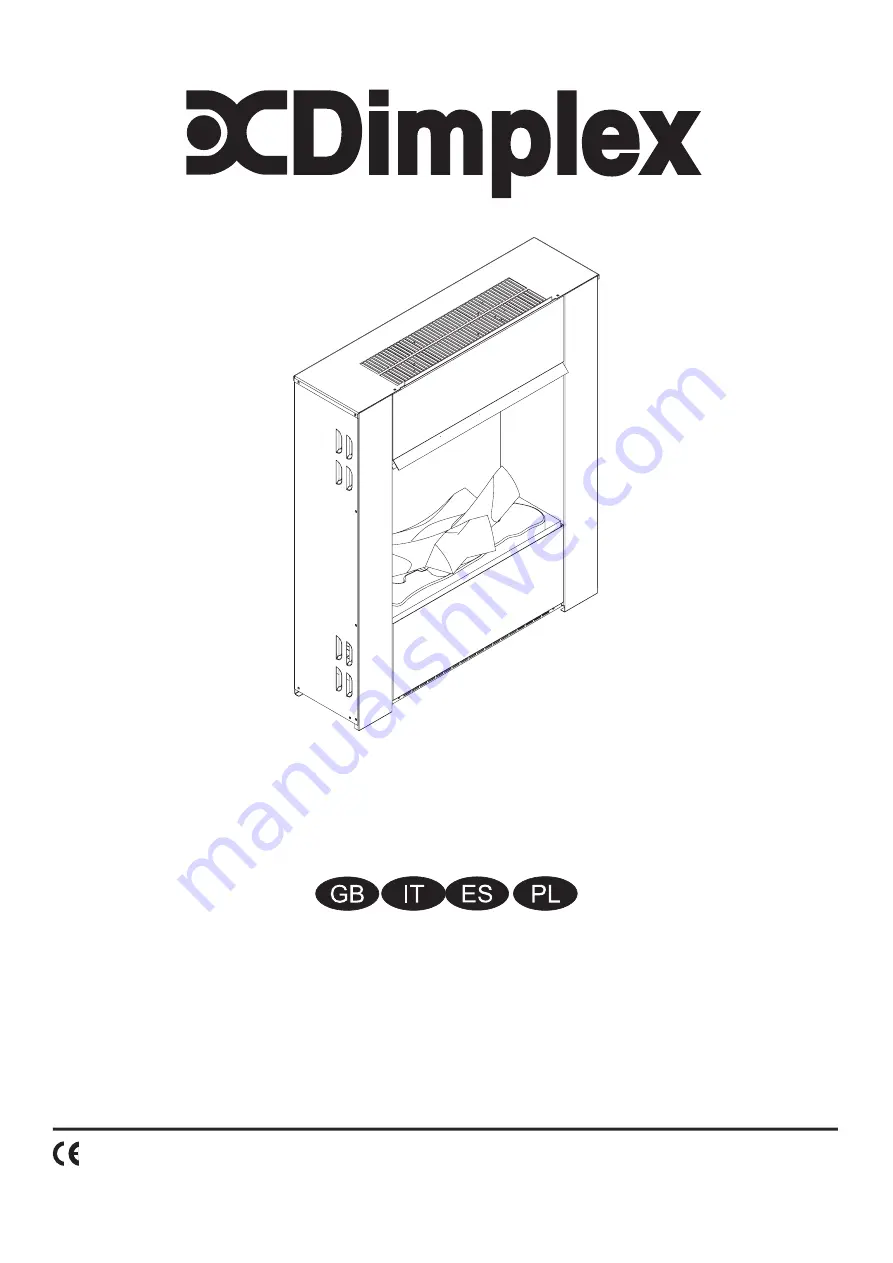
OPTIMYST WALL ENGINE

ENGDL20 S E, ENGDL20 L E


The product complies with the European Safety Standards EN60335-2-30 and the European Standard Electromagnetic Compatibility (EMC) 

EN55014, EN60555-2 and EN60555-3 These cover the essential requirements of EEC Directives 2014/35/EU and 2014/30/EU

08/53873/1      Issue 3 

OCN 10949

EN : This product is only suitable for well insulated rooms or occasional use.  DE : Dieses Produkt ist nur für gut isolierte Bereiche oder gelegentli-

che Verwendung geeignet.  FR : Ce produit convient uniquement à des endroits bien isolés ou pour un usage occasionnel.  IT : Questo prodotto è 

adatto solo per spazi ben isolati o per uso occasionale.  ES : Este producto sólo es adecuado para espacios bien aislados o un uso ocasional.  NL : 

Dit product is uitsluitend geschikt voor goed geïsoleerde ruimten of voor sporadisch gebruik.  PL : Produkt ten jest odpowiedni wyłącznie do dobrze 

odizolowanych miejsc lub do okazjonalnego użytku.  NO : Dette produktet egner seg kun for godt isolerte rom eller sporadisk bruk.  RO : Acest 

produs este adecvat exclusiv spaţiilor bine ventilate sau utilizării ocazionale.  CZ : Tento výrobek je vhodný pouze do dobře izolovaných prostor 

nebo k příležitostnému použití.  DK : Dette produkt er kun egnet til velisolerede rum eller lejlighedsvis brug.  PT : Este produto somente é adequado 

para espaços bem isolados ou uso ocasional.  SE : Denna produkt är endast avsedd för välisolerade utrymmen eller tillfällig användning.  FI : Tämä 

tuote soveltuu ainoastaan hyvin eristettyihin tiloihin tai satunnaiseen käyttöön.  SK : Tento výrobok je vhodný len pre dobre izolované priestory alebo 

na občasné použitie.  SI : Ta izdelek je primeren le za dobro izolirane prostore ali za občasno uporabo.  HR : Ovaj proizvod je pogodan samo za 

dobro izolirane prostore ili povremenu upotrebu.  HU : Ez a termék csak jól szigetelt terekhez vagy eseti használatra alkalmas.

Содержание 82016273

Страница 1: ... gebruik PL Produkt ten jest odpowiedni wyłącznie do dobrze odizolowanych miejsc lub do okazjonalnego użytku NO Dette produktet egner seg kun for godt isolerte rom eller sporadisk bruk RO Acest produs este adecvat exclusiv spaţiilor bine ventilate sau utilizării ocazionale CZ Tento výrobek je vhodný pouze do dobře izolovaných prostor nebo k příležitostnému použití DK Dette produkt er kun egnet til...

Страница 2: ...GB 3 IT 15 ES 27 PL 39 ...

Страница 3: ... of the appliance in a safe way and understanding the hazards involved Children aged from 3 years and less than 8 years shall not plug in regulate and clean the appliance or perform user maintenance Warning This appliance must be earthed The use of an extension lead or multi plug adaptor is not advised when connecting this product to the mains Connection through these devices could lead to a risk ...

Страница 4: ...tting on a level surface Before connecting the appliance check that the supply voltage is the same as that stated on the appliance Only use filtered water in this appliance Once installed never move this appliance or lay it on its back without draining the water from sump and water tank The water tank sump sump lid tank cap and air filters must be cleaned once every 2 weeks particularly in hard wa...

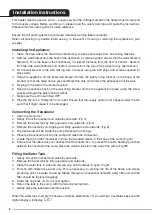
Страница 5: ...bracket 7 Make sure the unit is switched OFF 8 Plug the fire into a 13amp 240 volt outlet Ensure that the supply cable is not trapped under the fire such that it might cause it to be damaged Connecting the Transducer 1 Open the stove door 2 Gently lift out the fuel bed and carefully set aside Fig 4 3 Remove the water tank by lifting upwards and outwards Fig 5 4 Remove the nozzle by un clipping and...

Страница 6: ...setting will be displayed F1 F6 Press the UP and DOWN buttons to adjust the setting After you have selected your flame setting press BACK twice to exit the menu and return to the home screen Switching on the Heat With the remote control activated press MENU once FIRE will be blinking on the display Press ADV once HEAT will be blinking Press ENTER The current heat setting will be displayed OFF LO H...

Страница 7: ...Modes of Remote Operation User Timer Provides greatest flexibility to the user Four times slots are available throughout the day and these can be customised for each day of the week See How to adjust the timer modes for instructions on adjusting these from the factory default time periods temperatures Manual Mode This mode heats the room to the temperature you have set the remote control to Frost ...

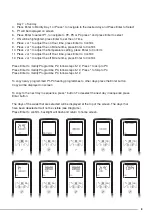
Страница 8: ...s Enter to Confirm 12 Press v or to adjust the off Minute time press Enter to Confirm Press Enter to modify Programme P2 follow steps 5 12 Press to skip to P3 Press Enter to modify Programme P3 follow steps 5 12 Press to Skip to P4 Press Enter to modify Programme P4 follow steps 5 12 To copy newly programmed P1 P4 heating programmes to other days press the Enter button Copy will be displayed on sc...

Страница 9: ...g will be displayed Press or v to toggle between F1 and F6 F1 being the lowest setting and F6 being the highest setting 2 Generally the flames appear more realistic when the flame control is turned down 3 Give the flame generator time to react to changes you may make 4 The fire will use less water if the flame effect is set to a lower level 5 Do not tilt or move the fire while there is water in th...

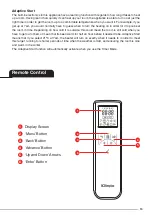
Страница 10: ...if you get up at 7am you would normally have to guess when to turn the heating on in order for it to pre heat the room in time Depending on how cold it is outside this could mean the room is still cold when you have to get out of bed or mean that its been warm for half an hour before it needed to be Adaptive Start means that if you select 21ºC at 7am the heater will turn on exactly when it needs t...

Страница 11: ...eplace with a Dimplex Opti myst 12V 45W Gu5 3 base 8º beam angle coloured lamp 8 Carefully insert the two pins of the new lamp into the two holes in the lamp holder Push lamp firmly in place See Fig 4 and 4a 9 Replace the nozzle water tank and fuel bed 10 Switch on Cleaning Warning Always press Switch A to turn off the product and disconnect the product from the power supply before cleaning the fi...

Страница 12: ...mble Air Filter 1 Press on the remote control or on the product to turn it off 2 Gently lift off the fuel bed and set aside 3 Remove the tank and place in a sink with the cap facing upwards 4 Gently slide up the air filter Fig 10 5 Gently rinse with water in the sink and dry with fabric towel before returning 6 Replace the filter making sure that the course black filter is in contact with the plas...

Страница 13: ...must be replaced by the manufacturer or its authorised dealer Recycling For electrical products sold within the European Community At the end of the electrical products useful life it not be disposed of with household waste Please recycle where facilities exist Check with your Local Authority or retailer for recycling advice in your country Patent Patent Application Products within the Optimyst ra...

Страница 14: ... disc Increase level of flame by changing the FIRE setting on the remote control See Adjust the Flame Setting Clean the Metal Disc with soft brush supplied See Fig 12 See Maintenance for a step by step procedure Direct the wire to the back of the sump and make sure it sits into the side slot exiting the sump Unpleasant smell when unit is used Dirty or stale water Using unfiltered tap water Clean t...

Страница 15: ...o collegare regolare e pulire l apparecchiatura o eseguire la manutenzione da parte dell utente Avvertenza Questa apparecchiatura deve essere collegata a terra L uso di una prolunga o di un adattatore a più prese non è consigliato per collegare il prodotto alla rete elettrica Il collegamento tra questi dispositivi può comportare rischio di sovraccarico surriscaldamento e perfino di incendio alla p...

Страница 16: ...pparecchiatura verificare che la tensione di rete sia quella riportata sulla stufa Utilizzare esclusivamente acqua filtrata per questa apparecchiatura Una volta installata non spostare l apparecchiatura e non poggiarla sul lato posteriore senza aver prima scaricato l acqua dalla vaschetta e dal serbatoio Il serbatoio dell acqua la vaschetta il coperchio della vaschetta e i filtri dell aria devono ...

Страница 17: ...nità sia SPENTA 8 Collegare la stufa a una presa di rete da 13 amp 240 volt Assicurarsi che il cavo di alimentazione non sia bloccato sotto la stufa in quanto potrebbe danneggiarsi Collegamento del trasduttore 1 Aprire la porta della stufa 2 Sollevare delicatamente il braciere e metterlo da parte facendo attenzione Fig 4 3 Rimuovere il serbatoio dell acqua sollevandolo ed estraendolo Fig 5 4 Rimuo...

Страница 18: ...l impostazione della fiamma corrente F1 F6 Premere i tasti SU e GIÙ per regolare l impostazione Dopo aver selezionato l impostazione della fiamma premere BACK due volte per uscire dal menu e tornare alla schermata principale Attivazione del calore Con il telecomando attivo premere una volta MENU FIRE lampeggia sul display Premere ADV una volta HEAT lampeggia Premere ENTER Viene visualizzata l impo...

Страница 19: ...data Modalità del funzionamento in remoto Timer Utente Offre grande flessibilità all utente Sono disponibili quattro fasce orarie sull intera giornata che è possibile personalizzare per ciascun giorno della settimana Fare riferimento a Come regolare le modalità timer per istruzioni su come regolarle passando da quelle di fabbrica per gli orari e le temperature Modalità Manuale Questa modalità scal...

Страница 20: ...12 Premere v o per regolare i Minuti di fine premere Enter per Confermare Premere Enter per modificare il Programma P2 seguire i passaggi da 5 a 12 Premere per passare a P3 Premere Enter per modificare il Programma P3 seguire i passaggi da 5 a 12 Premere per passare a P4 Premere Enter per modificare il Programma P4 seguire i passaggi da 5 a 12 Per copiare programmi di riscaldamento nuovi da P1 a P...

Страница 21: ...ne visualizzata Premere o v per passare da F1 a F6 F1 rappresenta l impostazione più bassa F6 l impostazione più elevata 2 Generalmente le fiamme appaiono più realistiche quando il controllo fiamma è basso 3 Lasciar il tempo al generatore di fiamma di adeguarsi alle modifiche apportate 4 La stufa utilizza meno acqua se l effetto fiamma viene impostato su un livello basso 5 Non inclinare o spostare...

Страница 22: ... mattino ci si chiede sempre a che ora è necessario accendere il riscaldamento per preriscaldare la stanza in tempo In base al freddo esterno la stanza potrebbe essere ancora fredda nel momento in cui si scende dal letto oppure essere riscaldata troppo presto rispetto al necessario Avvio adattabile significa che se si selezionano 21 C alle 7 del mattino la stufa si accende esattamente nel momento ...

Страница 23: ...ituire con una Dimplex Opti myst da 12 V 45 W Gu5 3 angolo del fascio luminoso 8 lampadina colorata 8 Inserire delicatamente i due perni della nuova lampadina nei due fori del portalampadina Spingere la lampadina saldamente in posizione Vedere Fig 4 e 4a 9 Sostituire la bocchetta il serbatoio dell acqua e il br 10 Accendere Pulizia Premere sempre l interruttore A per spegnere il prodotto e scolleg...

Страница 24: ...o dell aria 1 Premere sul telecomando o sul prodotto per spegnerlo 2 Sollevare delicatamente il braciere e metterlo da parte 3 Rimuovere il serbatoio e metterlo in un lavabo con il tappo rivolto verso l alto 4 Far scorrere delicatamente verso l alto il filtro dell aria Fig 10 5 Risciacquare delicatamente con acqua nel lavabo ed asciugare con un panno in tessuto prima di rimontarlo 6 Sostituire il ...

Страница 25: ... danneggiato il cavo di alimentazione deve essere sostituito dal produttore o dal rivenditore autorizzato Smaltimento Per i prodotti elettrici venduti all interno della Comunità Europea Al termine del ciclo di vita utile dei prodotti elettrici questi non devono essere smaltiti con i normali rifiuti domestici Effettuare lo smaltimento presso le apposite strutture Verificare presso il proprio ente l...

Страница 26: ...modificando l impostazione FIRE sul telecomando Vedere Regolare l Impostazione della Fiamma Pulire il Disco di Metallo con la spazzola morbida fornita Vedere Fig 12 Vedere Manutenzione per una procedura passo passo Sistemare il filo sul retro della vaschetta ed assicurarsi che si trovi sulla fessura laterale di uscita della vaschetta Odore sgradevole durante l utilizzo dell unità Acqua sporca o st...

Страница 27: ...d no deben enchufar regular ni limpiar el aparato ni llevar a cabo tareas de mantenimiento Advertencia Este aparato necesita conexión a tierra No se recomienda el uso de un cable de extensión o adaptador de enchufes múltiples para conectar este producto a la red eléctrica La conexión a través de estos dispositivos podría ocasionar un riesgo de sobrecarga sobrecalentamiento e incluso fuego en el ca...

Страница 28: ...e de que el electrodoméstico esté colocado sobre una superficie nivelada Antes de conectar el aparato compruebe que el voltaje de la corriente sea el indicado en el aparato Solo use agua filtrada en este electrodoméstico Una vez instalado nunca mueva este electrodoméstico ni lo apoye sobre su parte posterior sin drenar el agua del sumidero y del tanque de agua El tanque de agua el sumidero la tapa...

Страница 29: ...ado a través del soporte de fijación de seguridad 7 Asegúrese de que la unidad esté apagada 8 Conecte el hogar a una toma de corriente de 13 amp 240 voltios Asegúrese de que el cable de alimentación no quede atrapado debajo del hogar de manera que pueda dañarse Conexión del transductor 1 Abra la puerta de la estufa 2 Levante con cuidado la cama de combustible y déjela a un lado con cuidado Fig 4 3...

Страница 30: ...N bajar para ajustar la configuración Después de haber seleccionado su configuración de llama pulse BACK atrás dos veces para salir del menú y volver a la pantalla de inicio Encender el calor Con el control remoto activado pulse MENU una vez FIRE fuego parpadeará en la pantalla Pulse ADV una vez HEAT calor parpadeará Pulse ENTER La configuración actual de calor mostrará OFF apagado LO bajo y HI al...

Страница 31: ...izador de usuario ofrece la mayor flexibilidad al usuario Hay cuatro espacios de tiempo disponibles durante todo el día que se pueden personalizar para cada día de la semana Consulte Cómo ajustar los modos del temporizador para obtener instrucciones sobre cómo ajustar estos espacios desde los períodos y las temperaturas predeterminados de fábrica Modo manual Este modo calienta la habitación a la t...

Страница 32: ... o para ajustar los minutos de apagado y pulse Enter para confirmar Pulse Enter para modificar el Programa P2 siga los pasos 5 12 y pulse para pasar a P3 Pulse Enter para modificar el Programa P3 siga los pasos 5 12 y pulse para pasar a P4 Pulse Enter para modificar el Programa P4 siga los pasos 5 12 Para copiar programas de calefacción P1 P4 recientemente programados a otros días pulse el botón E...

Страница 33: ...figuración actual Pulse o v para alternar entre F1 y F6 F1 es la configuración más baja y F6 es la configuración más alta 2 En general las llamas parecen más realistas cuando se baja el control de la llama 3 Dé tiempo al generador de llama para reaccionar a los cambios que pueda hacer 4 El fuego usará menos agua si el efecto de la llama se establece en un nivel inferior 5 No incline ni mueva el fu...

Страница 34: ...as 7 a m normalmente tendría que adivinar cuándo encender la calefacción para precalentar la habitación a tiempo Dependiendo del frío que haya fuera esto podría significar que la habitación todavía esté fría cuando haya que levantarse de la cama o que haya estado caliente durante media hora antes de lo necesario El Inicio adaptativo significa que si selecciona 21 ºC a las 7 a m el calentador se en...

Страница 35: ... una bombilla de color Optimyst Dimplex 12 V 45 W base Gu5 3 y ángulo de haz de 8º 8 Inserte con cuidado los dos pernos de la nueva bombilla en los dos orificios del portalámparas Empuje la bombilla firmemente en su lugar Vea la Fig 4 y 4a 9 Vuelva a colocar la boquilla el tanque de agua y la cama de combustible 10 Enciéndalo Limpieza Advertencia pulse siempre el interruptor A para apagar el produ...

Страница 36: ...aire 1 Pulse en el control remoto o en el producto para apagarlo 2 Levante suavemente la cama de combustible y déjela a un lado 3 Retire el tanque y colóquelo en un fregadero con la tapa hacia arriba 4 Deslice suavemente hacia arriba el filtro de aire Fig 10 5 Enjuáguelo suavemente con agua en el fregadero y séquelo con una toalla de tela antes de volver a ponerlo 6 Vuelva a poner el filtro asegur...

Страница 37: ...limentación de la red eléctrica debe ser reemplazado por el fabricante o su distribuidor autorizado Reciclaje Para los productos eléctricos vendidos dentro de la Comunidad Europea Al finalizar la vida útil de los productos eléctricos estos no deben desecharse junto a los residuos domésticos Si existen utilice los servicios de reciclaje Póngase en contacto con las autoridades locales o con su vende...

Страница 38: ...ión de FIRE fuego en el control remoto Consulte Ajuste la configuración de la llama Limpie el disco de metal con un cepillo suave suministrado Vea la Fig 12 Consulte Mantenimiento para ver un procedimiento paso a paso Dirija el cable a la parte posterior del sumidero y asegúrese de que esté bien encajado en la ranura lateral que sale del sumidero Hay un olor desagradable cuando se utiliza la unida...

Страница 39: ...Dzieci w wielu od 3 do 8 lat nie powinny podłączać do gniazdka regulować czyścić ani konserwować urządzenia Ostrzeżenie Urządzenie wymaga uziemienia Podczas podłączania urządzenia do gniazda sieciowego nie zaleca sie używania przedłużaczy ani trójników Połączenie przez te urządzenia może prowadzić do przeciążenia przegrzania lub nawet pożaru przedłużacza lub adaptera na skutek niewłaściwej jakości...

Страница 40: ...hni Przed podłączeniem urządzenia sprawdź czy wartość napięcia zasilania jest identyczna z wartością podaną na urządzeniu W urządzeniu należy używać wyłącznie wodę filtrowaną Po zamontowaniu nigdy nie przenoś urządzenia ani nie kładź go na grzbiecie bez wcześniejszego usunięcia wody ze zbiornika na wodę i zbiornika ociekowego Zbiornik na wodę zbiornik ociekowy wieko zbiornika ociekowego nakrętkę z...

Страница 41: ...mocuj urządzenie do wspornika montażowego przy pomocy dołączonych śrub 7 Upewnij się że urządzenie jest wyłączone 8 Podłącz grzejnik do gniazda zasilania 13 A 240 V Upewnij się że kabel zasilający nie jest uwięziony pod ogniem co mogłoby spowodować jego uszkodzenie Podłączanie przetwornika 1 Otwórz drzwiczki piecyka 2 Unieś ostrożnie warstwę paliwa i odłóż ją na bok Rys 4 3 Wymontuj zbiornik na wo...

Страница 42: ...ający napis FIRE ogień Wciśnij ENTER Bieżące ustawienie płomienia będzie wyświetlane jako F1 F6 Aby wyregulować ustawienie wciskaj przyciski UP DO GÓRY i DOWN DO DOŁU Po wybraniu ustawienia płomienia dwukrotnie wciśnij BACK wstecz celem wyjścia z menu i powrotu do ekranu startowego Włączanie ogrzewania Po aktywowaniu pilota wciśnij jednokrotnie przycisk MENU Wyświetlacz będzie pokazywał migający n...

Страница 43: ...cy zdalnej Zegar użytkownika Oferuje użytkownikowi niezrównaną elastyczność Dostępne są cztery szczeliny czasowe w ciągu dnia które można dostosować do każdego dnia tygodnia Instrukcje regulowania trybów zegara i zmieniania fabrycznych ustawień czasu i temperatury zamieszczono w rozdziale Regulowanie trybów pracy zegara Tryb sterowania ręcznego Tryb ten realizuje podgrzewanie pomieszczenia do temp...

Страница 44: ...j Enter aby potwierdzić 12 Wciśnij v lub aby ustawić Minute Minuty wciśnij Enter aby potwierdzić Wciśnij Enter aby zmodyfikować Program P2 wykonaj kroki 5 do 12 wciśnij aby przejść do Programu P3 Wciśnij Enter aby zmodyfikować Program P3 wykonaj kroki 5 do 12 wciśnij aby przejść do Programu P4 Wciśnij Enter aby zmodyfikować Program P4 wykonaj kroki 5 do 12 Aby skopiować nowowprowadzone programy gr...

Страница 45: ...etlone zostanie bieżące ustawienie Wciśnij lub v celem przełączenia się między F1 a F6 F1 to ustawienie najniższe a F6 to ustawienie najwyższe 2 Zasadniczo płomienie wyglądają bardziej realistycznie wtedy gdy poziom jasności płomieni jest mniejszy 3 Pozostaw generator płomienia na chwilę do czasu aż zareaguje na wprowadzone zmiany 4 O ustawieniu niższego poziomu grzejnik będzie zużywał mniej wody ...

Страница 46: ... do komfortowej temperatury w odpowiednim czasie Jeżeli przykładowo wstajesz o godzinie 7 00 musi zgadywać kiedy włączyć grzejnik aby nagrzał pokój w odpowiednim czasie W zależności od temperatury na zewnątrz może to oznaczać że po wyjściu z łóżka w sypialni wciąż jest zimno lub że grzejnik zdążył już ogrzać pokój Uruchomienie opóźnione oznacza że po wybraniu wartości 21 ºC o godzinie 7 00 grzejni...

Страница 47: ...x Opti myst 12 V 45W z trzonem Gu5 3 kąt wiązki 8º 8 Ostrożnie włóż dwa styki nowej lampy w otwory osady lampy Wciśnij lampę mocno na jej miejsce Zob Rys 4 a 4a 9 Wymień dyszę zbiornik na wodę i warstwę paliwa 10 Włącz Czyszczenie Ostrzeżenie Przed przystąpieniem do czyszczenia grzejnika zawsze ustaw przełącznik A na wyłączenie produktu i odłącz go od gniazda zasilania Pozostaw urządzenie na 10 mi...

Страница 48: ... w odwrotnej kolejności Filtr powietrza 1 Wciśnij na pilocie zdalnego sterowania lub na produkcie aby go wyłączyć 2 Unieś ostrożnie warstwę paliwa i odłóż ją na bok 3 Wymontuj zbiornik umieść go w zlewie nakrętką do góry 4 Ostrożnie wysunąć do góry filtr powietrza Rys 10 5 Przed zwrotem ostrożnie opłukaj wodą w zlewie i osusz ręcznikiem materiałowym 6 Wymień filtr upewniwszy się że czarny filtr zg...

Страница 49: ...oducenta lub autoryzowanego dystrybutora Recykling Dotyczy produktów elektrycznych sprzedawanych w krajach Unii Europejskiej Po zakończeniu eksploatacji urządzeń elektrycznych nie wolno utylizować razem z odpadami domowymi W miarę możliwości prosimy o przekazanie do recyklingu Aby uzyskać więcej informacji na temat możliwości utylizacji należy skontaktować się z lokalnymi władzami lub sprzedawcą u...

Страница 50: ...eń na pilocie zdalnego sterowania Zob Regulacja ustawienia płomienia Tarczę metalową wyczyść przy pomocy dołączonego miękkiego pędzla Zob Rys 12 Procedurę opisano krok po kroku w rozdziale Konserwacja Poprowadź przewód do tylnej części zbiornika ociekowego upewnij się że znajduje się on w bocznej szczelinie wychodzącej ze zbiornika ociekowego Nieprzyjemny zapach w czasie używania urządzenia Woda j...

Страница 51: ...Fig 1 Fig 2 Fig 4 Fig 3 Fig 4a 2 3 1 644mm 300mm Minimum 600mm Recommended 157mm 564mm 625mm 240mm 1205mm Recommended 51 ...

Страница 52: ...Fig 5 Fig 6a Fig 8 Fig 6 Fig 7 Fig 9 52 ...

Страница 53: ...Fig 10 Fig 11 53 ...

Страница 54: ...Notes 54 ...

Страница 55: ...Notes 55 ...

Страница 56: ...56 ...

Отзывы: