Document Title:
Remote Tomo5 operation guide for eBIC microscopes
Author(s):
Kyle Morris
Julika Radecke
Andrew Howe
Version:
2.0.3
Date:
27 Jun 2022
If you have any questions at any point during set-up, please ask your Local Contact for assistance Page 8 of 29
3 Microscope setup and screening
3.1 Grid loading, Atlas and Presets
3.1.1 Initial checks and start up
Your Local Contact will have loaded and inventoried the autoloader cassette
Note you may find the previous sessions grid on the column or unloaded to cassette position 1
If Tomo5 is not loaded, begin by starting this software from the TEM PC
3.1.2 Collect your Atlas
Session setup:
We find it can help with set up to have a grid Atlas to navigate, so collect one first
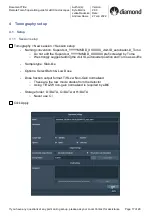
Start a new session for taking an Atlas (Atlas > New Session > Session Setup)
-
Naming convention: Supervisor_YYYYMMDD_XXXXXX_visit-ID_Atlas
o
Do not edit Supervisor_YYYYMMDD_XXXXXX prefix created by Tomo
o
We strongly suggest adding the visit ID and Atlas suffix
-
Image format: MRC
o
These are the Atlas and Atlas tile image formats
o
Using MRC is recommended to retain the extended MRC header information
-
Use the default SSD storage folder path: H:\DATA or G:\DATA or D:\DATA
o
Never use C:\
Session set-up can then be controlled by users directly through the Tomo interface. Changes to beam settings
should all be controlled directly through the Tomo Preparation presets and navigation around the grid can be done
via right-click options over the images in Preparation, Atlas and Tomo image windows.
If you are returning to this section to re-acquire an Atlas after Image Shift Calibration:
o
Select the grid(s) > Reset Selected
o
Skip Session setup


