TB-6518
12/06 Page 1 of 4
Digital Hand-Held Static Field Meter
Operation and Maintenance
DESCO EMIT WEST
- 3651 Walnut Avenue, Chino, CA 91710 • (909) 627-8178 • Fax (909) 627-7449
DESCO EMIT EAST
- 90 Hudson Road, Canton, MA 02021-1407 • (781) 821-8370 • Fax (781) 575-0172 • Web Site: DescoEMIT.com
Operation
ZEROING THE METER
1. The meter needs only to be zeroed at the time you first
use the instrument. It will maintain this value until the
battery is changed.
2. Press the ON/ZERO button and release. The LCD
display is activated and LED rangefinder lights begin to
flash.
3. Ground the operator by using a wrist strap or a
footgrounding device. You can also ground the unit
directly via a ground cord. The case of the instrument is
conductive and is the reference for the measurement.
4. Face the Fieldmeter away from charged objects and
press the ON/ZERO button. Hold until the display reads
zero. The instrument may also be zeroed by pointing it
toward a known grounded surface (such as the palm of
the opposite hand) and depressing the ON/ZERO button.
Although you must be careful not to contact the recessed
sensor plate, the amount of spacing between the
instrument and the target is not critical when zeroing the
instrument.
Figure 2. Zeroing the meter.
TAKING READINGS
1. Point the sensor plate toward the target and move to a
spacing of one inch from sensor plate to target. Use the
LED rangefinder to determine this distance. The two
LEDs appear to form a stationary (not moving) circle on
the target at one inch. Note the meter reading. A source
with a negative polarity shows a minus (-) sign in the
display. A positive source will display no sign.
To hold the reading, click the HOLD/OFF button briefly.
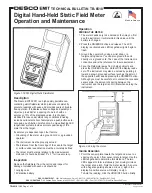
Figure 1. 50551 Digital Static Fieldmeter
Description
The Desco EMIT 50551 is a high quality, portable non-
contacting static fieldmeter which produces consistently
accurate readings with ease and provides years of trouble-
free operation. It indicates surface voltage and polarity on
objects up to ±20kV at a spacing of one inch with an
accuracy of 5% of the displayed value. It is chopper-
stabilized for use under almost any conditions including
ionized environments. Also featured are a push-button auto-
zero and a push-button hold function. A unique flashing LED
rangefinder system provides accurate positioning of the
meter from the target.
Its accuracy is dependent upon four factors:
• Grounding of the meter via a ground cord or a grounded
operator.
• The instrument must be properly zeroed.
• The distance from the front edge of the case to the target
or surface under examination must be accurately defined.
• The target must be large relative to the measurement
distance. It should be at least 5" x 5" for true accuracy.
Inspection
Remove the fieldmeter from the carton and inspect for
damage. Included with each unit should be:
1 carrying case
1 9V alkaline battery
Made in America
TECHNICAL BULLETIN TB-6518
© 2006 DESCO INDUSTRIES INC.
Employee Owned


