background image

2 Safety instructions
2.1 Basic safety information

Dentsply Sirona

Operating Instructions Primescan Connect

12

67 97 216 D3801

D3801.201.01.03.02    2022-09

2

Safety instructions

2.1

Basic safety information

2.1.1

Prerequisites

NOTE

Important information on building installation

In order to prevent the risk of an electric shock, this unit must only be
connected to a supply mains with a ground wire.

The building installation must be performed by a qualified expert in
compliance with the national regulations.

NOTE

Restrictions regarding installation site

The system is not intended for operation in areas subject to explosion
hazards.

NOTE

Do not damage the unit!

The unit can be damaged if opened improperly.

It is expressly prohibited to open the unit with tools!

2.1.2

Connecting the unit

Perform connection by following the directions given in the present
operating instructions.

2.1.3

General safety information

CAUTION

Risk group 2: Potentially hazardous optical radiation!

Direct radiation to the eye can be harmful to the eye.
➢ During operation, do not look directly at the lamp for long periods.

CAUTION

Note on the prevention, recognition, and elimination of unintended
electromagnetic effects:

The Primescan Connect acquisition unit is Class B equipment
(classified according to CISPR 11, EN 60601-1-2: 2015 based on IEC
60601-1-2: 2014).

This unit may be used in professional equipment of health services.

NOTE

Install only approved software

To prevent interference with the runtime reliability of the program,
only software approved by Dentsply Sirona may be installed.

Содержание Primescan Connect

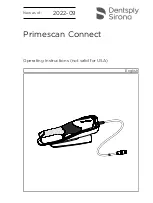
Страница 1: ...New as of 2022 09 Primescan Connect Operating Instructions not valid for USA English...

Страница 2: ...2 Safety instructions 12 2 1 Basic safety information 12 2 1 1 Prerequisites 12 2 1 2 Connecting the unit 12 2 1 3 General safety information 12 2 1 4 Transporting the scanner 14 2 1 5 Stability of th...

Страница 3: ...can 40 5 2 4 Approximal surface scan 40 5 2 5 Single and multiple buccal registration 41 5 2 6 Square and full jaw scan 42 5 2 7 Scan strategy for edentulous cases 44 5 2 8 Concluding the optical impr...

Страница 4: ...of the window sleeve 59 6 1 3 9 Using disposable sleeves 60 6 1 3 10 Sterilizing autoclavable sleeves in the autoclave and using disposable windows 61 6 1 4 Cleaning the inside of the sleeve window 63...

Страница 5: ...create hazards and cause damage Please therefore read and follow these operating instructions carefully Always keep them within easy reach Also pay attention to the safety instructions to prevent per...

Страница 6: ...familiarize himself with its functions and the specified warning and safety information Download Center for technical documents We have set up a Download Center or the technical documents at dentsplys...

Страница 7: ...uation that could result in serious bodily injury or death CAUTION A possibly dangerous situation that could result in minor or moderate bodily injury NOTE A possibly harmful situation which could lea...

Страница 8: ...patients users or third parties it is necessary that maintenance work is carried out at fixed time intervals to ensure the operational safety and reliability of your product The operator must ensure t...

Страница 9: ...not be used for any other purpose If the unit is used for any purpose other than the one mentioned above it may be damaged The system may only be used in conjunction with the Primescan intraoral scan...

Страница 10: ...nd 20XX Year of manufacture Safety labels Identifies labels imprints on the unit see Safety labels Product disposal symbol see Disposal 72 Follow the operating instructions To ensure safe operation of...

Страница 11: ...ckaging Take note of the following symbols on the packaging Up Keep dry Fragile handle with care Temperature during storage and transport Relative humidity during storage and transport Air pressure du...

Страница 12: ...aged if opened improperly It is expressly prohibited to open the unit with tools 2 1 2 Connecting the unit Perform connection by following the directions given in the present operating instructions 2...

Страница 13: ...with the product Plug connections of external PC interfaces CAUTION Additional devices connected to external interfaces must be tested according to the relevant standards e g EN 60601 1 2006 Cor 2010...

Страница 14: ...e and fall Ensure that the free cable ends are coiled when transporting the scanner The scanner can be detached from the coupling box for use in different treatment rooms 2 1 5 Stability of the unit N...

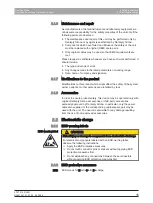
Страница 15: ...s to the product Modifications to this product which might affect the safety of the system owner patients or other persons are prohibited by law 2 1 8 Accessories In order to ensure product safety thi...

Страница 16: ...nce to ground potential by a nonconductive layer e g a shoe sole Formation of an electrostatic charge Electrostatic charges generally build up whenever two bodies are rubbed against each other e g whe...

Страница 17: ...bles are sensitive to electrostatic discharge Even voltages which are imperceptible to the user can cause breakdown of the structures thus leading to a discharge current which melts the chip in the af...

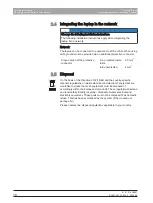
Страница 18: ...tective conductor Cross section of the protective conductor in a protected instal lation 2 5 mm 2 laid unprotected 4mm 2 2 5 Disposal On the basis of the Directive 2012 19 EU and the country specific...

Страница 19: ...or high precision intraoral optical impressions High resolution heated oral scanner 3D scanner with removable reflective sleeve Integrated image processing Coupling box including interfaces Scanner ho...

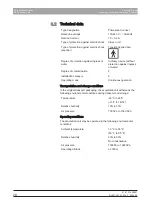
Страница 20: ...without protection against ingress of water Degree of contamination 2 Installation category Operating mode Continuous operation Transportation and storage conditions In the original transport packagi...

Страница 21: ...FAM Input voltage range 100 240 VAC 50 60 Hz Input current range 1 0 0 6 A EM10681C 02 from EDAC Power Electronics Co Ltd Taiwan Input voltage range 100 240 VAC 50 60 Hz Input current range 2 0 1 0 A...

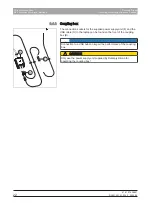
Страница 22: ...02 2022 09 3 4 2 Coupling box B D F The connection sockets for the supplied power supply unit F and the USB cable D to the laptop can be found on the front of the coupling box B NOTE Connection to a U...

Страница 23: ...Further products which are connected to this unit must also bear the CE mark Compliance Anyone creating or changing a medical electrical system in accordance with standard IEC 60601 1 2005 A1 2012 A2...

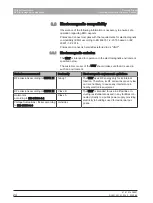
Страница 24: ...agnetic environment specified below The customer or user of the UNIT should make sure that it is used in such an environment Emission measurement Conformity Electromagnetic environment guidelines RF e...

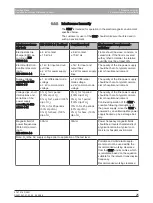
Страница 25: ...l mode voltage 2 kV common mode voltage The quality of the line power supply should be that of a typical commer cial or hospital environment Voltage dips short interruptions and variations of the powe...

Страница 26: ...transmitter in watts W according to the transmitter manufacturer s speci fications and d as recommended safety distance in meters m Field strengths from fixed RF trans mitters as determined by an elec...

Страница 27: ...nfluenced by their absorption and reflection by buildings objects and persons 1 The field strengths of fixed transmitters such as base stations of radiotelephones and mobile agricultural radio broadca...

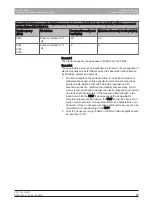
Страница 28: ...smission frequency m 150 kHz to 80 MHz 80 MHz to 800 MHz 800 MHz to 2 5 GHz d 1 2 P d 1 2 P d 2 3 P 0 01 0 12 0 12 0 23 0 1 0 38 0 38 0 73 1 1 2 1 2 2 3 10 3 8 3 8 7 3 100 12 12 23 For transmitters wh...

Страница 29: ...to wait 12 hours before putting the system into operation To do this the system must be removed from the storage case NOTE Observe operating conditions The storage case included in the scope of delive...

Страница 30: ...d on a flat horizontal surface inside or outside of the patient environment Ensure that the cables of the scanner do not pose a safety risk CAUTION Trip fall hazard The installation of the supply cabl...

Страница 31: ...1 03 02 2022 09 31 CAUTION Connecting additional devices to the external interfaces Additional devices connected to external interfaces of the laptop must be tested according to the relevant standards...

Страница 32: ...he coupling box B watching out for the guide nose 3 Place the scanner in the scanner holder C 4 Connect the coupling box to the laptop using a USB cable D with a USB female connector 5 Insert the conn...

Страница 33: ...result in a short circuit Install the unit at room temperature Wait until the unit has reached room temperature and is absolutely dry for at least one hour The unit is dry and can be put into operati...

Страница 34: ...lways be shut down properly to prevent data loss To prevent the laptop from becoming slower over time perform a normal shutdown of the operating system at regular intervals 1 Exit all programs 2 Power...

Страница 35: ...image brightness during the acquisition is controlled automatically so that there is always optimum image brightness largely independent of the distance between the scanner and the tooth The surround...

Страница 36: ...function IMPORTANT Heating up the scanner The internal scanner heating ensures that condensation does not form during scanning The heating starts immediately after connecting the scanner to the coupli...

Страница 37: ...During the continuous data acquisition a color 3D model is generated automatically on the screen A white field indicates in which area data will be acquired If the automatic data flow breaks off the...

Страница 38: ...be heard If the registration cannot be implemented the acquisition flow is suspended You are informed of this by means of a sound This is different to the sound emitted during successful acquisition...

Страница 39: ...ve the scanner to the starting position For this purpose the scanner is in the occlusal view of the tooth which is next to the prepared tooth in the distal direction 2 Scan in the mesial direction To...

Страница 40: ...reparation in the distal direction 1 Rotate the scanner to maximum 20 toward the lingual direction 2 Guide the scanner over the entire lingual distance in the mesial direction over the prepared tooth...

Страница 41: ...ngual scan 40 2 Perform a buccal scan of the bite block prior to completing the registration This buccal scan should be carried out close up to the preparation To acquire sufficient geometry capture t...

Страница 42: ...oral surface of the anterior teeth and move the scanner in the oral direction along the quadrant Move the scanner over the distal tooth to the vestibular side and track the first quadrant to the ante...

Страница 43: ...the distal tooth tilt the scanner approx 60 in an oral direction and move it orally along the dental arch up to the opposite distal tooth 2 Guide the scanner occlusally from the distal tooth across t...

Страница 44: ...he opposite side Ensure that 1 1 and 1 2 overlap each other at the starting point 2 Guide the scanner occlusally from the distal area across the entire dental arch back to the other side 3 To complete...

Страница 45: ...behind the model or are otherwise cut away from the line You are now in the ACQUISITION phase 1 Click on the Tool icon in the side palette on the right edge of the screen 2 Click the Cut button The c...

Страница 46: ...legal regulations which require regular safety inspections of electrical devices or systems by the operator Dentsply Sirona would like to draw your attention to the fact that a so called retest repea...

Страница 47: ...ng agents which have been approved by Dentsply Sirona 6 1 1 Cleaning agents and disinfectants 6 1 1 1 Cleaning agents Alpro Minuten Wipes Merz Pursept A D rr FD 366 sensitive FD 366 sensitive wipes Va...

Страница 48: ...unit Scanner cable and all connection cables 1 Use a new cotton gauze moistened with one of the cleaning agents listed in the Cleaning agents and disinfectants 47 section to disinfect the contact sur...

Страница 49: ...t the sapphire glass is not damaged If the Primescan scanner has been damaged it must no longer be used on patients The Primescan scanner must be recalibrated NOTE Do not sterilize the Primescan scann...

Страница 50: ...during the acquisition Wipe down the sleeve afterwards again with the absorbent cotton gauze dipped in drinking water NOTE Hygiene processes Observe the following hygiene processes NOTE Observe count...

Страница 51: ...ilized and cross contamination may occur Always put on the window sleeve disposable sleeve or autoclavable sleeve with disposable windows CAUTION Risk of injury The window of the window sleeve is made...

Страница 52: ...anner window or the sleeve window if the sleeve is not pushed in a straight way The sleeve must not come into contact with the scanner window Push the sleeve straight toward the scanner body do not ti...

Страница 53: ...see Preliminary cleaning of the sleeve 52 2 Use a dampened wiping cloth see Wipe disinfectants virucidal limited 47 or an absorbent cotton gauze dipped in an agent named in section Wipe disinfectants...

Страница 54: ...your country via your dealer A HLD set to support the HLD processes can be ordered from Dentsply Sirona with REF 66 83 184 A HLD tank C Metal bracket B Cover D Plugs 1 Carry out a preliminary cleanin...

Страница 55: ...e in order to ensure that no particle contamination or fluids penetrate the inside of the sleeve The plug provides a waterproof seal for the sleeve when attached correctly CAUTION Observe the safety i...

Страница 56: ...1 201 01 03 02 2022 09 9 Insert the metal bracket with the sleeve 10 Place the cover on the container and leave the sleeve in the disinfectant for at least 12 minutes CIDEX OPA The sleeve will not be...

Страница 57: ...e sleeve with tap water for at least 30 seconds while holding it with the bracket 13 Remove the bracket from the sleeve carefully and slowly by pushing the bracket downwards Ensure that the sleeve is...

Страница 58: ...lug using a soft lint free cloth Ensure that no fluid is able to penetrate the inside of the sleeve 18 Store the sleeve in such a way that it is protected from contamination until the next use 19 Remo...

Страница 59: ...from the scanner body see Removing the sleeve 52 section 3 Place the white protective sleeve on the scanner head and place the scanner body in the scanner holder 4 The sleeve can be sterilized using h...

Страница 60: ...olor analysis 1 Following each patient remove the disposable sleeve from the scanner body and dispose of it according to the standard procedure 2 Clean the scanner head with a dry cloth 3 Remove one d...

Страница 61: ...indow inserted Make sure that a disposable window is inserted each time you use it 1 Carry out a preliminary cleaning process after each patient see Preliminary cleaning of the sleeve 52 2 Remove the...

Страница 62: ...on the Primescan scanner in the holder so that it can warm up briefly prior to the intraoral exposure Make sure that the holder has been wipe disinfected The following autoclaving processes have been...

Страница 63: ...teel sleeve with a clean dust free and grease free cloth and ensure that no droplets remain 6 Remove the scanner body from the holder and remove the white protective sleeve 7 Before placing the sleeve...

Страница 64: ...an scanner must be allowed to warm up for 2 minutes before calibration Recalibrate the scanner in the following cases following transport shaking stress or during first commissioning after storage in...

Страница 65: ...e the Primescan scanner in the calibration set using one hand Ensure that the external calibration set screw is fully screwed in a clockwise motion until it gently locks into place 4 Click on the OK b...

Страница 66: ...alibration process is continued Once the calibration is complete a message is displayed indicating this 3 Confirm the message by clicking the OK button The Primescan scanner is calibrated Error messag...

Страница 67: ...calibration must be performed regularly The scanner must be color calibrated every 2 weeks in order to carry out a reliable color analysis You will achieve the best results if the scanner is color ca...

Страница 68: ...during the subsequent color calibration and the serial number of the color calibration set is thus displayed If this does not match the serial number printed on your color calibration set click on the...

Страница 69: ...et container Previous storage may mean that the period for use has been reduced to less than 2 years can only be used for one year after the container has been opened Write the date that the container...

Страница 70: ...your thumb and index finger In doing so the O ring is clamped in 2 Use your thumb and index finger to guide towards the holding nut as shown above During this process the O ring is partially pushed o...

Страница 71: ...he O ring into the groove in a similar way to pushing it out but without any force 3 Guide your thumb and index finger in such a way along the groove until the O ring is fully positioned in the groove...

Страница 72: ...ail services enretec de You can arrange for transport to enretec GmbH yourself or request enretec GmbH to organize transport Please prepare the unit for transport according to the Important conditions...

Страница 73: ...rimescan Connect 7 Disposal 67 97 216 D3801 D3801 201 01 03 02 2022 09 73 IMPORTANT Operators of equipment with storage functions for customer and patient data are responsible for deleting all persona...

Страница 74: ...rating Instructions Primescan Connect 74 67 97 216 D3801 D3801 201 01 03 02 2022 09 8 Appendix 8 1 Making backup copies To increase the system s data security and protect themselves against data losse...

Страница 75: ...uct service 5 Disposal of old electrical and electronic devices 72 Disposal of waste electrical and electronic equipment 18 E enretec GmbH 72 H HUB 18 I Intended use 9 M Maintenance 15 Manufacturer s...

Страница 76: ...Index Dentsply Sirona Operating Instructions Primescan Connect 76 67 97 216 D3801 D3801 201 01 03 02 2022 09 U Unpacking 29 W Water 20...

Страница 77: ......

Страница 78: ...e required due to technical improvements SIRONA Dental Systems GmbH Sprache englisch Printed in Germany D3801 201 01 03 02 2022 09 Nr 132 941 SIRONA Dental Systems GmbH Fabrikstra e 31 64625 Bensheim...

Отзывы: