background image

17

Using as a D/A Converter

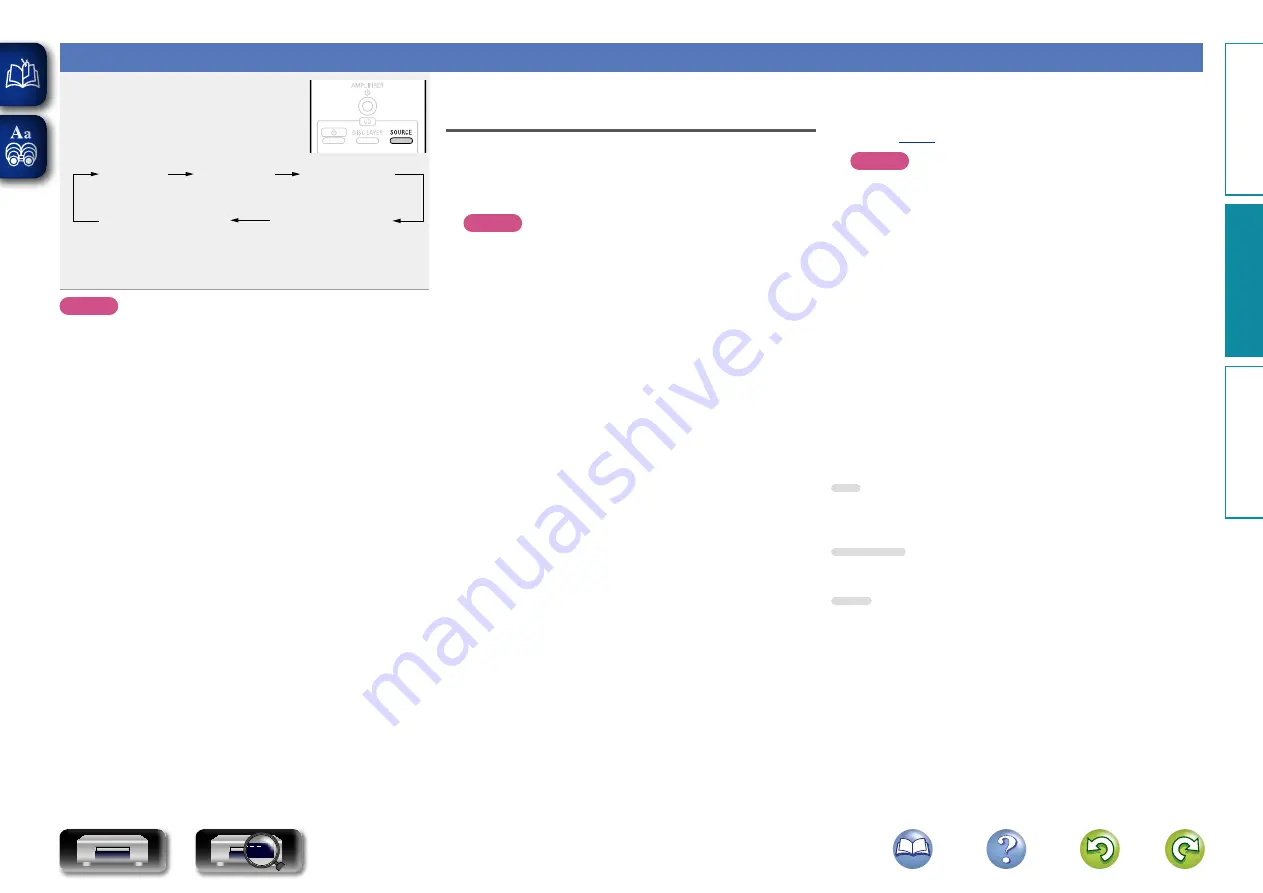
Press 

SOURCE

 to select “EXT IN 

USB”, “EXT IN COAX” or “EXT IN 

OPT”.

DISC

EXT IN COAX

EXT IN OPT

EXT IN USB

• 

“EXT IN 

SS 

k” is displayed according to the sampling frequency 

of the external input.

• 

If the sampling frequency cannot be detected, the display flashes.

NOTE

• 

Linear PCM signals with sampling frequencies of 32 kHz, 44.1 kHz, 
48 kHz, 64 kHz, 88.2 kHz, 96 kHz, 128 kHz, 176.4 kHz and 192 kHz 
can be input in the DCD-2020AE. 

• 

Do not input non-PCM signals, such as CD-ROM, Dolby Digital, and 
DTS. This causes noise and could damage the speakers.

• 

If the sampling frequency switches, such as from A mode to B mode 
in a CS broadcast, muting may operate for 1-2 seconds, cutting the 
sound.

Connecting and playing back from a 

computer (USB)


n

Installing the dedicated driver

Before music files saved on a computer can be played on this 
unit, the dedicated driver must be downloaded from the DENON 
website, and installed in the computer.

NOTE

• 

The dedicated driver must be installed in the computer before 
this unit is connected to a computer. Operation will not occur 
correctly if connected to the computer before the dedicated 
driver has been installed. Moreover, if the computer is running 
Windows XP as its OS, the computer’s speed will decrease 
significantly, and a computer restart may be required.

• 

Operation may fail in some computer hardware and software 
configurations.


n

Connection

Use the rear panel USB port to connect this unit to a personal 
computer. For the connection procedure, refer to “Connecting a 
PC” (

v

page 5

)


.

NOTE

• 

Perform operations such as playback and pause on the computer. 
At this time, you cannot perform operations with buttons on this 
unit or the remote control.

• 

You can also control the volume and equalizer on the computer. 
Enjoy playing music at the desired volume.

• 

When this unit is functioning as a D/A converter, sound is not 
output from the computer’s speakers.

• 

If the computer is disconnected from this unit while the computer 
music playback software is running, the playback software may 
freeze. Always exit the playback software before disconnecting 
the computer.

• 

When an abnormality occurs on the computer, disconnect the 
USB cable and restart the computer.

• 

The supported sampling frequencies are 32/44.1/48/88.2/96/ 
176.4/192 kHz.

• 

The sampling frequency of the music playback software and 
sampling frequency displayed on this unit may differ.


n

Computer (recommended system)

OS

• 

Windows® XP Service Pack3, Windows® Vista or Windows® 7

• 

Macintosh OSX 10.6.3 or later.

Software

• 

Server software supporting Windows Media Player® and iTunes.

USB

• 

USB 2.0: USB High speed/USB Audio Class V2.0

USB

Oper

ations

Inf
or

mation

Oper

ations

Pr

epar

ations

CD

Содержание DCD-2020AE

Страница 1: ...DCD 2020AE SUPER AUDIO CD PLAYER Owner s Manual Operations Information Preparations CD ...

Страница 2: ...s been damaged in any way such as power supply cord or plug is damaged liquid has been spilled or objects have fallen into the apparatus the apparatus has been exposed to rain or moisture does not operate normally or has been dropped 14 Batteries shall not be exposed to excessive heat such as sunshine fire or the like DECLARATION OF CONFORMITY We declare under our sole responsibility that this pro...

Страница 3: ...es should not be placed on the unit Observe and follow local regulations regarding battery disposal Do not expose the unit to dripping or splashing fluids Do not place objects filled with liquids such as vases on the unit Do not handle the mains cord with wet hands When the switch is in the OFF STANDBY position the equipment is not completely switched off from MAINS The equipment shall be installe...

Страница 4: ...udio CDs 10 Playing CD 11 Playback of MP3 and WMA files 12 Playback iPod 13 Playing a USB memory device 14 Operations enabled during playback 15 Using as a D A Converter 17 Using the timer play function 18 Information 19 Part names and functions 20 Front panel 20 Display 21 Rear panel 21 Remote control unit 22 Other information 24 Playable media 24 Cautions on using media 26 Explanation of terms 2...

Страница 5: ...the operating parts inside the unit causing the unit not to operate properly If this happens let the unit sit for an hour or two with the power turned off and wait until there is little difference in temperature before using the unit Cautions on using mobile phones Using a mobile phone near this unit may result in noise If that occurs move the mobile phone away from this unit when it is in use Mov...

Страница 6: ...eparations 3 F Connections vpage 4 F Setting the Auto Standby mode vpage 8 Preparations Here we explain the connections and setup methods for this unit Preparations Preparations Operations Information CD ...

Страница 7: ...gital connections Optical cable sold separately Coaxial digital connections Coaxial digital cable sold separately R L R L iPod connections iPod cable sold separately PC connections USB cable sold separately R L R L Connections Connecting a 2 channel audio amplifier This connection is for playback of audio of this unit using a 2 channel audio device R L R L AUDIO AUDIO R L IN Amplifier Digital Outp...

Страница 8: ...puter to the USB port on the rear panel of this unit using a commercially available USB connecting cable this unit can be used as a D A converter vpage 17 Using as a D A Converter USB port Type B Signal flow Computer installed with a media player USB 2 0 cable sold separately Type A Plug that fits the shape of the connection device connector Preparations Preparations Operations Information CD ...

Страница 9: ...via a USB hub Do not use an extension cable when connecting a USB memory device This may cause radio interference with other devices When connecting an iPhone to this unit keep the iPhone at least 20 cm away from this unit If the iPhone is kept closer to this unit and a telephone call is received by the iPhone noise may be output from this device If the iPod is connected using an iPod cable commer...

Страница 10: ...7 Connecting an iPod or USB memory device to the USB port Supported iPod models iPod classic iPod nano iPod touch iPhone as of August 2012 Preparations Preparations Operations Information CD ...

Страница 11: ... CD X for at least 5 seconds Auto Standby mode is switched between Off and On The power indicator indicates Auto Standby mode Off On during Standby as shown below Auto Standby mode Off Lit in red Auto Standby mode On Unlit The power indicator flashes in red during Auto Standby mode setting If you set the Auto Standby mode while the unit is ON the unit will enter the standby mode as soon as the Aut...

Страница 12: ...Operations 9 F Playback vpage 10 Operations Here we explain functions and operations that let you make better use of this unit Operations Information Operations Preparations CD ...

Страница 13: ...ches for that disc but the top priority playback layer setting itself does not change 3 Press SOURCE to set the playback media mode to DISC 4 Press DISC LAYER and switch to the layer you want to set Super Audio CD only STEREO MULTI CD STEREO Plays back the 2 channel area of the Super Audio CD the default setting MULTI Plays back the multi channel area of the Super Audio CD The analog output of the...

Страница 14: ...t recorded in the disc is selected a layer that exists is played back based on the playback layer priority 5 Press 1 3 The 1 indication lights off The disc tray closes and playback starts n nPlaying a specific track Press 0 9 and 10 to select the track GExampleH Track 4 Press 4 GExampleH Track 12 Press 10 and 2 n nOperations enabled during playback vpage 15 NOTE Do not place any foreign objects in...

Страница 15: ...ts n nTo switch the folder or file during playback Folder Use ui to select the folder and then press ENTER File Use o p to select the file then press ENTER Also use 8 9 to select the file The file numbers are set automatically when the disc is loaded Copyright protected files cannot be played The Not Support is displayed Note that depending on the software used for burning and other conditions som...

Страница 16: ...nit display iPod display Playable files Audio file P P Video file P Active buttons Remote control unit This unit P P iPod P 3 Use ui to select the item then press ENTER to select the music file to be played 4 Press 1 3 Playback starts Disconnecting the iPod q Press 2 w Disconnect the USB cable from the USB port n nTo switch the display Browse mode only During playback press TITLE ARTIST The displa...

Страница 17: ...n press ENTER File Use o p to select the file then press ENTER Use 8 or 9 to select the file The file numbers are set automatically when the USB memory device is loaded n nSwitching the display During playback press TITLE ARTIST While an MP3 WMA AAC is being played back Title name Album name Artist name While a WAV file is being played back only the file name is displayed The player can display th...

Страница 18: ...r when no disc is inserted NOTE In the pure direct mode DIMMER is not available for operation Switching the display Press TIME Each time TIME is pressed the display changes as follows Track elapsed time Track remaining time Total remaining time NOTE While playing back MP3 WMA discs USB or iPod you cannot switch the time display During random playback or program playback the total remaining time wi...

Страница 19: ...back resumes Operations enabled during playback Playing tracks in a specific order Program playback Up to 20 tracks can be programmed 1 In the stop mode press PLAY SELECT The PROG indicator lights Each time PLAY SELECT is pressed the display changes as follows RAND PROG Indicator turns off 2 Use 0 9 and 10 to select the tracks GExampleH To program tracks 3 12 7 to play in that order Press 3 10 2 a...

Страница 20: ...peed will decrease significantly and a computer restart may be required Operation may fail in some computer hardware and software configurations n nConnection Use the rear panel USB port to connect this unit to a personal computer For the connection procedure refer to Connecting a PC vpage 5 NOTE Perform operations such as playback and pause on the computer At this time you cannot perform operatio...

Страница 21: ...also to the owner s manual of the audio timer 5 Turn the timer ON The power of the components connected to the timer turns off When the set time is reached the power of the different components automatically turns on and playback starts from the first track NOTE The timer play does not support the random play or program play This unit Timer device Amplifier To household power outlet AC 230 V 50 60...

Страница 22: ...ther information vpage 24 F Troubleshooting vpage 28 F Specifications vpage 29 F Index vpage 30 Information Here we list various information related to this unit Please refer to this information as needed Operations Information Information Preparations CD ...

Страница 23: ...3 14 Q2Play Pause button 1 3 13 14 Q3Disc tray Q4SUPER AUDIO CD indicator If the unit is one of the following states this indicator lights The super audio CD is inserted The layer mode of the super audio CD is set to STEREO or MULTI Q5Advanced AL32 Processing indicator If the unit is one of the following states the Advanced AL32 Processing is enabled and this indicator lights CD is inserted The un...

Страница 24: ...it is pressed Single track repeat All track repeat Repeat off indicator turns off eInformation display Various information is displayed here depending on the operation mode rPlayback format indicators Lights up while an WAV MP3 WMA file is being played back tPlayback signal channel indicator L Front left LFE Subwoofer C Center SL Surround left R Front right SR Surround right yTime display indicato...

Страница 25: ...2 13 14 16 iTIME button 15 oPlayback operation buttons 13 14 Reverse skip Forward skip button 8 9 Play Pause button 1 3 CALL button Fast reversing Fast forwarding button 6 7 Stop button 2 Q0DIMMER button 16 Q1SOURCE button 10 14 Q2CLEAR button 16 Q3PLAY SELECT button 13 15 16 Q4REPEAT button 12 13 15 16 Q2 Q3 Q4 Q1 y i o Q0 u t q w e r AMP operation qAMPLIFIER power button X wVOLUME buttons df eMU...

Страница 26: ... battery fluid should leak carefully wipe the fluid off the inside of the battery compartment and insert new batteries Remove the batteries from the remote control unit if it will not be in use for long periods Used batteries should be disposed of in accordance with the local regulations regarding battery disposal The remote control unit may function improperly if rechargeable batteries are used O...

Страница 27: ...e files Extension File specification MP3 mp3 Sampling frequency 32 44 1 48 kHz Bit rate 32 kbps to 320 kbps Format MPEG1 Audio Layer 3 WMA wma Sampling frequency 32 44 1 48 kHz Bit rate 64 kbps to 192 kbps Format Windows Media Audio NOTE Be sure to give files the extension mp3 or wma Files with any other extensions or with no extensions cannot be played Recordings you have made should only be used...

Страница 28: ...re played first next on the second layer then next on the third layer and so on in this order USB memory device For playback of files recorded on USB files in the first folder on the first layer are played first next folders on the second layer in the folder then next on the third layer and so on in this order Then accordingly files on another first layer are played The playback order displayed on...

Страница 29: ...ses Do not bend or heat discs Do not enlarge the hole in the center Do not write on the labeled printed surface with ball point pens pencils etc or stick new labels on discs Condensation may form on discs if they are moved suddenly from a cold place outdoors for example to a warm place but do not try to dry discs with a hairdryer etc Do not eject a USB memory device or turn off the unit while a US...

Страница 30: ...tandardized audio data compression scheme using the MPEG 1 video compression standard It compresses the data volume to about one eleventh its original size while maintaining sound quality equivalent to a music CD P Pure direct This function enables higher quality playback of audio signals by turning off the display and digital output to eliminate any slight effect they may have on the audio circui...

Страница 31: ...s and adjust as necessary 4 6 8 A specific section of a disc does not play properly The disc is dirty or scratched Wipe the dirt off the disc or replace the disc 26 Programmed playback is not possible The tracks have not been programmed properly Programmed playback is not possible with MP3 and WMA files Program properly Use a CD 16 12 Symptom Cause Countermeasure Page A CD R or CD RW disc cannot b...

Страница 32: ...titions only files stored in the top partition can be played Record the files in a compatible format Files that are copyright protected cannot be played on this unit 24 25 Specifications n n Audio performance Super Audio CD CD Analog output Channels 2 channels 2 channels Playable frequency range 2 Hz 100 kHz 2 Hz 20 kHz Playable frequency response 2 Hz 50 kHz 3 dB 2 Hz 20 kHz 0 5dB S N 121 dB Audi...

Страница 33: ...inalizing 27 Folder 25 Folder mode 12 14 Front Panel 20 v v H HD layer 24 Hybrid discs 24 v v I iPod 13 v v L Linear PCM 27 v v M MP3 12 24 27 v v O Operation Fast forward fast reverse 15 Pause 15 Program 16 Pure direct 15 Random 15 Repeat 16 Skip 15 Stop 15 v v P Pause 15 PC 5 Playback CD 10 11 iPod 13 MP3 12 USB memory device 14 WMA 12 Power cord 8 Pure direct 15 27 v v R Random playback 15 Rear...

Страница 34: ...31 Dimensions Unit mm 324 5 335 0 220 0 51 5 53 0 20 5 117 5 138 0 434 0 344 0 61 0 4 0 6 5 61 0 157 5 140 0 Weight 13 7 kg Operations Information Information Preparations CD ...

Страница 35: ...D M Holdings Inc 3520 10187 10AD V01 www denon com ...

Отзывы: