29
7.5
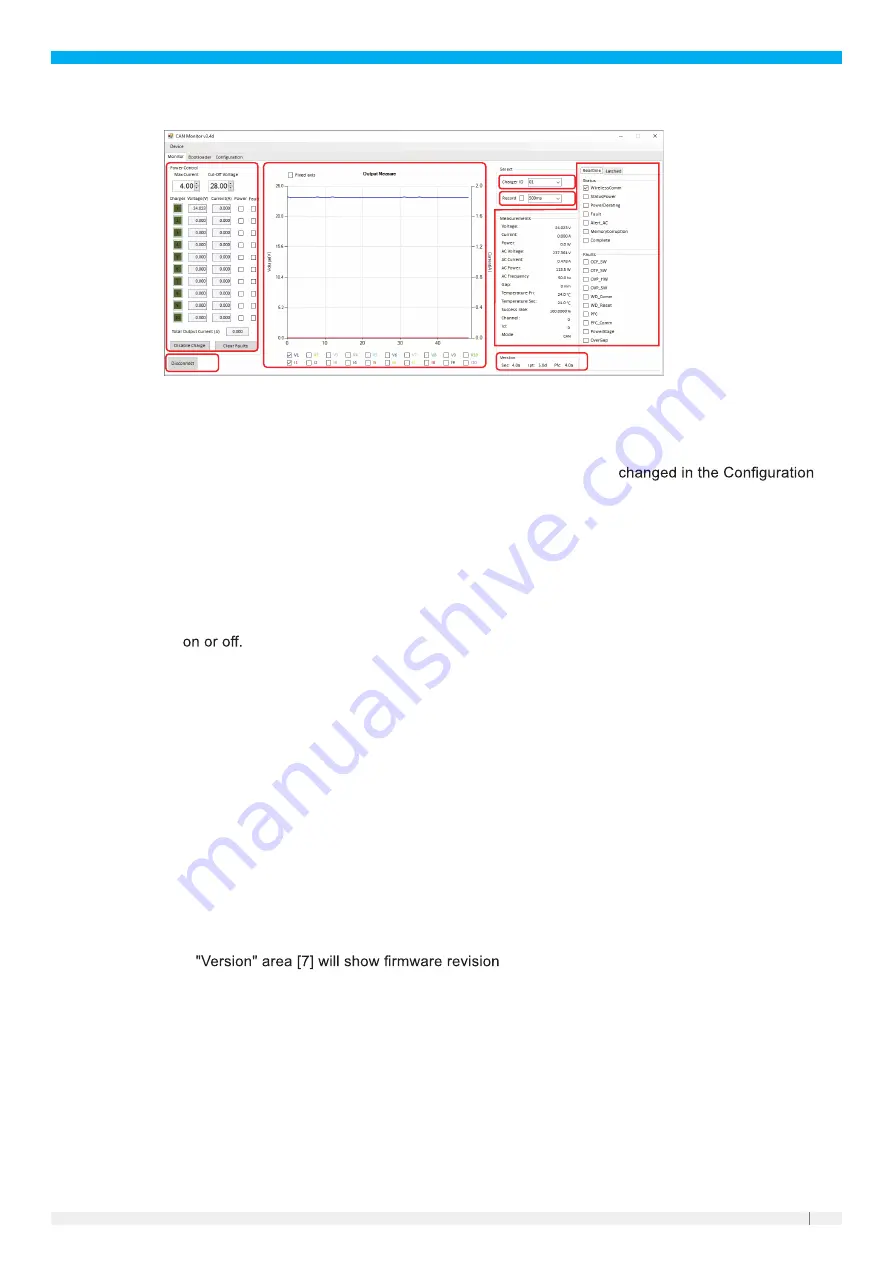
Areas of the monitor tab
2
6
7
3
1
4
5
1. Connect/disconnect button
2. Selects the CAN node address of the WSU to have its status shown in [3] or recorded in [6]. Also
used to select the node address of the WSU to have its settings
tab. If only one WSU is used then this can be ignored.
3. Status of the charger system who's node address is currently selected
4. Set voltage target and maximum current (i.e., setpoints). If multiple WSUs of the same variant are
used with their outputs in parallel, then the current entered is the current per WSU. The numbers
1-10 down the left side refer to CAN node IDs. Each number can be clicked to toggle that WSU
5. Area for graphing the WSU outputs. The I and V numbers at the bottom can be used to show or
hide each WSU.
6. Record button plus how often each recording is made.
7. Firmware revisions of each charger system part correctly aligned and powered.
7.6
Basic operation
Click the “Connect” button to start communicating with the WSB. If everything is set up correctly the
GUI will report live data from the WSB, for example:
●
"Measurements" area [3] will show the voltage present on its terminals, temperature, etc
●
"Output Measure" area [5] will start graphing the WSU output
●
If the WPB has power and the pads are correctly aligned, the GUI will also show its live data.


