


154
Adding and Replacing Parts
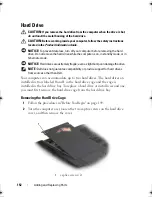
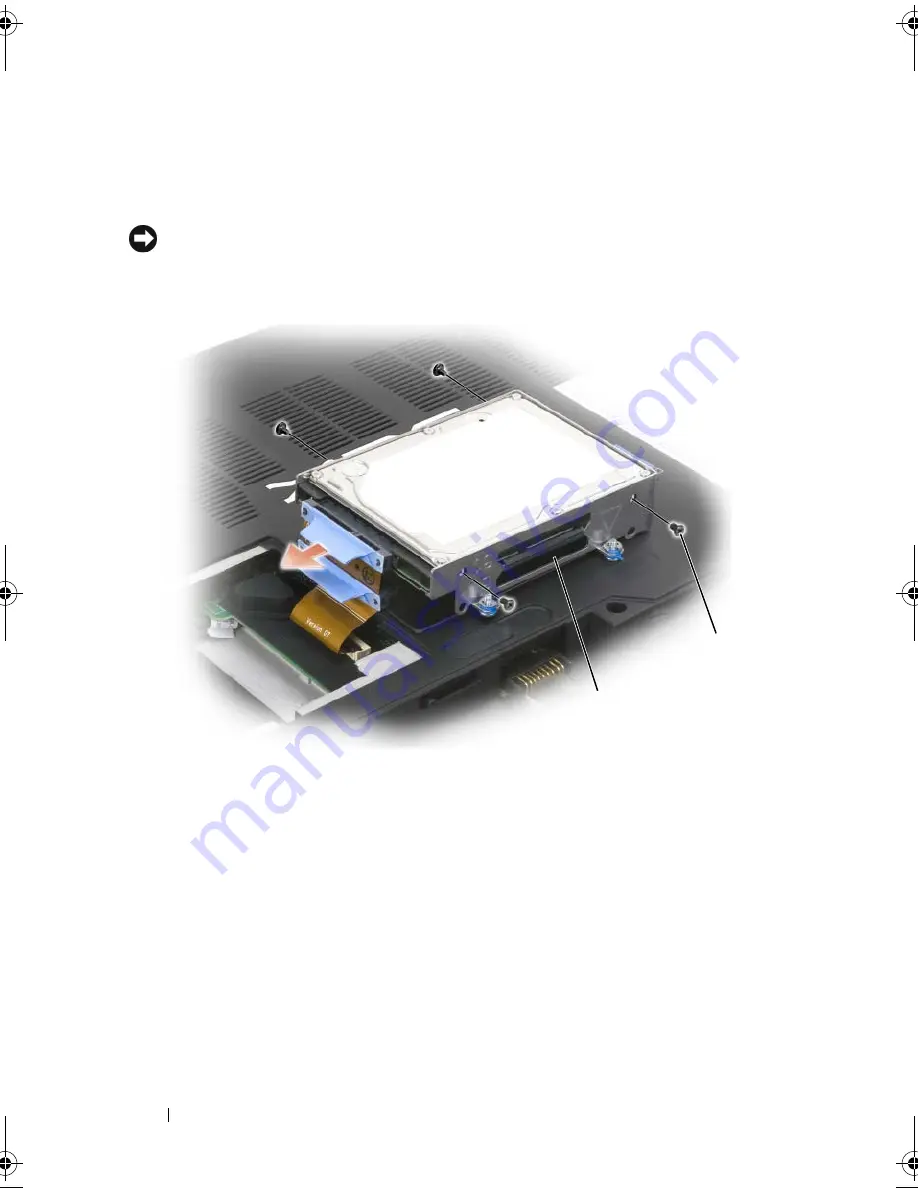
Replacing a Hard Drive in the Hard Drive Cage
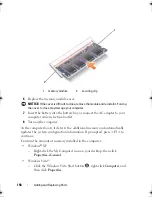
1
Remove two screws on each side of the hard drive cage to free the hard
drive, then lift the drive out of its tray in the cage.
NOTICE:
When a hard drive is not in the computer, store it in protective antistatic
packaging. See “Protecting Against Electrostatic Discharge” in the
Product
Information Guide
.
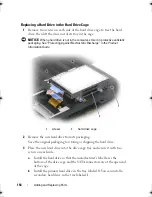
2
Remove the new hard drive from its packaging.
Save the original packaging for storing or shipping the hard drive.
3
Place the new hard drive into the drive cage tray and secure it with two
screws on each side.
a
Install the hard drive so that the manufacturer’s label faces the
bottom of the drive cage and the SATA connectors are at the open end
of the cage.
b
Install the primary hard drive in the tray labeled
0
. You can install a
secondary hard drive in the tray labeled
1
.
1
screws
2
hard drive cage
1
2
book.book Page 154 Monday, April 14, 2008 4:23 PM
Содержание XPS M1730
Страница 1: ...w w w d e l l c o m s u p p o r t d e l l c o m Dell XPS M1730 Owner s Manual Model PP06XA ...
Страница 12: ...12 Contents ...
Страница 18: ...18 Finding Information ...
Страница 19: ...About Your Computer 19 About Your Computer Front View 1 13 2 4 8 7 10 5 9 3 11 14 12 6 15 ...
Страница 46: ...46 Using the Keyboard ...
Страница 54: ...54 Using a Battery ...
Страница 102: ...102 Setting Up and Using Networks ...
Страница 148: ...148 Troubleshooting ...
Страница 162: ...162 Adding and Replacing Parts ...
Страница 184: ...184 Appendix ...
Страница 207: ...Index 207 reinstalling 146 system restore 141 wizards Program Compatibility wizard 124 WWAN See also Mobile Broadband ...
Страница 208: ...208 Index ...