background image

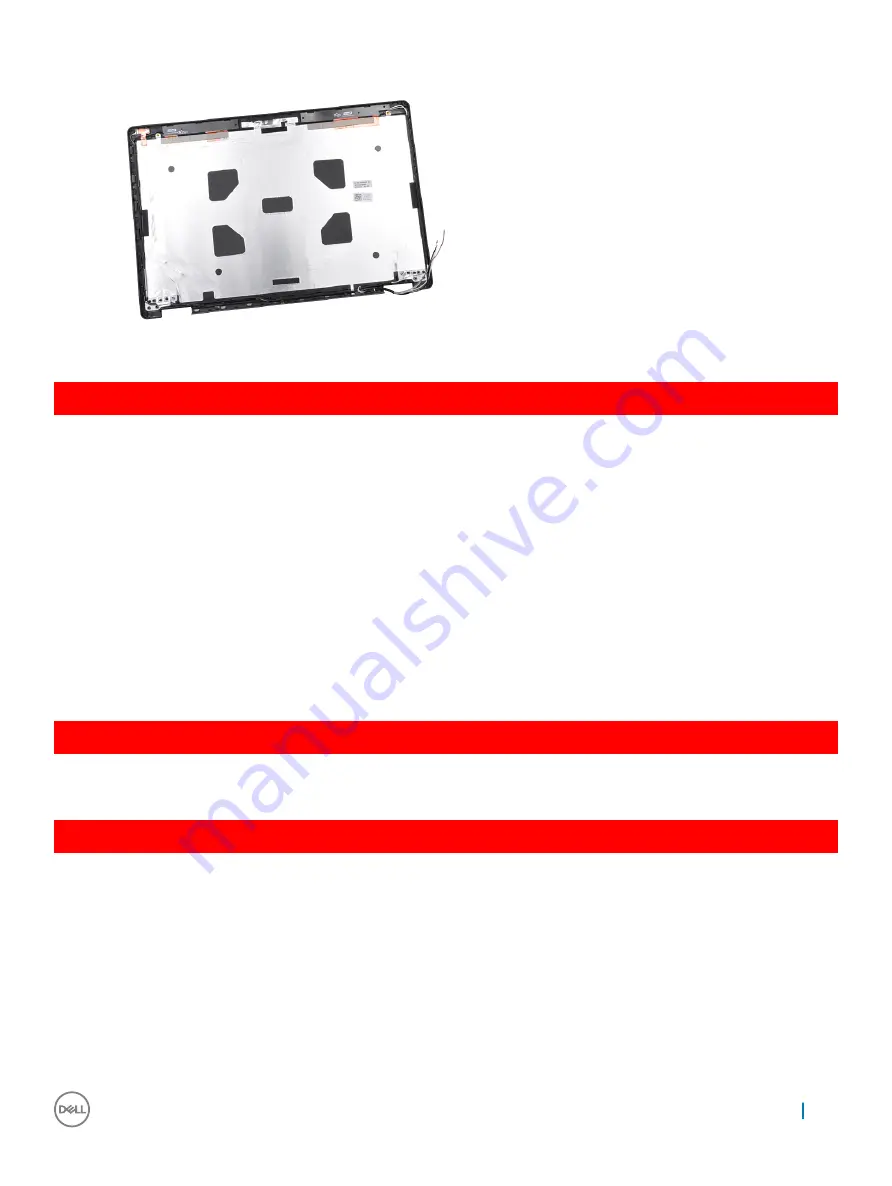
The display back cover assembly is the remaining component, after removing all the components.

GUID-CDC91034-3E3F-449F-BA72-6F5F0A09F633

Installing the display back cover assembly

Place the display back cover assembly on a flat surface.

Install the:

a

camera

b

eDP cable

c

display panel

d

display bezel

e

display assembly

f

display hinge cover

g

WWAN card(optional)

h

WLAN

i

battery

j

base cover

Follow the procedure in 

After working inside your computer

.

GUID-B2F0CB60-3ABC-4810-802B-5FAA7A1515DC

Camera

GUID-BD74F948-F429-44C5-9E48-8A71BF132A15

Removing camera

Follow the procedure in 

Before working inside your computer

.

Remove the:

a

base cover

b

battery

c

WWAN card (optional)

d

WLAN card

e

display hinge cover

f

display assembly

g

display bezel

Removing and installing components

57

Содержание Vostro 5480

Страница 1: ...Dell Latitude 5480 Owner s Manual Regulatory Model P72G Regulatory Type P72G001 ...

Страница 2: ...amage to hardware or loss of data and tells you how to avoid the problem WARNING A WARNING indicates a potential for property damage personal injury or death GUID F1C5ECBB F43D 449A 9548 0D719858EB9E 2017 Dell Inc or its subsidiaries All rights reserved Dell EMC and other trademarks are trademarks of Dell Inc or its subsidiaries Other trademarks may be trademarks of their respective owners 2017 01...

Страница 3: ...dentity Module SIM board 17 Installing the Subscriber Identification Module SIM card 17 Removing the Subscriber Identification Module SIM card 18 Base cover 18 Removing base cover 18 Installing base cover 19 Battery 19 Removing battery 19 Installing battery 20 Solid State Drive optional 21 Removing optional M 2 Solid State Drive SSD 21 Installing optional M 2 SSD 22 Hard drive 22 Removing hard dri...

Страница 4: ... 36 System board 37 Removing system board 37 Installing system board 40 SmartCard module 41 Removing smart card reader board 41 Installing smart card reader board 42 Speaker 43 Removing speaker 43 Installing speaker 44 Display assembly 44 Removing display assembly 44 Installing display assembly 48 Display bezel 49 Removing display bezel 49 Installing display bezel 50 Display hinge cover 50 Removin...

Страница 5: ...10 65 Graphic options 66 Intel HD Graphics drivers 66 Downloading drivers 66 Display options 67 Identifying the display adapter 67 Changing the screen resolution 67 Rotating the display 68 Adjusting brightness in Windows 10 68 Cleaning the display 69 Using touch screen in Windows 10 69 Connecting to external display devices 69 Realtek ALC3246 Waves MaxxAudio Pro controller 70 Downloading the audio...

Страница 6: ... screen options 86 POST Behavior screen options 87 Virtualization support screen options 89 Wireless screen options 89 Maintenance screen options 89 System Log screen options 90 Updating the BIOS in Windows 90 Updating your system BIOS using a USB flash drive 91 System and setup password 91 Assigning a system password and setup password 92 Deleting or changing an existing system and or setup passw...

Страница 7: ...00 7 การวินิจฉัยระบบ 101 Enhanced Pre Boot System Assessment ePSA diagnostics 101 Device status lights 102 Battery status lights 103 8 Troubleshooting 104 Dell Enhanced Pre Boot System Assessment ePSA diagnostic 3 0 104 Running the ePSA diagnostics 104 Real Time Clock RTC reset 104 9 Contacting Dell 106 Contents 7 ...

Страница 8: ...ourself by using a wrist grounding strap or by periodically touching an unpainted metal surface that is grounded to ground yourself before you touch the computer to perform any disassembly tasks CAUTION Handle components and cards with care Do not touch the components or contacts on a card Hold a card by its edges or by its metal mounting bracket Hold a component such as a processor by its edges n...

Страница 9: ...ExpressCard 4 Connect any telephone or network cables to your computer CAUTION To connect a network cable first plug the cable into the network device and then plug it into the computer 5 Connect your computer and all attached devices to their electrical outlets 6 Turn on your computer GUID 52C8386F 7013 4A8E 912D 2DF589CA6CA4 Turning off your computer GUID B70C8BD7 328C 424F 8DF4 80728A0080AB Tur...

Страница 10: ... attached devices are turned off If your computer and attached devices did not automatically turn off when you shut down your operating system press and hold the power button for about 6 seconds to turn them off 10 Working on your computer ...

Страница 11: ...Chassis view GUID C704E1F4 F4F4 43C8 87F2 EC6CA33E92DB System front view Figure 1 Front view 1 Dual array microphone 2 Camera 3 Camera status light 4 Dual array microphone 5 Display 6 Battery and charge status light 7 Speaker 2 Chassis view 11 ...

Страница 12: ...4BE E7DE 47CA A9A4 1B93C6CA71E6 System back view Figure 2 Back view 1 Network port 2 Fan vent 3 microSim card slot optional 4 HDMI port 5 USB 3 1 Gen 1 port 6 Power connector port GUID 4436A27F 0EE0 4694 BC30 4E64FF743052 System side view left Figure 3 Left view 12 Chassis view ...

Страница 13: ...port 3 SD card reader NOTE Latitude 5480 computer also has an optional Smart card reader GUID DD54F0B8 F526 462A B941 E5593E5AE19D System side view Right Figure 4 Right view 1 Headset microphone port 2 USB 3 1 Gen 1 port with PowerShare 3 VGA port 4 Noble wedge lock slot Chassis view 13 ...

Страница 14: ...3 9217 4D26 A6DF A4A931E39478 System top view Figure 5 Top view 1 Power button Power status LED 2 Keyboard 3 Palm rest 4 Touchpad NOTE Latitude 5480 computer also has an optional fingerprint reader 14 Chassis view ...

Страница 15: ...two icons on them These keys can be used to type alternate characters or to perform secondary functions To type the alternate character press Shift and the desired key To perform secondary functions press Fn and the desired key The following table shows the features hot key combination Table 1 Hot key combination Features Function Fn F1 Mute audio Fn F2 Decrease volume Fn F3 Increase volume Chassi...

Страница 16: ...eyboard backlight brightness Fn F11 Decrease brightness Fn F12 Increase brightness Fn Esc Toggle Fn key lock Fn PrntScr Turn off on wireless Fn Insert Sleep Fn Right arrow key End Fn Left arrow Home NOTE You can define the behavior of the shortcut keys by pressing Fn Esc or by changing Function Key Behavior in BIOS setup program 16 Chassis view ...

Страница 17: ...s Phillips 0 screwdriver Phillips 1 screwdriver Small plastic scribe GUID 8415CF53 F1E0 49C0 99EF 78E812ED7644 Subscriber Identity Module SIM board GUID B60E529B 4F7B 45A4 B667 79763588242A Installing the Subscriber Identification Module SIM card 1 Insert a paperclip or a SIM card removal tool into the pinhole 1 2 Pull the SIM card tray to remove it 2 3 Place the SIM card on the SIM card tray 4 Pu...

Страница 18: ...3 Remove the SIM card from the SIM card tray 4 Push the SIM card tray into the slot until it clicks into place GUID DA12D285 BE8F 419A BADD 8C7CE1AEEE1A Base cover GUID 1A1FFC0F 932A 4FF2 8E1C 6A116DCF1D11 Removing base cover 1 Follow the procedure in Before working inside your computer 2 To remove the base cover a Loosen the M2 5 6 3 captive screws that secure the base cover to the computer 1 b P...

Страница 19: ...After working inside your computer GUID 2F290758 2CFF 42C3 A93C DC0EF3A54A0F Battery GUID F2983803 7011 4A0B A9BA 59C560417C6B Removing battery 1 Follow the procedure in Before working inside your computer 2 Remove the base cover 3 To remove the battery a Disconnect the battery cable from the connector on the system board 1 b Remove the M2 6 captive screw that secures the battery to the computer 2...

Страница 20: ...the battery d Unroute the cable from the routing channel 1 and remove the cable from the battery GUID 33E02BE1 560A 4CDF AC33 37EEC8C32AA7 Installing battery 1 Insert the battery into the slot on the computer 2 Route the battery cable through the routing channels 3 Tighten the M2 6 captive screw to secure the battery to the computer 4 Connect the battery cable to the connector on the system board ...

Страница 21: ...y 3 To remove the SSD card a Peel the adhesive Mylar shield that secures the SSD card 1 NOTE Need to be removed carefully in order to be reused on the replacement SSD b Remove the M2 3 screw that secures the SSD to the computer 2 c Slide and lift the SSD from the computer 3 4 To remove the SSD frame a Remove the M2 3 screw that secures the SSD frame to the computer 1 b Lift the SSD frame away from...

Страница 22: ...nto the connector on the computer 4 Place the Mylar shield over the SSD 5 Install the a battery b base cover 6 Follow the procedure in After working inside your computer GUID DA236FEA AA29 400C 89C3 C25D4B9DE6F3 Hard drive GUID 0960E075 7239 4F68 9536 49C2E8860BB5 Removing hard drive assembly 1 Follow the procedure in Before working inside your computer 2 Remove the 22 Removing and installing comp...

Страница 23: ...Connect the hard drive cable to the connector on the hard drive and on the system board 4 Install the a battery b base cover 5 Follow the procedures in After working inside your system GUID B369D04D 3080 4AE8 912A 8F95B80E032D Coin cell battery GUID 61BA6717 FC02 4136 BB4C 80CBB848E677 Removing the coin cell battery 1 Follow the procedure in Before working inside your computer 2 Remove the a base ...

Страница 24: ...ector on the system board 3 Install the a battery b base cover 4 Follow the procedure in After working inside your computer GUID CCAA203F 6E60 4861 BC9C 1EED5672FD0D WLAN card GUID B9430252 89EB 445C 8F3F 7EB3FAB9CE1F Removing WLAN card 1 Follow the procedure in Before working inside your computer 2 Remove the a base cover b battery 24 Removing and installing components ...

Страница 25: ...talling WLAN card 1 Insert the WLAN card into the connector on the system board 2 Connect the WLAN cables to the connectors on the WLAN card 3 Place the metal bracket to secure the WLAN cables 4 Tighten the M2 3 screw to secure the WLAN card to the computer 5 Install the a battery b base cover 6 Follow the procedure in After working inside your computer GUID 11835ECE B208 48CF 86B8 CADB55E2FB64 WW...

Страница 26: ... the computer 2 Route the WWAN cables through the routing channel 3 Connect the WWAN cables to the connectors on the WWAN card 4 Replace the screw to secure the WWAN card to the computer 5 Install the a battery b base cover 6 Follow the procedure in After working inside your computer GUID B4BFAFB3 4A6A 47FD A777 9CA7EF95C20B Memory modules GUID 04A5C57B 73F9 4E1D 959B 3F158B0CD18F Removing memory ...

Страница 27: ... battery b base cover 3 Follow the procedure in After working inside your computer GUID D995663C CF3C 48E7 AFAE CA47CB6BAD67 Keyboard GUID 8216DEA8 E2D4 4327 8108 1AC3AA6A531B Removing keyboard trim 1 Follow the procedure in Before working inside your computer 2 Pry the keyboard trim from the edges 1 and lift it away from the computer 2 Removing and installing components 27 ...

Страница 28: ...it clicks in place 2 Follow the procedure in After working inside your computer GUID 78031CE9 7CBC 4807 B462 F7DC3D6B2B0B Removing keyboard 1 Follow the procedure in Before working inside your computer 2 Remove the a base cover b battery c keyboard trim 3 Lift the latch and disconnect the keyboard cable from the connector NOTE There may be different number of cables to disconnect based on the keyb...

Страница 29: ... the M2 2 screws that secure the keyboard to the computer 1 b Pry the keyboard from the edge and lift it away from the computer 2 WARNING Make sure you pull the keyboard cable routed under the computer to avoid any damage to the keyboard cable Removing and installing components 29 ...

Страница 30: ...er 2 Place the keyboard to align with the screw holders on the computer 3 Tighten the M2 2 screws to secure the keyboard to the computer 4 Connect the keyboard cable to the connector 5 Install the a keyboard trim b battery c base cover 6 Follow the procedure in After working inside your computer 30 Removing and installing components ...

Страница 31: ... heat sink NOTE This section is for the UMA model only a Remove the M2 3 screws that secure the heat sink on the system board 1 b Lift the heat sink away from the system board 2 GUID 9D15A387 9153 48DE 9314 9D99DC735322 Installing heat sink 1 NOTE This section is for UMA model only Place the heat sink on the system board 2 Tighten the M2 3 screws to secure the heat sink to the computer Removing an...

Страница 32: ...e system fan 1 Follow the procedure in Before working inside your computer 2 Remove the a base cover b battery c WWAN card optional d hard drive assembly optional e chassis frame 3 To remove the system fan NOTE This section is for UMA model only a Disconnect the system fan cable from the connector on the system board 1 b Lift the system fan away from the computer 2 32 Removing and installing compo...

Страница 33: ...ower connector port GUID FE9ABFCB 5A90 4033 9757 FFE9868A781B Removing power connector port 1 Follow the procedure in Before working inside your computer 2 Remove the a base cover b battery 3 To remove the power connector port a Remove the M2 3 screw that secures the display cable to the computer 1 b Disconnect the power connector port cable from the connector on the system board 2 c Remove the M2...

Страница 34: ... the power connector port 3 Tighten the M2 3 screw to secure the power connector port to the computer 4 Connect the power connector port cable to the connector on the system board 5 Tighten the M2 3 screw to secure the display cable to the computer 6 Install the a battery b base cover 7 Follow the procedure in After working inside your computer 34 Removing and installing components ...

Страница 35: ...ly optional f SSD card 3 To release the chassis frame a Release the WLAN and WWAN cables from the routing channels 1 b Lift the latch and disconnect the keyboard cable from the connector 2 NOTE There may be more than one cable to disconnect based on the keyboard type 4 To remove the chassis frame a Remove the M2 2 M2 3 and M2 5 screws that secure the chassis frame to the computer 1 b Lift the chas...

Страница 36: ...Connect the keyboard cable to the connector NOTE There may be more than one cable to connect based on keyboard types 4 Route the WLAN and WWAN optional cables through the routing channels 5 Install the a SSD card b WLAN card c WWAN card optional d hard drive assembly optional e battery f base cover 6 Follow the procedure in After working inside your system 36 Removing and installing components ...

Страница 37: ...our computer 2 Remove the a SIM card b base cover c battery d keyboard trim e keyboard f WLAN card g WWAN card optional h hard drive assembly optional i SSD card j memory module k coin cell battery l heatsink m system fan n chassis frame 3 Disconnect the following cables from the system board a Speaker 1 b LED board 2 c Touchpad 3 Removing and installing components 37 ...

Страница 38: ... the connectors on the system board 3 NOTE This step is applicable only for IR camera d Disconnect the power connector port cable from the connector on the system board 4 e Remove the M2 2 screws that secure the metal bracket 5 NOTE The metal bracket secures the DisplayPort over USB Type C f Lift the metal bracket away from the system board 6 38 Removing and installing components ...

Страница 39: ...5 To remove the system board a Remove the M2 2 screws that secure the system board to the computer 1 b Lift the system board away from the computer 2 Removing and installing components 39 ...

Страница 40: ... bracket on the DisplayPort over USB Type C 5 Connect the power connector port cable to the connector on the system board 6 Connect the display cables to the connectors on the system board 7 Place the metal bracket to secure the display cable 8 Tighten the M2 2 screw to secure the metal bracket 9 Connect the following cables a touchpad b USH board c LED board 10 Install the a chassis frame b syste...

Страница 41: ...623 BB16 9EDA7178E139 Removing smart card reader board 1 Follow the procedure in Before working inside your computer 2 Remove the a base cover b battery c WLAN card d WWAN card optional e hard drive assembly optional f SSD card g chassis frame 3 To remove the smart card reader board a Remove the screws that secure the smart card reader board to the palmrest 1 b Slide and remove the smart card read...

Страница 42: ...screws to secure the smart card reader board to the computer 3 Affix the smart card reader board cable and connect the cable to the connector 4 Install the a chassis frame b SSD card c WLAN card d WWAN card optional e hard drive assembly optional f battery g base cover 5 Follow the procedure in After working inside your computer 42 Removing and installing components ...

Страница 43: ...e a base cover b battery c keyboard trim d keyboard e WLAN card f WWAN card optional g hard drive assembly optional h SSD card i memory module j coin cell battery k system fan l heat sink m chassis frame n system board 3 To remove the speakers a Release the speaker cable through the routing channels 1 b Lift the speaker away from the computer 2 Removing and installing components 43 ...

Страница 44: ...5 89F16860B79E Display assembly GUID BF881CD2 4B31 4AE2 965C DD0651F45011 Removing display assembly 1 Follow the procedure in Before working inside your computer 2 Remove the a base cover b battery c WLAN card d WWAN card optional e hard drive assembly optional f display hinge cover 3 To disconnect the display cable a Release the WLAN and WWAN cables from the routing channels 1 b Remove the M2 5 s...

Страница 45: ... display assembly a Remove the M2 5 screws that secure the display assembly to the computer 1 b Release the WLAN cable WWAN cable and display cable through the routing channels 2 3 Removing and installing components 45 ...

Страница 46: ...5 Turn over the computer 6 To remove the display assembly a Remove the screws that secure the display assembly to the computer 1 b Open the display 2 46 Removing and installing components ...

Страница 47: ...c Lift the display assembly from the computer Removing and installing components 47 ...

Страница 48: ...omputer 4 Connect the display cable to the connector on the system board 5 Place the metal bracket to secure the display cable 6 Tighten the M2 5 screws to secure the display cable 7 Route the WLAN and WWAN cables through the routing channels 8 Install the a display hinge cover b hard drive assembly optional c WLAN card d WWAN card optional e battery f base cover 9 Follow the procedure in After wo...

Страница 49: ...remove the display bezel a Pry the display bezel at the base of the display 1 b Lift the display bezel to release it 2 c Pry the edges on the side of the display to release the display bezel 3 4 CAUTION The adhesive used on the LCD bezel to seal it with the LCD itself makes it hard to remove the bezel as the adhesive is very strong and tends to stay stuck to the LCD portion and can peel the layers...

Страница 50: ...WAN card optional d WLAN card e battery f base cover 4 Follow the procedure in After working inside your computer GUID 83582729 F7EB 4745 858B 73C01746EBDD Display hinge cover GUID 9CFFFF9B DA11 4D83 8080 252919861FC5 Removing display hinge cover 1 Follow the procedure in Before working inside your computer 2 Remove the a base cover b battery 3 To remove the display hinge cover a Remove the screw ...

Страница 51: ...eat step 1 and step 2 to install the other display hinge cover 4 Install the a battery b base cover 5 Follow the procedure in After working inside your computer GUID D0DF1B3A 887B 49C0 A3C3 0FAC4F2797F4 Display hinges GUID 71C455F5 B437 4014 BAFF 174001F6E7B7 Removing display hinge 1 Follow the procedure in Before working inside your computer 2 Remove the a base cover Removing and installing compo...

Страница 52: ...ly 2 c Repeat step a and step b to remove the other display hinge GUID 8E464428 D9B3 4CE7 A24A B67CADBFCD74 Installing display hinge 1 Place the display hinge on the display assembly 2 Tighten the M2 5 3 screws to secure the display hinge to the display assembly 3 Repeat step 1 and step 2 to install the other display hinge 4 Install the a display bezel b display assembly c WLAN card d WWAN card op...

Страница 53: ...tery c WWAN card optional d WLAN card e display hinge cover f display assembly g display bezel 3 Remove the M2 3 screws that secure the display panel to the display assembly 1 and lift to turn over the display panel to access the eDP cable 2 4 To remove the display panel a Peel the adhesive tape 1 b Lift the blue tape that secures the eDP cable 2 c Lift the latch and disconnect the eDP cable from ...

Страница 54: ...Replace the display panel to align with the screw holders on the display assembly 4 Tighten the M2 3 screws to secure the display panel to the display assembly 5 Install the a display bezel b display assembly c WWAN card optional d WLAN card e display hinge cover f battery g base cover 6 Follow the procedure in After working inside your computer 54 Removing and installing components ...

Страница 55: ...Before working inside your computer 2 Remove the a base cover b battery c WLAN card d WWAN card optional e display hinge cover f display assembly g display bezel h hinge cover i display panel 3 Disconnect the eDP cable from the camera 4 Peel the eDP cable from the adhesive to remove it from the display Removing and installing components 55 ...

Страница 56: ...ase cover 3 Follow the procedure in After working inside your computer GUID 9CEB68C0 F0D6 4234 A078 9075DAAA0CA7 Display back cover assembly GUID 7D3D40A1 26A7 4C27 9FF1 93B9BBF3E51B Removing the display back cover assembly 1 Follow the procedure in Before working inside your computer 2 Remove the a base cover b battery c WLAN d WWAN card optional e display hinge cover f display assembly g display...

Страница 57: ...lay bezel e display assembly f display hinge cover g WWAN card optional h WLAN i battery j base cover 3 Follow the procedure in After working inside your computer GUID B2F0CB60 3ABC 4810 802B 5FAA7A1515DC Camera GUID BD74F948 F429 44C5 9E48 8A71BF132A15 Removing camera 1 Follow the procedure in Before working inside your computer 2 Remove the a base cover b battery c WWAN card optional d WLAN card...

Страница 58: ... computer GUID 27E5B5B8 7D94 445F 897F 27BC6DEE5195 Installing camera 1 Insert the camera into the slot on the display assembly 2 Connect the camera cable to the connector 3 Install the a display panel b display bezel c display assembly d display hinge cover e WWAN card optional f WLAN card g battery h base cover 4 Follow the procedure in After working inside your computer 58 Removing and installi...

Страница 59: ...computer 2 Remove the a base cover b battery c display hinge cover d WLAN card e WWAN card optional f hard drive assembly optional g SSD card h memory module i coin cell battery j system fan k heat sink l display assembly m chassis frame n system board 3 The palm rest is the remaining component after removing all the components Removing and installing components 59 ...

Страница 60: ...oard b chassis frame c system fan d heat sink e display assembly f hard drive assembly optional g coin cell battery h memory module i SSD card j WWAN card optional k WLAN card l hard drive assembly optional m battery n base cover 3 Follow the procedure in After working inside your computer 60 Removing and installing components ...

Страница 61: ...ore Intel Core i5 7300U 3M Cache up to 3 5 GHz vPro Dual Core Intel Core i7 7600U 4M Cache up to 3 9 GHz vPro Dual Core Intel Core i5 7300HQ 6M Cache up to 3 5GHz Quad Core 35W CTDP Intel Core i5 7440HQ 6M Cache up to 3 8GHz Quad Core 35W CTDP Intel Core i7 7820HQ 8M Cache up to 3 9GHz Quad Core 35W CTDP Intel Core i5 6200U 3M cache up to 2 3GHz Dual Core Intel Core i5 6300U 3M cache up to 2 4GHz ...

Страница 62: ...nm Manufacturing Process Technology Intel Turbo Boost Technology Intel Hyper Threading Technology Intel Built in Visuals Intel HD graphics exceptional videos editing smallest details in the videos Intel Quick Sync Video excellent video conferencing capability quick video editing and authoring Intel Clear Video HD visual quality and color fidelity enhancements for HD playback and immersing web brow...

Страница 63: ... 630 Intel Core i7 7820HQ 8M Cache up to 3 9GHz Quad Core 35W CTDP 2 9 GHz 8 MB 4 4 35 W DDR4 2133 DDR4 2400 Intel HD Graphics 630 GUID EFCD968F DB30 401A 8F24 2220283059BC Identifying processors in Windows 10 1 Tap Search the Web and Windows 2 Type Device Manager 3 Tap Processor The processor information is displayed GUID E32431F6 39F9 4D1F A700 FEF62874C357 Verifying the processor usage in Task ...

Страница 64: ...ws Task Manager window The processor performance details are displayed 4 Click Open Resource Monitor GUID BE0D416D CDF7 42FE 8A13 4AA7ABBFAA5D Chipsets All laptops or notebook communicate with the CPU through the chipset This laptop is shipped with the Intel Mobile CM238 GUID 124C5790 2CB1 4F17 88F0 0EDC2450A914 Intel chipset drivers Verify if the Intel chipset drivers are already installed in the...

Страница 65: ...lect the operating system installed on your laptop 6 Scroll down the page expand Chipset and select your chipset driver 7 Click Download File to download the latest version of the chipset driver for your laptop 8 After the download is complete navigate to the folder where you saved the driver file 9 Double click the chipset driver file icon and follow the instructions on the screen GUID 06B68D39 9...

Страница 66: ...X 64 Bit NVIDIA GeForce 940MX 64 Bit GUID C92029B1 5DE9 46B0 A5CB B175AD80A70E Intel HD Graphics drivers Verify if the Intel HD Graphics drivers are already installed in the laptop Table 5 Intel HD Graphics drivers Before installation After installation GUID 6E8E3CB8 E173 461A 975F 90DF0C9EE742 Downloading drivers 1 Turn on the tablet 2 Go to Dell com support 66 Technology and components ...

Страница 67: ...473 3CFE 4353 8B03 7423E563377E Display options This laptop has the following display options 14 0 inch HD Anti glare 366 x 768 14 0 inch FHD Anti glare 1920 x 1080 14 0 inch FHD Touch 1920 x 1080 GUID 6D580E34 A5F4 440D AE6C 21A62D1735D4 Identifying the display adapter 1 Right Click the Start menu 2 Select Device Manager 3 Expand Display adapters The display adapters are displayed GUID 3E881A35 C...

Страница 68: ...ight arrow key Rotate 90 degrees Down arrow key Rotate 180 degrees Left arrow key Rotate 270 degrees GUID CC593559 34AE 4428 87C1 FE37520CEFB4 Adjusting brightness in Windows 10 To enable or disable automatic screen brightness adjustment 1 Swipe in from the right edge of the display to access the Action Center 2 Tap or click All Settings System Display 3 Use the Adjust my screen brightness automat...

Страница 69: ...ns that are hard to remove repeat this procedure till the display is clean GUID B5F217A0 6DB8 4062 9E92 5CB632B0CEDA Using touch screen in Windows 10 Follow these steps to enable or disable the touch screen 1 Right click on the Start menu 2 Select Control Panel 3 Tap Pen and Input Devices in the Control Panel 4 Tap the Touch tab 5 Select Use your finger as an input device to enable the touch scree...

Страница 70: ...ver 8 Click Download File to download the latest version of the audio driver for your laptop 9 After the download is complete navigate to the folder where you saved the audio driver file 10 Double click the audio driver file icon and follow the instructions on the screen GUID B1CB8E86 CF54 4B95 B2ED 138672CBF3FE Identifying the audio controller in Windows 10 1 Swipe from the right edge to access t...

Страница 71: ...Expert Key Management Allows you to manipulate the security key databases only if the system is in Custom Mode The Enable Custom Mode option is disabled by default The options are PK KEK db dbx If you enable the Custom Mode the relevant options for PK KEK db and dbx appear The options are Save to File Saves the key to a user selected file Replace from File Replaces the current key with a key from ...

Страница 72: ... 1 Turn on or restart your system 2 When the Dell logo appears perform the following action to enter the BIOS setup program With keyboard Tap F2 until the Entering BIOS setup message appears To enter the Boot selection menu tap F12 The hard drive is listed under the System Information under the General group GUID DA1C05F6 9DF5 434A B510 A13DD61EB45A Camera features This laptop is shipped with fron...

Страница 73: ... 8 1 and 10 To start the camera open an application that uses the camera For instance if you tap the Skype software that is shipped with the laptop the camera turns on Similarly if you are chatting on the internet and the application requests to access the webcam the webcam turns on GUID 23DAFF4B 30FA 4A9B B980 5D9BE8F25640 Starting the camera application 1 Tap or click the Windows button and sele...

Страница 74: ...ry features This laptop supports a minimum memory of 4 GB and a maximum of 32 GB DDR4 memory up to 2133 MHz dual core 4 GB and a maximum of 32 GB DDR4 memory up to 2400 MHz quad core NOTE The memory module in the Dual Core processor will have 2400 MHz printed but it performs at 2133 MHz 74 Technology and components ...

Страница 75: ...reBoot System Assessment PSA starts on your computer NOTE If you wait too long and the operating system logo appears continue to wait until you see the login screen desktop screen Turn off the computer and try again If the memory test results in 25 or less errors then the RMT basic feature automatically fixes the issues The test will indicate a pass result since the defect s have been removed If t...

Страница 76: ...t port that does it all delivering the fastest most versatile connection to any dock display or data device like an external hard drive Thunderbolt 3 uses a USB Type C connector port to connect to supported peripherals 1 Thunderbolt 3 uses USB Type C connector and cables It is compact and reversible 2 Thunderbolt 3 supports speed up to 40 Gbps 3 DisplayPort 1 2 compatible with existing DisplayPort...

Страница 77: ...GUID 677ECE1A ABEF 4DC0 BF9A 21403EF163F3 Thunderbolt Icons Figure 7 Thunderbolt Iconography Variations Technology and components 77 ...

Страница 78: ...ce screen options System Log screen options Updating the BIOS in Windows Updating your system BIOS using a USB flash drive System and setup password GUID 39EA0288 9174 49B6 ABA2 37C542A11FC5 Boot Sequence Boot Sequence allows you to bypass the System Setup defined boot device order and boot directly to a specific device for example optical drive or hard drive During the Power on Self Test POST whe...

Страница 79: ... the system GUID DB925BAE A35B 445D A065 7FDEFA32EA1F System Setup overview System Setup allows you to Change the system configuration information after you add change or remove any hardware in your computer Set or change a user selectable option such as the user password Read the current amount of memory or set the type of hard drive installed Before you use System Setup it is recommended that yo...

Страница 80: ...ig Device Cellular Device Bluetooth Device Battery Information Displays the battery status and the type of AC adapter connected to the computer Boot Sequence Allows you to change the order in which the computer attempts to find an operating system Diskette Drive Internal HDD USB Storage Device CD DVD CD RW Drive Onboard NIC Advanced Boot Options This option allows you the legacy option ROMs to loa...

Страница 81: ...ed by default Enable SMART Reporting USB Configuration This is an optional feature This field configures the integrated USB controller If Boot Support is enabled the system is allowed to boot any type of USB Mass Storage Devices HDD memory key floppy If USB port is enabled device attached to this port is enabled and available for OS If USB port is disabled the OS cannot see any device attached to ...

Страница 82: ...s option is enabled by default Enable Hard Drive Free Fall Protection This option is enabled by default Enable Secure Digital SD Card This option is enabled by default Secure Digital SD Card Boot Secure Digital SD Card Read only Mode GUID 8532F736 D37C 4D26 B691 BFF3A777C57E Video screen options Option Description LCD Brightness Allows you to set the display brightness depending up on the power so...

Страница 83: ...en the admin password is set Default setting Allow Non Admin Password Changes is selected Non Admin Setup Changes Allows you to determine whether changes to the setup options are allowed when an Administrator Password is set If disabled the setup options are locked by the admin password UEFI Capsule Firmware Updates Allows yout to control whether this system allows BIOS updates via UEFI capsule up...

Страница 84: ...is set Default Setting Disabled Master Password Lockout Allows you to disable master password support Hard disk password need to be cleared before the setting can be changed Enable Master Password Lockout Default setting Disabled GUID CD8CD048 8FEA 42BB 96C5 B726E1850AF9 Secure Boot screen options Option Description Secure Boot Enable This option enables or disables the Secure Boot feature Disable...

Страница 85: ...nning code storing sensitive information in the context of the main OS The options are Disabled Enabled Default setting Disabled Enclave Memory Size This option sets SGX Enclave Reserve Memory Size The option are 32 MB 64 MB 128 MB GUID 79E2E444 E969 4ED4 ADE8 B7F1242768FF Performance screen options Option Description Multi Core Support This field specifies whether the process has one or all cores...

Страница 86: ...s Select Days Default setting Disabled USB Wake Support Allows you to enable USB devices to wake the system from Standby NOTE This feature is only functional when the AC power adapter is connected If the AC power adapter is removed during Standby the system setup removes power from all the USB ports to conserve battery power Enable USB Wake Support Wake on Dell USB C Dock This option is enabled by...

Страница 87: ...e using Dell s fast charging technology This option is enabled by default Primarily AC use Custom If Custom Charge is selected you can also configure Custom Charge Start and Custom Charge Stop NOTE All charging mode may not be available for all the batteries To enable this option disable the Advanced Battery Charge Configuration option Sleep Mode This option is used to select which sleep mode will...

Страница 88: ... toggle dynamically the primary behavior of these keys The available options are Fn Lock This option is selected by default Lock Mode Disable Standard Lock Mode Enable Secondary Fastboot Allows you to speed up the boot process by bypassing some of the compatibility steps The options are Minimal Thorough default Auto Extended BIOS POST Time Allows you to create an additional preboot delay The optio...

Страница 89: ... must be enabled to use this feature Trusted Execution disabled by default GUID 0C995EDA 773D 4D93 937F FB55EAC18542 Wireless screen options Option Description Wireless Switch Allows to set the wireless devices that can be controlled by the wireless switch The options are WWAN GPS on WWAN Module WLAN WiGig Bluetooth All the options are enabled by default NOTE For WLAN and WiGig enable or disable c...

Страница 90: ...iew and clear the System Setup Power events GUID 39A4D20E 3382 4BBB 8017 A2044689C2C8 Updating the BIOS in Windows It is recommended to update your BIOS System Setup when you replace the system board or if an update is available For laptops ensure that your computer battery is fully charged and connected to a power outlet NOTE If BitLocker is enabled it must be suspended prior to updating the syst...

Страница 91: ...rive NOTE You will need to use a bootable USB Flash drive Please refer to the following article for further details http www dell com support article us en 19 SLN143196 how to create a bootable usb flash drive using dell diagnostic deployment package dddp lang EN 1 Download the BIOS update EXE file to another system 2 Copy the file e g O9010A12 EXE onto the bootable USB Flash drive 3 Insert the US...

Страница 92: ...space 3 Type the system password that you entered earlier in the Confirm new password field and click OK 4 Press Esc and a message prompts you to save the changes 5 Press Y to save the changes The computer reboots GUID 3D32F643 EE78 4538 9D89 34BDFB68E9F1 Deleting or changing an existing system and or setup password Ensure that the Password Status is Unlocked in the System Setup before attempting ...

Страница 93: ...tions Processor specifications Memory specifications Storage specifications Audio specifications Video specifications Camera specifications Communication specifications Port and connector specifications Contactless smart card specifications Display specifications Keyboard specifications Touchpad specifications Battery specifications AC Adapter specifications Physical specifications Environmental s...

Страница 94: ...Quad core 6 MB i7 series Dual core 4 MB Quad core vPro 8 MB GUID 780D9161 14E1 4D9F 8F24 26F7B478F080 Memory specifications Feature Specification Memory connector Two SODIMM slots Memory capacity per slot 4 GB 8 GB and 16 GB Memory type DDR4 Speed 2133 MHz 2400 MHz NOTE The memory module in the Dual Core processor will have 2400 MHz printed but it performs at 2133 MHz Minimum memory 4 GB Maximum m...

Страница 95: ...r amplifier 2 W RMS per channel Volume controls Hot keys GUID BAF5BA9E 8355 4F20 9792 CCEC9149DF46 Video specifications Feature Specification Type Integrated on system board hardware accelerated UMA controller Intel HD Graphics 620 Intel HD Graphics 630 Graphics Nvidia graphics optional Data bus Integrated video External display support 19 pin HDMI connector 15 pin VGA connector GUID 7CDF8DF1 7E6A...

Страница 96: ...5EEF2 0CC5 48BD 913A 3E36AE798605 Port and connector specifications Feature Specification Audio Stereo headset mic combo Video One 19 pin HDMI connector 15 pin VGA connector Network adapter One RJ 45 connector USB Three USB 3 1 Gen 1 ports One USB 3 1 Gen 1 with PowerShare Memory SD card reader SD 4 0 SmartCard reader Optional Micro SIM uSIM card One external optional DisplayPort over USB Type C D...

Страница 97: ...m 14 inches Active area X Y HD Anit glare Maximum resolution 1366 x 768 Maximum brightness 200 nits Refresh rate 60 Hz Maximum viewing angles horizontal 40 degrees Maximum viewing angles vertical 10 30 degrees Pixel pitch 0 226 mm 0 009 inches FHD Anti glare Maximum resolution 1920 x 1080 Maximum brightness 220 nits Refresh rate 60 Hz Maximum viewing angles horizontal 80 degrees Maximum viewing an...

Страница 98: ...es 82 keys United Kingdom 83 keys Japan 86 keys Brazil 84 keys GUID 91423DC9 F531 43D6 A7EE 200F1335E7EF Touchpad specifications Feature Specification Active Area X axis 99 50 mm Y axis 53 00 mm GUID B7F779AA 7F1A 48A1 BA06 A98D13BEEAB3 Battery specifications Feature Specification Type 42 WHr 51 WHr 68 WHr Depth 42 WHr 181 mm 7 126 inches 51 WHr 181 mm 7 126 inches 68 WHr 233 mm 9 17 inches Height...

Страница 99: ...to 50 C Discharge 0 C to 70 C Operating 0 C to 35 C 32 F to 95 F Non operating 20 C to 65 C 4 F to 149 F Coin cell battery 3 V CR2032 lithium coin cell NOTE If system has a 4 cell 68Whr battery it will not have a HDD and must have a SSD GUID A5BFD1A1 DF19 4BD1 BC46 F1CBDC12189F AC Adapter specifications Feature Specification Type 65 W and 90 W Input voltage 100 V AC to 240 V AC Input current maxim...

Страница 100: ...s Depth 228 9 mm 9 0 inches Starting weight 3 52 lb 1 60 Kg GUID 235A25EF 9CC0 4E3F 8DED 0EE421BFCA5D Environmental specifications Temperature Specifications Operating 0 C to 35 C 32 F to 95 F Storage 40 C to 65 C 40 F to 149 F Relative humidity maximum Specifications Operating 10 to 90 non condensing Storage 5 to 95 non condensing Altitude maximum Specifications Operating 0 m to 3048 m 0 ft to 10...

Страница 101: ... thorough tests to introduce additional test options to provide extra information about the failed device s View status messages that inform you if tests are completed successfully View error messages that inform you of problems encountered during testing CAUTION Use the system diagnostics to test only your computer Using this program with other computers may cause invalid results or error message...

Страница 102: ...dicator Turns on steadily or blinks to indicate battery charge status The device status LEDs are usually located either on the top or left side of the keyboard They display the storage battery and wireless devices connectivity and activity Apart from that they can be useful as a diagnostic tool when there s a possible failure to the system NOTE The position of the power status light may vary depen...

Страница 103: ...ill pause for 3 seconds before the next cycle repeat itself again GUID B7187258 116A 4CF7 8B00 704729AA7883 Battery status lights If the computer is connected to an electrical outlet the battery light operates as follows Alternately blinking amber light and white light An unauthenticated or unsupported non Dell AC adapter is attached to your laptop Alternately blinking amber light with steady whit...

Страница 104: ...evice press Esc and click Yes to stop the diagnostic test 7 Select the device from the left pane and click Run Tests 8 If there are any issues error codes are displayed Note the error code and validation number and contact Dell GUID 8D55A66D C835 4685 B13C A5E9659C765D Real Time Clock RTC reset The Real Time Clock RTC reset function allows you or the service technician to recover the recently laun...

Страница 105: ... Password System Password HDD Password Key Databases System Logs The following items may or may not reset based on your custom BIOS setting selections The Boot List Enable Legacy OROMs Secure Boot Enable Allow BIOS Downgrade Troubleshooting 105 ...

Страница 106: ...one based support and service options Availability varies by country and product and some services may not be available in your area To contact Dell for sales technical support or customer service issues 1 Go to Dell com support 2 Select your support category 3 Verify your country or region in the Choose a Country Region drop down list at the bottom of the page 4 Select the appropriate service or ...

Отзывы: