background image

www.dell.com

®

Dell

®

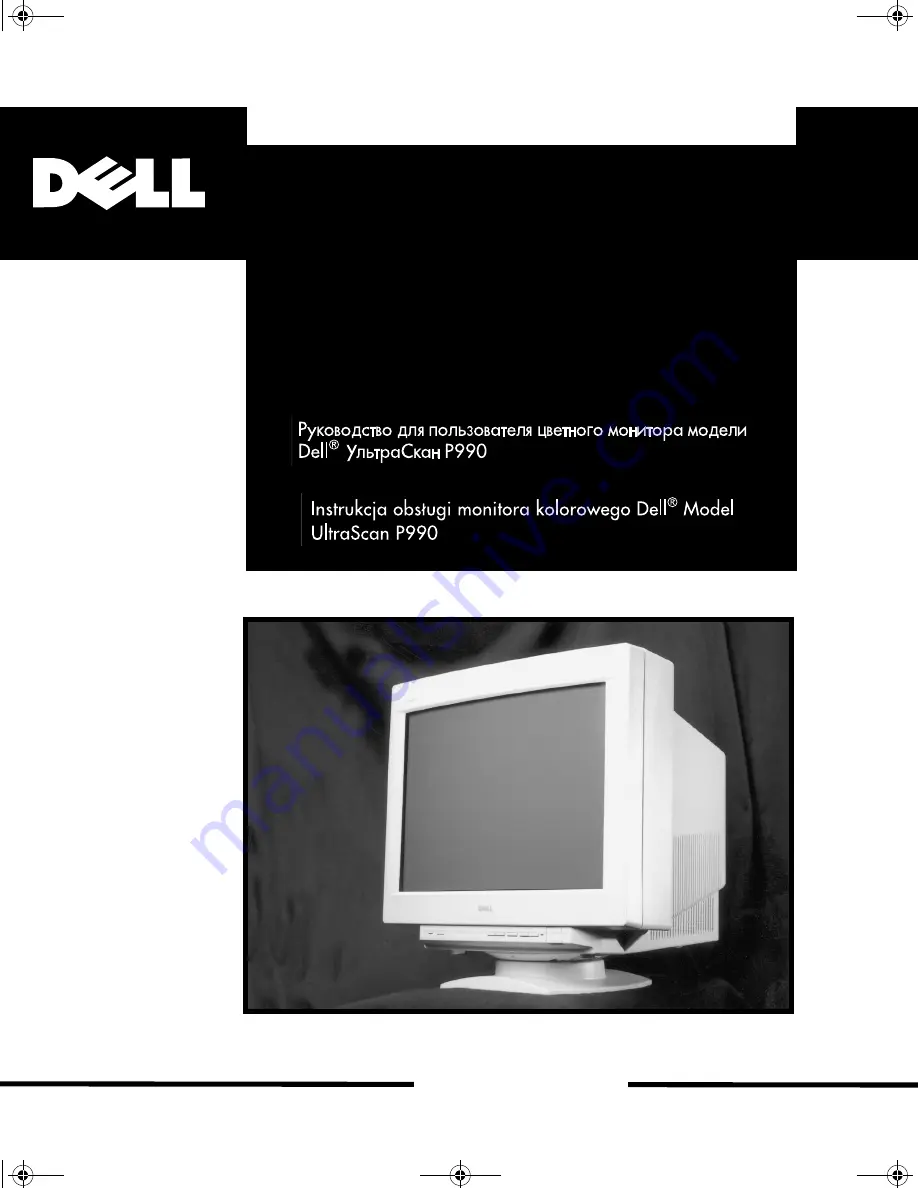
 Model UltraScan P990 Color Monitor User’s Guide

Guide de l’utilisateur du moniteur couleur Dell

®

 UltraScan P990

Dell

®

 Modell UltraScan P990 Farbmonitor - Benutzerhandbuch

Monitor en color Dell

®

 modelo UltraScan P990; Guía del usuario

DELL P990(E).book  Page 1  Friday, December 4, 1998  2:36 PM

Содержание UltraScan P990

Страница 1: ...tor User s Guide Guide de l utilisateur du moniteur couleur Dell UltraScan P990 Dell Modell UltraScan P990 Farbmonitor Benutzerhandbuch Monitor en color Dell modelo UltraScan P990 Guía del usuario DELL P990 E book Page 1 Friday December 4 1998 2 36 PM ...

Страница 2: ...DELL P990 E book Page 2 Friday December 4 1998 2 36 PM ...

Страница 3: ...trademark of Video Electronics Standards Association IBM is a registered trademark of International Business Machines Corporation The ENERGY STAR name and logo are registered trademarks of the U S Environmental Protection Agency EPA As an ENERGY STAR Partner Dell Computer Corporation has determined that this product meets the ENERGY STAR guidelines for energy efficiency Other trademarks and trade ...

Страница 4: ...DELL P990 E book Page 4 Friday December 4 1998 2 36 PM ...

Страница 5: ... A 1 Français Table des matières 2 V Corps principal 2 1 Appendice A 1 Deutsch Inhalt 3 V Hauptteil 3 1 Anhang A 1 Español Contenido 4 V Texto principal 4 1 Apendice A 1 5 V 5 1 A 1 6 V 6 1 A 1 DELL P990 E book Page v Friday December 4 1998 2 36 PM ...

Страница 6: ...vi DELL P990 E book Page vi Friday December 4 1998 2 36 PM ...

Страница 7: ...Introducing the On Screen Display OSD system 1 6 Navigating the menu 1 6 COLOR RETURN Restoring the Color Image 1 10 MOIRE ADJUST Adjusting the moire 1 10 Graphic Enhancement Mode GEM 1 12 Monitor Information 1 12 Resetting the adjustments 1 13 Resetting a single adjustment item 1 13 Resetting all of the adjustment data for the current input signal 1 13 Resetting all of the adjustment data for all...

Страница 8: ...ear 2000 Statement of Compliance for Dell Branded Hardware Products 1 29 Appendix A 1 Regulatory Notices A 1 Tables Table 3 1 Geometry Adjustments 1 7 Table 3 2 Convergence Adjustment 1 9 Table 3 3 Option Adjustment 1 9 Tabel 3 4 Display Power Management System DPMS 1 14 Table 3 5 Preset Timing Modes 1 14 Tabel 3 6 Troubleshooting Problems 1 16 Table 3 7 Specifications 1 20 Table A 1 Green Away Co...

Страница 9: ...i reflective coating to enhance the ergo nomic characteristics of the monitor Clean the screen surface lightly with a soft cloth If necessary use water with a soft cloth to remove hand oils fingerprints etc Do not use any type of abrasive pad scouring powder or solvents such as alcohol benzene or ammonia as they might damage the anti reflective coating Plug and Play This monitor complies with the ...

Страница 10: ...arning on Power Connection Use an appropriate power cord for your local power supply For customers in the U S A If you do not use an appropriate power cord the monitor will not conform to man datory FCC standards Before disconnecting the power cord wait for at least 30 seconds after turning off the power to allow the static electricity on the CRT display surface to discharge After the power has be...

Страница 11: ...the power cord to a power outlet 3 Switch on the monitor and computer 4 Adjust the user controls according to your personal preference Installation is complete NOTE If you have any problems with your Dell Monitor refer to the Troubleshooting section on pages 1 15 to 1 19 Computer to the video output connector on the computer Video Signal cable Both are a Blue color to an AC power outlet Power cord...

Страница 12: ...adjusting other items 4 MENU button page 1 6 Displays the MENU OSD 5 6 CONTRAST buttons page 1 5 Adjust the contrast Operate as the buttons when adjusting other items 6 1 POWER switch and indicator page 1 14 Turns the monitor on and off The indicator lights up green when the monitor is on and lights up orange when the monitor is in Power Saving mode 7 AC IN connector Provides AC power to the monit...

Страница 13: ...izontally hold it at the bottom with both hands Adjusting the Brightness and Contrast 1 Press the BRIGHTNESS m M or 6 CONTRAST buttons The BRIGHTNESS CONTRAST OSD appears 2 To adjust the brightness contrast Press the BRIGHTNESS m M 6 CONTRAST buttons 90 15 5 90 BRIGHTNESS CONTRAST 26 26 DELL P990 E book Page 5 Friday December 4 1998 2 36 PM ...

Страница 14: ...raphic user interface software that provides a full screen picture It may not work properly if the background color is dark or if the input picture does not fill the screen to the edges such as an MS DOS prompt Introducing the On Screen Display OSD system Navigating the menu Press the MENU button to display the main MENU on your screen OK MENU MENU EXIT CENTER SIZE GEOMETRY ZOOM COLOR CONVERGENCE ...

Страница 15: ...to adjust the picture s rotation and shape Table 3 1 Geometry Adjustments Select To ROTATION Rotate the picture PINCUSHION Expand or contract the picture sides PIN BALANCE Shift the picture sides to the left or right KEYSTONE Adjust the picture width at the top and bottom of the screen KEY BALANCE Shift the picture to the left or right at the top and bottom of the screen CENTER 26 73 SIZE 26 73 RO...

Страница 16: ...elp with monitor and printer color matching You can also fine tune the color temperature from 9 300K to 5 000K by selecting VARIABLE and using the 6 buttons to adjust the color tem perature manually When using one of the GEM modes you can fine tune the color temperature from 11 000K to 9 300K ZOOM ZOOM COLOR 1 2 9300K VARIABLE COLOR 1 2 VARIABLE COLOR DELL P990 E book Page 8 Friday December 4 1998...

Страница 17: ...t the OSD POSITION menu to move the OSD position OPTION Select the OPTION menu to adjust the monitor s options The options include Table 3 3 Option Adjustments Select To MANUAL DEGAUSS Degaussing demagnetizihog the screen CONTROL LOCK Locking the controls LANGUAGE Changing the OSD language COLOR RETURN Restoring the color image Image Restoration See COLOR RETURN section for details CANCEL MOIRE Ad...

Страница 18: ... the m M buttons to select COLOR RETURN Then press the right 6 button A white rectangle appears in the center of the screen while the image is being restored about two seconds NOTE Before using this feature the monitor must be in normal operation mode Green power indicator for at least 30 minutes If the monitor goes into power saving mode you must return the monitor to normal operation mode and wa...

Страница 19: ...rn on the Moire Adjustment To adjust the amount of moire cancellation first press the m M buttons to highlight MOIRE ADJUST Then press the 6 buttons to adjust the amount of moire cancellation until the moire effect is at a minimum OFF ON CANCEL MOIRE OPTION MOIRE ADJUST OPTION 26 DELL P990 E book Page 11 Friday December 4 1998 2 36 PM ...

Страница 20: ... increasing the sharpness and brightness NOTE The PRESENTATION MODE and GRAPHICS VIDEO MODE may produce ghost images when displaying text oriented applications These modes change the brightness of the picture dynamically according to changes in moving pictures If ghost images appear set the GEM to STANDARD MODE The PRESENTATION MODE and GRAPHICS VIDEO MODE change the color temperature adjustment r...

Страница 21: ...he current input signal Press the RESET button when no menu is displayed on the screen Note that the following items are not reset by this method on screen menu language page 1 9 on screen menu position page 1 9 control lock page 1 9 Resetting all of the adjustment data for all input signals Press and hold the reset button for more than two seconds when no menu is displayed on the screen This rese...

Страница 22: ...ternate 3 active off 4 0 7 9 W orange 4 power off 0 01 0 5 W off 5 failure mode orange flashing Note 0 watt power consumption can only be achieved when the system and the monitor are completely disconnected from the mains Table 3 5 Preset Timing Modes No Resolution dots lines Horizontal Frequency Vertical Frequency Graphics Mode 1 720 400 31 5 kHz 70 Hz VGA Text 2 640 480 31 5 kHz 60 Hz VGA Graphi...

Страница 23: ...initron picture tube unique by allowing more light to reach the screen resulting in a brighter more detailed picture On screen messages If there is something wrong with the input signal one of the following messages will appear on the screen To solve the problem see Troubleshooting on pages 1 16 to 1 19 1 OUT OF SCAN RANGE indicates that the input signal is not supported by the monitor s specifica...

Страница 24: ...d Make sure the 1 POWER switch is in the ON position If the CHECK SIG NAL CABLE mes sage appears on the screen or if the 1 indicator is either orange or alternating between green and orange Make sure the video signal cable is properly connected and all plugs are firmly seated in their sockets Make sure none of the HD15 video input connector pins are bent or pushed in Make sure the video board is c...

Страница 25: ...the metal frame of the CRT to obtain a neutral field for uniform color repro duction If a second degauss cycle is needed allow a minimum interval of 20 minutes for the best result You cannot adjust the monitor with the buttons on the front panel If the Control Lock function is set to ON set it to OFF using the OPTION OSD page 1 9 Screen image is not centered or sized properly Adjust the size page ...

Страница 26: ...es for this symptom are electric fans fluorescent lighting and laser printers If you have another monitor close to this monitor increase the distance between them to reduce the interference Try plugging the monitor into a different AC outlet pref erably on a different circuit Try using the monitor with a different computer in a dif ferent room Picture is flickering Refer to your computer system s ...

Страница 27: ...m is heard right after the power is turned on When the power is turned on the auto degauss cycle is activated While the auto degauss cycle is activated a hum may be heard The same hum is heard when the monitor is manually degaussed This is not a malfunction White does not look white Adjust the color temperature using the COLOR OSD page 1 8 Table 3 6 Troubleshooting Problems continued Symptom Check...

Страница 28: ...eo Analog RGB 75 Ω typical 0 7 Vp p Positive Sync External HD VD Composite Polarity Free TTL Video Composite Sync on green 0 3 Vp p Negative Deflection frequency Horizontal 30 to 96 kHz Vertical 48 to 120 Hz AC input voltage current 100 to 120 V 50 60 Hz 1 7 A 220 to 240 V 50 60 Hz 1 2 A Inrush current 120 VAC 50 A 240 VAC 80 A Power consumption Maximum 125 W 426 BTU h Nominal 105 W 358 BTU h Dime...

Страница 29: ...risk of loss or damage during shipment Dell will ship the repaired or replacement products to you freight prepaid if you use an address in the United States excluding Puerto Rico and U S possessions Shipments to other loca tions will be made freight collect Dell owns all parts removed from repaired products Dell uses new and reconditioned parts made by various manufacturers in performing warranty ...

Страница 30: ...cts back to Dell in their original packaging or equivalent prepay shipping charges and you must insure the shipment or accept the risk of loss or damage during shipment Dell will ship the repaired or replacement products to you freight prepaid if you use an address in Canada Shipments to other locations will be made freight collect Dell owns all parts removed from repaired products Dell uses new a...

Страница 31: ...eland DELL warrants to the end user in accordance with the following provisions that its branded hardware products pur chased by the end user from a DELL company or an authorized DELL distributor in the European Union Norway or Switzerland will be free from defects in materials workman ship and design affecting normal use for a period of one year as of the original purchase date Products for which...

Страница 32: ...uarantee will be the end user s sole and exclusive remedy against DELL or any of its affiliates and neither DELL nor any of its affiliates shall be liable for loss of profit or contracts or any other indi rect or consequential loss arising from negligence breach of contract or howsoever This Guarantee does not impair or affect mandatory statutory rights of the end user against and or any rights re...

Страница 33: ...tion of future legislation Dell has instituted a disposal program called Green Away for the collec tion and disposal of these products Dell s Green Away Program Dell s Green Away program is a free material return and disposal service for Dell custom ers covering computer products sold by Dell under the Blue Angel plan The returned products are reused recycled or disposed of as appropriate in accor...

Страница 34: ...oards and cases are sent to refiners Plastic parts are sent to plastic recyclers Unusable packaging is sent to paper recyclers CRT s are sent to recycling companies to be disposed as follows The tubes are washed and the luminescent powder is recovered some elements are extracted for reuse and the remainder is disposed of via controlled incineration Glass is sorted and sent to the lead smelter or r...

Страница 35: ...een Away Collection Points Country Telephone Address model Belgium 02 481 91 00 R Frazier Ltd Plantijnweg 15 4104 BC Culemborg Netherlands Denmark 46 8 5900 5151 WMI Sellbergs AB Box 1294 S 171 25 Solna Sweden Finland 46 8 5900 5181 WMI Sellbergs AB Box 1294 S 171 25 Solna Sweden Northern Germany 0130 86 12 51 Bockmann Ohlig Tersteegenstrasse 21a 42653 Solingen Southern Germany 0130 86 12 51 Knab ...

Страница 36: ...n ties conditions and remedies express or implied relating to year 2000 readiness or compliance are disclaimed To make a claim under this warranty for NSTL logo hardware customers must contact Dell prior to January 1 2001 Despite a system s ability to pass the YMARK2000 test actual rollover results in specific operating environments may vary depending on other factors including but not limited to ...

Страница 37: ... than its own The information in this document has been reviewed and is believed to be accurate How ever neither Dell Computer Corporation nor its affiliates assume any responsibility for inaccuracies errors or omissions that may be contained herein In no event will Dell Com puter Corporation or its affiliates be liable for direct indirect special incidental or consequential damages resulting from...

Страница 38: ...DELL P990 E book Page 30 Friday December 4 1998 2 36 PM ...

Страница 39: ...est une marque commerciale déposée d International Business Machines Corporation l appellation et le logo ENERGY STAR sont des marques commerciales déposées de l U S Environmental Protection Agency EPA En qualité de partenaire d ENERGY STAR Dell Computer Corporation a déterminé que ce produit satisfait aux directives d ENERGY STAR en matière de rendement énergétique D autres marques commerciales e...

Страница 40: ...DELL P990 F book Page 4 Friday December 4 1998 2 38 PM ...

Страница 41: ...ème d écrans de menu OSD 2 6 Pilotage par menu 2 6 RESTAURER COULEUR Restauration de l image couleur 2 10 REGLAGE MOIRE Réglage du moiré 2 10 Mode d optimisation graphique Graphic Enhancement Mode GEM 2 12 Informations sur le moniteur 2 12 Réinitialisation des réglages 2 13 Réinitialisation d un seul paramètre de réglage 2 13 Réinitialisation de toutes les données de réglage pour le signal d entré...

Страница 42: ... et en Suisse 2 21 Déclaration de conformité à l an 2000 des matériels de la marque Dell 2 22 Appendice A 1 Avis sur les réglementations A 1 Tables Table 3 1 Réglage de la géométrie 2 7 Table 3 2 Réglage de la convergence 2 9 Table 3 3 Réglage des options 2 9 Table 3 4 Signalisation de gestion de l alimentation de l affichage DPMS 2 14 Table 3 5 Modes de synchronisation présélectionnés 2 14 Table ...

Страница 43: ...tes Entretien La surface de l écran est revêtue d une fine couche de matériau antireflet destinée à opti miser davantage les caractéristiques ergonomiques du moniteur Nettoyez la surface de l écran avec un chiffon doux Si nécessaire utilisez un chiffon doux légèrement imprégné d eau pour éliminer les traces de doigts etc N utilisez aucun type de tampon abrasif de poudre à récurer ou de solvants co...

Страница 44: ...tilisez un cordon d alimentation approprié à votre tension d alimentation secteur locale Pour les clients aux Etats Unis Si vous n utilisez pas un cordon d alimentation approprié le moniteur ne satisfera pas aux normes FCC applicables Avant de déconnecter le cordon d alimentation attendez au moins 30 secondes après avoir mis le moniteur hors tension de façon à permettre la décharge de l électricit...

Страница 45: ... à une prise secteur 3 Mettez le moniteur et l ordinateur sous tension 4 Ajustez les commandes utilisateur en fonction de vos préférences person nelles L installation est terminée REMARQUE Si vous rencontrez des problèmes avec votre moniteur Dell reportez vous à la section Dépannage aux pages 2 16 à 2 19 Ordinateur vers le connecteur de sortie vidéo de l ordinateur Câble de signal vidéo Tous deux ...

Страница 46: ...réglage d autres paramètres 4 Touche MENU page 2 6 Affiche l écran MENU 5 6 Touches CONTRASTE page 2 5 Réglage du contraste Opèrent comme les touches pour le réglage d autres paramètres 6 1 Commutateur et indicateur ALIMENTATION page 2 14 Mise sous et hors tension du moniteur L indicateur s allume en vert lorsque le moniteur est sous tension et en orange lorsque le moniteur se trouve en mode d éco...

Страница 47: ...icalement ou horizontalement saisissez le des deux mains par la base Réglage de la luminosité et du contraste 1 Appuyez sur les touches LUMINOSITE m M ou 6 CONTRASTE L écran LUMINOSITE CONTRASTE apparaît 2 Pour régler la luminosité contraste Appuyez sur les touches LUMINOSITE m M 6 CONTRASTE 90 15 5 90 LUMINOSITE CONTRASTE 26 26 DELL P990 F book Page 5 Friday December 4 1998 2 38 PM ...

Страница 48: ...dows ou un logiciel d interface graphique similaire qui affiche une image plein écran Elle risque de ne pas fonctionner correctement si la couleur d arrière plan est foncée ou si l image d entrée ne remplit pas l écran jusqu aux bords comme une invite MS DOS Présentation du système d écrans de menu OSD Pilotage par menu Appuyez sur la touche MENU pour afficher le MENU principal à l écran OK MENU M...

Страница 49: ... ajuster la rotation et la forme de l image Table 3 1 Réglage de la géométrie Sélectionnez Pour ROTATION faire basculer l image COUSSIN élargir ou rétrécir les côtés de l image CORRECT CYLINDRE décaler l image vers la gauche ou vers la droite TRAPEZE ajuster la largeur de l image dans le haut ou dans le bas de l écran PARALLELISME décaler l image vers la gauche ou vers la droite dans le haut ou da...

Страница 50: ... les couleurs du moniteur et de l imprimante Vous pouvez également ajuster finement la température des couleurs entre 9 300K et 5 000K en sélectionnant VARIABLE et en utilisant les touches 6 pour ajuster manuellement la température des couleurs En utilisant l un des modes GEM vous pouvez ajuster finement la température des couleurs entre 11 000K et 9 300K ZOOM ZOOM COULEUR 1 2 9300K VARIABLE COULE...

Страница 51: ...ION OSD pour changer les menus de position OPTION Sélectionnez le menu OPTION pour régler les options du moniteur Les options incluent Table 3 3 Réglage des options Sélectionnez Pour DEGAUSS MANUEL dégausser démagnétiser l écran MENU VERROUILLE verrouiller les commandes LANGUAGE Changer la langue d affichage des menus RESTAURER COULEUR restaurer l image couleur restauration d image Pour plus de dé...

Страница 52: ...hes m M pour sélectionner RESTAURER COULEUR Appuyez ensuite sur la touche 6 droite Un rectangle blanc apparaît au centre de l écran pendant que l image est restaurée environ deux secondes REMARQUE Pour pouvoir exécuter cette fonction le moniteur doit se trouver en mode de fonctionnement normal indicateur d alimentation allumé en vert pen dant au moins 30 minutes Si le moniteur passe en mode d écon...

Страница 53: ...lage du moiré Pour ajuster le degré de suppression du moiré appuyez d abord sur les touches m M de façon à mettre REGLAGE MOIRE en évidence Appuyez ensuite sur les touches 6 pour ajuster le degré de suppres sion du moiré jusqu à ce que le moiré ait été réduit au minimum OFF ON SUPPRIMER MOIRE OPTION REGLAGE MOIRE OPTION 26 DELL P990 F book Page 11 Friday December 4 1998 2 38 PM ...

Страница 54: ...t visuel supérieur en accentuant la netteté et la luminosité REMARQUE Il se peut que les modes PRESENTATION MODE et GRAPHICS VIDEO MODE produisent des images fantômes lorsque vous exploitez des applications ori entées texte Ces modes changent la luminosité de l image dynamiquement en fonction des changements des images animées Si des images fantômes apparaissent réglez GEM sur STANDARD MODE Les mo...

Страница 55: ...ée en cours Appuyez sur la touche REINITIALSATION alors qu aucun menu n est affiché à l écran Attention que vous ne pouvez pas réinitialiser les paramètres suivants à l aide de cette méthode langue d affichage des menus page 2 9 position d affichage des menus page 2 9 verrouillage des commandes page 2 9 Réinitialisation de toutes les données de réglage pour tous les signaux d entrée Maintenez la t...

Страница 56: ...0 W vert MINIMUM 50 W vert 1 veille 6 0 14 W vert et orange en alter nance 2 interruption 6 0 14 W vert et orange en alter nance 3 inactif 4 0 7 9 W orange 4 hors tension 0 01 0 5 W éteint 5 défaillance clignote en orange Table 3 5 Modes de synchronisation présélectionnés N Résolution points lignes Fréquence Horizontale Fréquence verticale Mode graphique 1 720 400 31 5 kHz 70 Hz VGA Texte 2 640 48...

Страница 57: ... l élément essentiel qui rend les tubes image Trinitron uniques en permettant à davantage de lumière d atteindre l écran ce qui produit une image plus brillante et mieux détaillée Messages à l écran Si le signal d entrée présente des anomalies l un des messages suivants apparaît à l écran Pour résoudre le problème survenu reportez vous à Dépannage aux pages 2 16 à 2 19 1 HORS PLAGE DE BALAYAGE Ind...

Страница 58: ...r 1 n est pas allumé Assurez vous que le cordon d alimentation est correcte ment branché Assurez vous que le commutateur 1 ALIMENTATION se trouve sur la position ON Si le message TESTER CABLES ECRAN apparaît sur l écran ou si l indica teur 1 est allumé soit en orange soit en vert et en orange en alter nance Assurez vous que le câble de signal vidéo est correcte ment raccordé et que toutes les fich...

Страница 59: ... moniteur il se peut que les couleurs ne soient plus uniformes La fonction DEGAUSS démagnétise le cadre métallique du tube cathodique de manière à obtenir un champ neu tre pour une reproduction des couleurs uniforme Si un second cycle de démagnétisation s avère indispensable laissez s écouler un intervalle d au moins 20 minutes de manière à obtenir les meilleurs résultats Vous ne parvenez pas à ré...

Страница 60: ...e suppres sion du moiré via le menu OPTION page 2 9 L image sautille ou présente des oscilla tions ondulatoires Isolez et éliminez les sources potentielles de champs électriques ou magnétiques Les causes de ce symptôme sont généralement des ventilateurs élec triques des lampes fluorescentes et des imprimantes laser Si vous disposez d un autre moniteur à proximité de ce moniteur éloignez les davant...

Страница 61: ...et le passage de davantage de lumière sur l écran ce qui confère au tube cathodique Trinitron des couleurs et une luminosité plus intenses Un bruit de souffle est audible après la mise sous tension Lorsque le moniteur est mis sous tension un cycle de démagnétisation automatique est activé Pendant l acti vation de ce cycle de démagnétisation automatique auto degauss il arrive qu un bruit de souffle...

Страница 62: ...1 2 po Signal d entrée Vidéo RVB analogique 75 Ω typique 0 7 Vp p positif Sync Externe HD VD TTL libre à polarité composite Vidéo composite synchronisation sur le vert 0 3 Vp p négative Fréquence de déflexion Horizontale 30 à 96 kHz Verticale 48 à 120 Hz Tension courant d entrée CA 100 à 120 V 50 60 Hz 1 7 A 220 à 240 V 50 60 Hz 1 2 A Courant de démarrage 120 V CA 50 A 240 V CA 80 A Consommation é...

Страница 63: ...vec le point de vente ou un bureau DELL pendant la période de validité de la présente garantie L utilisateur est tenu de présenter la preuve d achat men tionnant le nom et l adresse du vendeur la date de l achat la désignation du modèle et le numéro de série le nom et l adresse du client ainsi qu une description détaillée des symptômes et de la configuration au moment de la survenance de la défail...

Страница 64: ...issextiles entre les années 2000 et 2009 incluses et pas celle d options de systèmes d exploitation ou de logiciels d application Les matériels de la marque Dell qui ont satisfait au test YMARK2000 sont conformes à BSI DISC PD 2000 1 A l exception de cette précision de la garantie Dell pour les matériels identifiés par le logo NSTL Dell décline toutes autres garanties conditions et tous remèdes ex...

Страница 65: ...e réclament des marques et des noms ou leurs produits Dell Computer Corporation décline tout intérêt de propriété sur les marques com merciales et noms de marque autres que les siens Les informations présentées dans ce document ont été vérifiées et sont considérées exactes Toutefois ni Dell Computer Corporation ni ses affiliés ne pourront être tenus responsables d imprécisions d erreurs ou d omiss...

Страница 66: ...2 24 Guide de l utilisateur du moniteur couleur Dell UltraScan P990 DELL P990 F book Page 24 Friday December 4 1998 2 38 PM ...

Страница 67: ...genes Warenzeichen der International Business Machines Corporation die BezeichnungENERGY STAR und das entsprechende Logo sind eingetragene Warenzeichen der EPA Environmental Protection Agency Umweltschutzbehörde der USA Als ENERGY STAR Partner bestätigt die Dell Computer Corporation daß dieses Produkt den ENERGY STAR Richtlinien für effiziente Energienut zung entspricht Andere in diesem Dokument u...

Страница 68: ...DELL P990 G book Page 4 Friday December 4 1998 2 40 PM ...

Страница 69: ...Das Bildschirmmenüsystem 3 6 Navigieren in den Menüs 3 6 WIEDERHERSTELLEN DER FARBTEMP Wiederherstellen der ursprünglichen Bildfarben 3 10 MOIRE EINST Korrigieren des Moiré Effekts 3 10 Der GEM Modus Graphic Enhancement Mode 3 12 Informationen zum Monitor 3 12 Zurücksetzen der Einstellungen 3 13 Zurücksetzen einer einzelnen Option 3 13 Zurücksetzen aller Einstellungen für das aktuelle Eingangssign...

Страница 70: ...Jahr 2000 Fähigkeit bei Hardware Produkten von Dell 3 26 Anhang A 1 Hinweise zu gesetzlichen vorschriften A 1 Tabellen Tabelle 3 1 Geometrie Einstellungen 3 7 Tabelle 3 2 Konvergenzeinstellungen 3 9 Tabelle 3 3 Optionseinstellungen 3 9 Tabelle 3 4 DPMS Display Power Management System Managementsystem für die Energieversorgung des Monitors 3 14 Tabelle 3 5 Voreingestellte Timing Modi 3 14 Tabelle 3...

Страница 71: ...erfläche ist mit einer dünnen Antireflexbeschichtung versehen die die ergonomischen Eigenschaften des Monitors verbessert Reinigen Sie die Bildschirmoberfläche vorsichtig mit einem weichen Tuch Falls erforderlich entfernen Sie Fettflecken und Fingerabdrücke mit einem mit Wasser angefeuchteten weichen Tuch Verwenden Sie keine Scheuerschwämme Scheuermittel oder Lösungsmittel wie Alkohol Benzin oder ...

Страница 72: ...ie das für die Stromversorgung in Ihrem Land geeignete Netzkabel Für Kunden in den USA Wenn Sie kein geeignetes Netzkabel verwenden entspricht dieser Monitor nicht den obligatorischen FCC Standards Warten Sie nach dem Ausschalten des Geräts mindestens 30 Sekunden bevor Sie das Netzkabel lösen In dieser Zeit kann sich die statische Elektrizität auf der Oberfläche der Kathodenstrahlröhre entladen We...

Страница 73: ... Stecker am anderen Ende des Netzkabels in eine Netzsteckdose 3 Schalten Sie Monitor und Computer ein 4 Stellen Sie den Monitor mit Hilfe der Bedienelemente nach Ihren Wünschen ein Die Installation ist damit abgeschlossen HINWEIS Wenn an Ihrem Dell Monitor Probleme auftreten schlagen Sie bitte unter Störungsbehebung auf Seite 3 15 bis 3 19 nach Computer an Videoausgang des Computers Videosignal ka...

Страница 74: ...auch andere Optionen eingestellt 4 Taste MENU Seite 3 6 Zum Aufrufen der Bildschirmmenüs 5 Tasten 6 KONTRAST Seite 3 5 Zum Einstellen des Kontrasts Mit den Tasten werden auch andere Optionen eingestellt 6 Netzschalter und anzeige 1 Seite 3 14 Zum Ein und Ausschalten des Monitors Die Netzanzeige leuchtet grün wenn der Monitor eingeschaltet ist und orange wenn sich der Monitor im Energiesparmodus be...

Страница 75: ...rehen oder neigen stützen Sie ihn bitte mit beiden Händen unten ab Einstellen von Helligkeit und Kontrast 1 Drücken Sie die Tasten HELLIGKEIT m M oder 6 KONTRAST Die Bildschirmanzeige HELLIGKEIT KONTRAST erscheint 2 So stellen Sie Helligkeit bzw Kontrast ein Drücken Sie die Tasten HELLIGKEIT m M 6 KONTRAST bzw 90 15 5 90 HELLIGKEIT KONTRAST 26 26 DELL P990 G book Page 5 Friday December 4 1998 2 40...

Страница 76: ...ftware mit einer ähnlichen grafischen Benutzeroberfläche konzipiert bei der das Bild den ganzen Bildschirm ausfüllt Die Funktion arbeitet möglicherweise nicht korrekt wenn die Hintergrundfarbe dunkel ist oder das eingespeiste Bild den Bildschirm nicht ganz ausfüllt wie z B die MS DOS Eingabeaufforderung Das Bildschirmmenüsystem Navigieren in den Menüs Drücken Sie die Taste MENU um das Hauptmenü ME...

Страница 77: ... die Form des Bildes festlegen wollen Tabelle 3 1 Geometrie Einstellungen Wählen Sie Zum ROTATION Festlegen der Bildrotation KISSEN Wölben der Bildränder nach außen oder innen KISSENVERZERRUNG Verschieben der Bildränder nach links oder rechts TRAPEZVERZERRUNG Einstellen der Bildbreite im oberen und unteren Bildschirmbereich TRAPEZ BALANCE Verschieben des Bildes nach links oder rechts im oberen und...

Страница 78: ...einander anzugleichen Sie können die Farbtemperatur auch feineinstellen und zwar im Bereich zwischen 9 300 K und 5 000 K indem Sie VARIABEL auswählen und die Farbtemperatur mit den Tasten 6 manuell regulieren Wenn Sie in einem der GEM Modi GEM Graphic Enhancement Mode arbeiten können Sie die Farbtemperatur auf einen Wert zwischen 11 000 K und 9 300 K feineinstellen ZOOM ZOOM FARBE 1 2 9300K VARIAB...

Страница 79: ...n einstellen wollen OPTION Wählen Sie OPTION wenn Sie die sonstigen Optionen des Monitors einstellen wollen Zu den Optionen gehören Tabelle 3 3 Optionseinstellungen Wählen Sie Zum MAN DEGAUSS Entmagnetisieren des Bildschirms TASTATURSPERRE Sperren der Bedienelemente LANGUAGE Auswählen der Sprache für die Bildschirmanzeigen WIEDERHERSTELLEN DER FARBTEMP Wiederherstellen der ursprünglichen Bildfarbe...

Страница 80: ... Sie zunächst mit den Tasten m M die Option WIEDERHERSTELLEN DER FARBTEMP Drücken Sie dann die rechte Taste 6 Ein weißes Rechteck erscheint in der Bildschirmmitte während die ursprünglichen Bildfarben wiederhergestellt werden ca zwei Sekunden HINWEIS Bevor Sie diese Funktion verwenden können muß sich der Monitor mindestens 30 Minuten lang im normalen Betriebsmodus befinden Netzanzeige leuchtet grü...

Страница 81: ...iré Korrekturfunktion einzuschalten Um den Grad der Moiré Korrektur festzulegen heben Sie zunächst mit den Tasten m M die Option MOIRE EINST hervor Regulieren Sie dann mit den Tasten 6 den Grad der Moiré Korrektur bis der Moiré Effekt auf ein Minimum reduziert ist AUS EIN MOIREKORREKTUR OPTION MOIRE EINST OPTION 26 DELL P990 G book Page 11 Friday December 4 1998 2 40 PM ...

Страница 82: ...ärfe und die Helligkeit gesteigert werden HINWEIS Beim PRESENTATION MODE und beim GRAPHICS VIDEO MODE können Dop pelbilder auftreten wenn Sie mit textorientierten Anwendungen arbeiten Die Helligkeit des Bildes wechselt bei diesen Modi dynamisch je nach den Änderungen sich bewegender Bilder Wenn Doppelbilder auftreten setzen Sie GEM auf STANDARD MODE Im PRESENTATION MODE und im GRAPHICS VIDEO MODE ...

Страница 83: ...gnal Drücken Sie die Taste RESET wenn kein Menü auf dem Bildschirm angezeigt wird Beachten Sie daß die folgenden Einstellungen bei diesem Verfahren nicht zurückgesetzt werden Sprache der Bildschirmmenüs Seite 3 9 Position der Bildschirmmenüs Seite 3 9 Sperrung der Bedienelemente Seite 3 9 Zurücksetzen aller Einstellungen für alle Eingangssignale Halten Sie die Taste RESET mehr als zwei Sekunden la...

Страница 84: ...orange 2 Unterbrechung 6 0 14 W abwechselnd grün und orange 3 Deaktiviert 4 0 7 9 W orange 4 Ausgeschaltet 0 01 0 5 W aus 5 Fehlermodus orange blinkend HINWEIS Leistungsaufnahme kann nur dann ereicht werden wenn das system und der Monitor von der wechselstromquelle völlig getrennt sind Tabelle 3 5 Voreingestellte Timing Modi Nr Auflösung Punkte Zeilen Horizontal frequenz Vertikal frequenz Grafikmo...

Страница 85: ...wirkt daß mehr Licht auf den Bildschirm gelangt und ermöglicht eine höhere Farbintensität und Detailgenauigkeit Bildschirmanzeigen Wenn am Eingangssignal ein Fehler vorliegt erscheint eine der folgenden Warnmeldungen auf dem Bildschirm Wie Sie das Problem beheben schlagen Sie unter Störungsbehebung auf Seite 3 16 bis 3 19 nach 1 NICHT IM ABTASTBEREICH Gibt an daß das Eingangssignal nicht den techn...

Страница 86: ...le 3 6 Störungsbehebung Symptom Überprüfen Sie bitte folgendes Kein Bild Die Anzeige 1 leuchtet nicht Das Netzkabel muß korrekt angeschlossen sein Der Netzschalter 1 muß sich in der Position EIN befinden Die Meldung SIGNALKABEL PRÜFEN erscheint auf dem Bildschirm oder die Anzeige 1 leuchtet orange oder wechselt zwischen grün und orange Das Bildschirmkabel muß korrekt angeschlossen sein und alle St...

Страница 87: ...ise nicht mehr gleichmäßig Mit der Entmagnetisierungsfunktion wird der Metallrahmen der Kathodenstrahlröhre entmagnetisiert so daß ein neutrales Feld entsteht in dem eine gleichmäßige Farbwiedergabe möglich ist Ist ein zweiter Entmagnetisierungszyklus erforderlich warten Sie nach dem ersten Zyklus mindestens 20 Minuten Auf diese Weise erzielen Sie die besten Ergebnisse Der Monitor läßt sich mit de...

Страница 88: ... weitgehend eliminiert wurde kann das Bild verschwommen sein Verringern Sie im Menü OPTION den Grad der Moiré Korrektur Seite 3 9 Das Bild springt oder oszilliert Stellen Sie elektrische bzw magnetische Geräte die aufgrund elektrischer oder magnetischer Felder Interferenzen mit dem Monitor verursachen können weiter vom Monitor entfernt auf oder entfernen Sie sie ganz Typischerweise werden solche S...

Страница 89: ...izontale Linien Drähte sind sichtbar Bei diesen Linien handelt es sich um Dämpfungsdrähte zur Stabilisierung der vertikalen Streifenmaske Seite 3 15 Aufgrund dieser Streifenmaske gelangt mehr Licht auf den Bildschirm so daß Farben und Helligkeit bei der Trinitron Kathodenstrahlröhre besonders intensiv sind Unmittelbar nach dem Einschalten ist ein Summgeräusch zu hören Wenn Sie den Monitor einschal...

Страница 90: ...rmalfall 75 Ω 0 7 Vp p positiv Synchronisation Extern HD VD zusammengesetzt Polarität frei TTL FBAS Grünsignal mit Synchronisation 0 3 Vp p negativ Ablenkfrequenz Horizontal 30 bis 96 kHz Vertical 48 bis 120 Hz Betriebsspannung 100 bis 120 V Wechselstrom 50 60 Hz 1 7 A 220 bis 240 V Wechselstrom 50 60 Hz 1 2 A Einschaltstoßstrom 120 V Wechselstrom 50 A 240 V Wechselstrom 80 A Leistungsaufnahme Höc...

Страница 91: ...ben indem er sich innerhalb der Garantiefrist an die Verkaufsstelle oder eine beliebige DELL Niederlassung wendet Dabei muß der Endbenutzer einen Kaufnachweis erbringen aus dem Name und Anschrift des Verkäufers das Kaufdatum Modell und Seriennummer Name und Anschrift des Kunden sowie nähere Angaben zu den Fehlersymptomen und der Konfiguration zum Zeitpunkt des Auftretens der Störung einschließlich...

Страница 92: ...chst einfache Demontage Baugruppen Kabel und andere Komponenten können von einer Person allein ausgebaut werden Es werden möglichst wenige Schrauben verwendet Beim Zerlegen lassen sich die meisten Arbeitsschritte von Hand oder mit Hilfe eines Standardschraubenschlüssels 6 mm durchführen Dells Entsorgungsprogramm im Sinne des Blauen Engels Der schnelle technische Fortschritt in der Computer Industr...

Страница 93: ...tet und es wird Ihnen mitgeteilt wie Sie bei der Rückgabe der Produkte vorgehen müssen Die für Sie geltende Telefonnummer und die Sammelstelle in Ihrer Nähe finden Sie unter Green Away Sammelstellen weiter hinten HINWEIS Leere Gehäuse Geräte aus denen integrale Bestandteile wie Chips oder das Netzteil ausgebaut wurden werden im Rahmen des kostenlosen Green Away Programms nicht zurückgenommen Wenn ...

Страница 94: ...ernativen für eine Zeitspanne von fünf Jahren gerechnet ab dem Produktionsstop des betreffenden Dell Produkts vorzuhalten zum Beispiel das Basissystem die Tastatur und den Monitor Chlorfrei gebleichtes Papier Nur Europa In Übereinstimmung mit Dells Zielsetzung die Auswirkungen der Entsorgung nicht mehr benötigter Produkte auf die Umwelt zu verringern und mit vielerorts geltenden Richtlinien wird d...

Страница 95: ...86 12 51 Bockmann Ohlig Tersteegenstrasse 21a 42653 Solingen Süddeutschland 0130 86 12 51 Knab Carl Benz Strasse 8 10 35440 Linden Niederlande 02 481 91 00 R Frazier Europe Plantijnweg 15 4104 BC Culemborg Niederlande Norwegen 46 8 5900 5179 WMI Sellbergs AB Box 1294 S 171 25 Solna Schweden Schweden 46 8 5900 5169 WMI Sellbergs AB Box 1294 S 171 25 Solna Schweden Großbritannien 0800 783 3124 R Fra...

Страница 96: ...h der Unterstützung für bzw der Kompatibilität mit dem Jahr 2000 ausgeschlossen Um einen Garantieanspruch für Hardware mit dem NSTL Logo geltend zu machen muß sich der Kunde vor dem 1 Januar 2001 an Dell wenden Auch wenn ein System den YMARK2000 Test bestanden hat können die tatsächlichen Umstellungsergebnisse in einer bestimmten Betriebsumgebung von anderen Faktoren abhängen einschließlich aber n...

Страница 97: ...onen in diesem Dokument wurden auf Richtigkeit überprüft Die Dell Computer Corporation und die Tochterfirmen von Dell übernehmen dennoch keinerlei Haftung für Ungenauigkeiten Fehler oder Auslassungen die möglicherweise in diesem Dokument enthalten sind Die Dell Computer Corporation und die Tochterfirmen von Dell übernehmen keine Haftung für direkte indirekte spezielle Neben oder Folgeschäden die a...

Страница 98: ...3 28 Dell Model UltraScan P990 Farbmonitor Benutzerhandbuch DELL P990 G book Page 28 Friday December 4 1998 2 40 PM ...

Страница 99: ... Association IBM es una marca registrada de International Business Machines Corporation el nombre y logotipo ENERGY STAR son marcas registradas de la U S Environmental Protection Agency EPA Como socio de ENERGY STAR Dell Computer Corporation ha determinado que este producto cumpla las directrices de ENERGY STAR para el ahorro energético En este documento pueden emplearse otras marcas y nombres com...

Страница 100: ...DELL P990 S book Page 4 Friday December 4 1998 2 52 PM ...

Страница 101: ...ma OSD On Screen Display indicación en pantalla 4 6 Desplazamiento por el menú 4 6 REAJUSTE DE COLOR Restauración del color de la imagen 4 10 AJUSTE MUARE Ajuste del efecto muaré 4 10 Modo de mejora de gráficos GEM 4 12 Datos del monitor 4 12 Restauración de los ajustes 4 13 Restauración del un elemento de ajuste específico 4 13 Restauración de todos los ajustes para la señal de entrada actual 4 1...

Страница 102: ...ega y Suiza 4 21 Declaración de preparación para el año 2000 de los productos de hardware de Dell 4 22 Apendice A 1 Notas sobre normativas A 1 Tablas Tabla 3 1 Ajustes geométricos 4 7 Tabla 3 2 Ajustes de convergencia 4 9 Tabla 3 3 Ajustes de opciones 4 9 Tabla 3 4 Señalización de gestión energética en pantalla DPMS 4 14 Tabla 3 5 Modos de temporización predefinidos 4 14 Tabla 3 6 Solución de prob...

Страница 103: ...aracterísticas ergonómicas del monitor Limpie con cuidado la superficie de la pantalla con un paño suave Si es necesario utilice un paño suave humedecido con agua para eliminar manchas oleosas huellas dactilares etc No utilice ningún tipo de estropajo o detergente abrasivos ni disol ventes como alcohol bencina o amoníaco ya que pueden dañar la capa antirreflejos Función Plug and Play conectar y us...

Страница 104: ...ión Utilice el cable de alimentación adecuado para el suministro eléctrico local Para clientes de los EE UU Si no utiliza el cable de alimentación adecuado el monitor no cumplirá las normas FCC obligatorias Antes de desconectar el cable de alimentación espere al menos 30 segundos después de apagar la unidad para permitir la descarga de la electricidad estática acu mulada en la superficie del TRC t...

Страница 105: ...able a una toma de corriente 3 Encienda el monitor y su ordenador 4 Ajuste los controles del usuario de acuerdo con sus preferencias La instalación está finalizada NOTA Si tiene problemas con su monitor Dell consulte la sección Solución de proble mas de la páginas 4 15 a 4 19 Ordenador al conector de salida de vídeo del ordenador Cable de señal de vídeo Ambos son de color azul a una toma de corrie...

Страница 106: ...4 6 Muestra el menú principal de OSD 5 Botones 6 CONTRASTE página 4 5 Ajustan el contraste Utilice los botones igual que al ajustar otras opciones 6 Interruptor e indicador 1 ENCENDIDO APAGADO página 4 14 Enciende y apaga el monitor El indicador se ilumina en color verde cuando el monitor está encendido y en color naranja cuando se encuentra en modo de ahorro energético 7 Conector AC IN Suministra...

Страница 107: ...tal o vertical sujételo con ambas manos por su parte inferior Ajuste del brillo y el contraste 1 Pulse los botones BRILLO m M o 6 CONTRASTE Aparecerá la indicación en pantalla BRILLO CONTRASTE 2 Para ajustar el brillo y el contraste Pulse los botones BRILLO m M y 6 CONTRASTE 90 15 5 90 BRILLO CONTRASTE 26 26 DELL P990 S book Page 5 Friday December 4 1998 2 52 PM ...

Страница 108: ...io similar y proporcionen imagen de pantalla completa Es posible que no funcione correctamente si el color de fondo es oscuro o la imagen recibida no llena la pantalla hasta los bordes por ejemplo un comando de MS DOS Introducción al sistema OSD On Screen Dis play indicación en pantalla Desplazamiento por el menú Pulse el botón MENU para mostrar el menú principal en la pantalla OK MENU MENU SALIR ...

Страница 109: ...a ajustar la rot ación y la forma de la imagen Tabla 3 1 Ajustes geométricos Seleccione Para RATACION Girar la imagen DIST DE COJIN Expandir o contraer los lados de la imagen BAL DE COJIN Mover los lados de la imagen a la derecha o la izquierda DIST TRAP Ajustar la anchura en las partes superior e inferior de la ima gen BAL TRAP Mover las partes superior e inferior de la imagen a la dere cha o la ...

Страница 110: ...lor del monitor con el de la impresora También es posible ajustar con precisión la temper atura de color entre 9 300K y 5 000K seleccionando VARIABLE y usando los botones 6 para realizar el ajuste de forma manual Si se utiliza uno de los modos GEM mejora de grá ficos es posible ajustar la temperatura de color con una precisión de 11 000K a 9 300K ZOOM ZOOM COLOR 1 2 9300K VARIABLE COLOR 1 2 VARIAB...

Страница 111: ...OSD para mover la posición de la indicación en pantalla OSD OPCION Seleccione el menú OPCION para ajustar las opciones del monitor Las opciones son Tabla 3 3 Ajustes de opciones Seleccione Para DESMAGNET MANUAL Desmagnetizar la pantalla BLOQUEO DE AJUST Bloquear los controles LANGUAGE Cambiar el idioma de indicación en pantalla REAJUSTE DE COLOR Restaurar el color de la imagen Consulte la sección ...

Страница 112: ...es m M para seleccionar REAJUSTE DE COLOR Después pulse el botón derecho 6 Durante la restauración del color que dura unos dos segundos aparece un rectángulo blanco en el centro de la pantalla NOTA Antes de usar esta función el monitor debe estar en el modo de funcionamiento normal indicador de encendido apagado verde durante al menos 30 minu tos Si el monitor activa el mode de ahorro de energía d...

Страница 113: ...uste del efecto muaré Para ajustar el grado de cancelación de efecto muaré pulse primero los botones m M para resaltar la opción AJUSTE MUARE Después pulse los bot ones 6 para ajustar la cancelación de muaré hasta que el efecto muaré sea mínimo NO SI ELIMINAR MUARE OPCION AJUSTE MUARE OPCION 26 DELL P990 S book Page 11 Friday December 4 1998 2 52 PM ...

Страница 114: ...lículas y juegos aumentando la nitidez y el brillo NOTA Los modos PRESENTATION y GRAPHICS VIDEO pueden producir imágenes fan tasma al visualizar aplicaciones orientadas a textos Estos modos cambian el brillo de la imagen dinámicamente de acuerdo con los cambios en las imágenes móviles Si aparecen imágenes fantasma cambie el modo GEM a modo STANDARD Los modos PRESENTATION y GRAPHICS VIDEO cambian e...

Страница 115: ...al Pulse el botón RESTAURACION sin que haya ningún menú en la pantalla Tenga en cuenta que los siguientes elementos no se pueden restaurar por este método idioma de presentación de menús página 4 9 posición de los menús en pantalla página 4 9 bloqueo de los controles página 4 9 Restauración de todos los ajustes para todas las señales de entrada Pulse el botón RESTAURACION durante más de dos segund...

Страница 116: ...IMUM 50 W verde 1 en espera 6 0 14 W verde y naranja alternados 2 en reposo 6 0 14 W verde y naranja alternados 3 sin actividad 4 0 7 9 W naranja 4 apagado 0 01 0 5 W apagado 5 modo de fallo naranja con parpadeo Tabla 3 5 Modos de temporización predefinidos Núm Resolución puntos líneas Horizontal Frecuencia Vertical Frecuencia Modo de gráficos 1 720 400 31 5 kHz 70 Hz VGA texto 2 640 480 31 5 kHz ...

Страница 117: ...Trinitron en algo único permitiendo que llegue más luz a la pantalla y produciendo una imagen más bril lante y detallada Mensajes en pantalla Si hay algún fallo en la señal de entrada aparecerá en pantalla uno de los siguientes men sajes Para resolver el problema consulte Solución de problemas en la páginas 4 16 a 4 19 1 FUERA DEL RANGO DE AJUSTE indica que la señal de entrada no es admitida por l...

Страница 118: ...1 ino se enciende Asegúrese de que el cable de alimentación está bien conectado Asegúrese de que el interruptor 1 ENCENDIDO APA GADO está en posición de encendido Si aparece en pantalla el mensaje CHE QUEE CABLE SEÑAL o si el indica dor 1 está naranja o alterna entre naranja y verde Asegúrese de que el cable de señal de vídeo está conectado correctamente y todas las clavijas están bien insertadas ...

Страница 119: ...el color puede perder su unifor midad Esta función desmagnetiza el armazón metálico del TRC tubo de rayos catódicos para obtener un campo neutro y una reproducción de los colores uniforme Si se neces ita un segundo ciclo de desmagnetización deje que transcurran al menos 20 minutos para obtener resulta dos óptimos No es posible ajustar el monitor con los botones del panel frontal Si la función de b...

Страница 120: ...cer borrosa Reduzca la cancelación de muaré mediante la indicación en pantalla OPCION página 4 9 La imagen salta o tiene oscilaciones onduladas Aísle y elimine las posibles fuentes de campos eléctri cos o magnéticos Algunas causas frecuentes de este síntoma son los ventiladores eléctricos las lámparas flu orescentes y las impresoras láser Si hay otro monitor cerca de éste aumente la distancia entr...

Страница 121: ...n la rejilla de apertura de tiras verti cales página 4 15 La rejilla de apertura deja pasar más luz hasta la pantalla aumentando así el color y el brillo del tubo de rayos catódicos Trinitron Se oye un zumbido tras encender la unidad Cuando se enciende el monitor se activa el ciclo de des magnetización Es posible que se oiga un zumbido mientras el ciclo está activado Se oye el mismo zum bido al de...

Страница 122: ... mm an al 13 7 8 10 1 2 pulg Señal de entrada Vídeo RGB analógica 75 Ω típica 0 7 Vp p positiva Sincronización HD VD externa TTL compuesta sin polar idad Vídeo compuesta sincr en verde 0 3 Vp p negativa Frecuencia de deflexión Horizontal 30 a 96 kHz Vertical 48 a 120 Hz Tensión intensidad de entrada CA 100 a 120 V 50 60 Hz 1 7 A 220 a 240 V 50 60 Hz 1 2 A Corriente de aflujo 120 V CA 50 A 240 V CA...

Страница 123: ...nfiguración en el momento del fallo de funcionamiento incluyendo los dispositivos periféricos y el software empleados En caso contrario DELL puede rechazar la reclamación de garantía Si se diagnostica un defecto garantizado DELL dispondrá lo necesario y pagará el transporte terrestre y el seguro desde y hasta el centro de reparación sustitución DELL El usuario final debe asegurarse de que el produ...

Страница 124: ... expresos o implíci tos relativos a la preparación para el año 2000 Para presentar una reclamación en virtud de esta garantía del hardware con el logotipo de NSTL los clientes deben ponerse en con tacto con Dell antes del 1 de enero del 2001 Aunque un sistema pase la prueba YMARK2000 los resultados de continuidad reales en entornos operativos específicos pueden variar dependiendo de otros factores...

Страница 125: ... nombres comerciales que no sean los suyos propios La información de este documento ha sido revisada y se considera que es exacta No obstante Dell Computer Corporation ni sus filiales aceptan responsabilidades por la falta de exactitud errores u omisiones que pueda contener este documento Bajo ningún con cepto serán responsables Dell Computer Corporation o sus filiales de los daños directos indire...

Страница 126: ......

Страница 127: ...тся торговыми марками фирмы Майкрософт Корпорейшн VESA является зарегистрированной торговой маркой ассоциации Видео Электроникс Стандардс Ассоциэйшн IBM является торговой маркой фирмы Интернэшнл Бизнесс Машинс Корпорейшн название и знак ENERGY STAR являются зарегистрированными торговыми марками Управления по сохране окражающей среды США Как участник в ENERGY STAR фирма Делл Компьютер Корпорейшн пр...

Страница 128: ......

Страница 129: ...ние изображения 5 6 Нажать кнопку ASC 5 6 Ознакомление с системой экранного дисплей OSD 5 6 Передвижение меню 5 6 ВОССТАНОВИТЬ ЦВЕТ Восстановление цветного изображения 5 10 НАСТРОЙКА МУАРА Регулирование муара 5 10 GRAPHIC ENHANCEMENT MODE GEM Режим графического улучшения 5 12 Мониторная информация 5 12 Возврат уставок 5 13 Возврат отдельного вида уставок 5 13 Возврат всех видов уставок для текущег...

Страница 130: ...в Европейском союзе Норвегии и Швейцарии 5 21 Заявление о соответствии аппаратной продукции марки Делл 2000 г 5 23 Приложение A 1 Peглaмeнтныe извещения A 1 Таблицы Таблица 3 1 Г еометрическое регулирование 5 7 Таблица 3 2 Регулировка сведения лучей 5 9 Таблица 3 3 Опционные регулирование 5 9 Таблица 3 4 Система управления дисплейной мощностью DPMS 5 14 Таблица 3 5 Режимы синхронизации предварител...

Страница 131: ...монитора покрыта тонким противоотражательным слоем позволяющим улучшить эргономические характкристики аппарата Наружная поверхность экрана прочищается осторожно чистой мягкой тряпкой При необходимости для очистки от жиров отпечатков пальца и т п следует протирать поверхность увлаженной мягкой тряпкой Не следует использовать всякого рода абразивные материалы чистящие порошки или растворители такие ...

Страница 132: ...ающую способность в компьютере Предупреждение по подключению питания Для питания монитора от местной сети надо использовать соответствующий силовой шнур Для покупателей в США При использования несоответствующего силового шнура цветной монитор не удовлетворяет обязательным стандартам FCC Федеральной комиссии свзи США Перед отсоединением силового шнура надо подождать не менее чем за 30 секунд с моме...

Страница 133: ...одключить другой конец шнура в гнездо сети 3 Включить питание цветного монитора и компьютера 4 Отрегулировать органы управления по вашим предпочтениям Этим кончаеся монтаж монитора Примечание При возникновении каких либо проблем по цветному монитору фирмы Делл смотрите на раздел Устранение неисправностей в стр 5 15 5 19 Компьютер Видеосигнальный кабель К видеовыходному соединителю компьютера Окраш...

Страница 134: ...MENU стр 5 6 Предназначается для показания экранного дисплея МENU 5 Кнопки КОНТРАСТНОСТЬ стр 5 5 Предназначаются для регулировании контрастности Кнопки используются также при регулировании других параметров 6 Выключатель и индикатор u ПИТАНИЕ стр 5 14 Предназначается для включения и отключения монитора Индикатор загорается в зеленом цвете при включении монитора а загорается в оранжевом при нахожде...

Страница 135: ...указанных ниже Поворачивают монитор вертикально или горизонтально держая его снизу двумя руками 90 15 5 90 Регулирование яркости и контрастности 1 Нажать кнопки ЯРКОСТЬ или КОНТРАСТНОСТЬ Экранный дисплей ЯРКОСТЬ КОНТРАСТ появится 2 Для регулирования яркости контрастности Нажать кнопки ЯРКОСТЬ КОНТРАСТНОСТЬ ЯРКОСТЬ КОНТРАСТ 26 26 ...

Страница 136: ...ром прогоняется Windows или аналогичное программное средство интерфейса пользователя графики представляющее полноэкранное изображение Она не может работать правильно в случае если фоновый цвет темен или если введенное изображение не показывается на полном экране до кромок в том числе энак приглашения MS DOS Ознакомление с системой экранного дисплей OSD Передвижение меню Нажав кнопку MENU отображат...

Страница 137: ... РА3МЕР 26 73 ГЕОМЕТРИЯ Выбрав меню ГЕОМЕТРИЯ отрегулировать поворот и форму изображения ВРАЩЕНИЕ ГЕОМЕТРИЯ 26 Таблица 3 1 Г еометрическое регулирование Выбрав ВРАЩЕНИЕ ПОДУШКА ДУГ А ТРАПЕЦИЯ ПАРАЛЛЕЛОГРАММ Выполняется Поворачивание изображение Расширение или стягивание боков изображения Перемещение боков изображения влево или вправо Регулирование ширины изображения на верху и низу экрана Перемеще...

Страница 138: ... позволяет цветовое согласование между монитором и принтером Выбор режима ПЛАВНО позволяет точную настройку цветовой температуры в пределах от 9 300К до 5 000К а применение кнопок ручное регулирование цветовой температуры МАСШТАБ МАСШТАБ ПЛАВНО ЦВЕТ ТЕМПЕРАТУРА 1 2 Применение одного из режимов GEM позволяет точную настройку цветовой температуры в пределах от 11 000К до 9 300К ЦВЕТ ТЕМПЕРАТУРА 1 2 ...

Страница 139: ...ные функции включают в себя следующее Таблица 3 3 Опционные регулирование Выбрав Выполняется H СВЕДЕНИЕ Устранение темного участка изображения красного или синего цвета по горизонтали V СВЕДЕНИЕ Устранение темного участка изображения красного или синего цвета по вертикали Выбрав Выполняется РАЗМАГНИЧИВАНИЕ Дегауссизация размагничивание экрана БЛОКИРОВКА УПР Блокировка органов управления LANGUAGE И...

Страница 140: ...ункции монитор должен быть в режиме нормальной операции индикатор питания горит в зеленом цвете в течение не менее 30 минут В случае если монитор входит в режим энергосбережения надо возвратить монитор в режим нормальной операции и подождать 30 минут до тех пор пока монитор не готовится Для сохранения монитора в режиме нормальной операции не менее 30 минут рекомендуется проверить уставки энергосбе...

Страница 141: ...ара Выбрав меню ПОДАВЛЕНИЕ МУАРА включить функцию регулирования муара ВЫКЛ ВКЛ ПОДАВЛЕНИЕ МУАРА ПРОЧЕЕ НАСТРОЙКА МУАРА ПРОЧЕЕ 26 Для регулирования величины подавления муара сначала нажимая кнопки высветить НАСТРОЙКА МУАРА Затем нажимая кнопку отрегулировать величину подавления муара до минимума эффекта муара ...

Страница 142: ...рограммных средств текстового назначения Эти режимы изменяют яркость изображения значительно согласно изменению в движущихся изображениях Если повторное изображение появляется то следует установить GEM на стандартный режим Режим представления и граяический видеорежим переключают диапазон регулирования цветовой температуры с 9 300К 5 000К на 11 000К 9 300К Подробнее сообщение смотреть ЦВЕТ ТЕМПЕРАТ...

Страница 143: ...дов уставок для текущего входного сигнала Нажать кнопку RESET когда никакое меню не отображается на экране Следует помнить что этим путем не возвращаются следующие виды уставок Язык экранного меню стр 5 9 Положение экранного меню стр 5 9 Блокировка органов управления стр 5 9 Возврат всех видов уставок для всех входных сигналов Нажать кнопку RESET и удерживать ее не менее двух секунд когда никакое ...

Страница 144: ...та строк Частота полей Графический режим способность точки линии 1 720 400 31 5 кГц 70 Гц Текст VGA 2 640 480 31 5 кГц 60 Гц Графика VGA 3 640 480 37 5 кГц 75 Гц Графика VGA 4 640 480 43 3 кГц 85 Гц VESA 5 800 600 46 9 кГц 75 Гц VESA 6 800 600 53 7 кГц 85 Гц VESA 7 1024 768 48 4 кГц 60 Гц VESA 8 1024 768 60 0 кГц 75 Гц VESA 9 1024 768 68 7 кГц 85 Гц VESA 10 1280 1024 64 0 кГц 60 Гц VESA 11 1280 10...

Страница 145: ...уникальность кинескопа модели Trinitron позволяющая довести больше света до экрана вследствие давая более яркое изображение с большей четкостью Демпферные проволоки Сообщения на экране При наличии какой либо ненормальности входного сигнала одно из приведенных ниже сообщений будет отображаться на экране Следует разрешить проблему ссылаясь на Устранение неисправностей на стр 5 16 5 19 1 НЕДОПУСТИМЫЙ...

Страница 146: ...ого кабеля надо убедиться что адаптер является правильным типом Убедиться что диапазон частот видеосигналов находится в пределах указанных для монитора Частота строк 30 96 кГц Частота полей 48 120 Гц Ссылаясь на руководство к компьютерной системе отрегулировать диапазон частот видеосигналов Автотестирование монитора НЕТ ИЗОБРАЖЕНИЙ При невозможности отображения изображения надо испытать монитор с ...

Страница 147: ...ется Даже при нахождении частот в правильном диапазоне некоторые видеоплаты могут иметь синхроимпульс длительность которого является слишком малой чтобы монитогр сонхронизировал правильно Произвести дегауссизацию монитора см стр 5 9 Расположение аппарата который создает магнитное поле в том числе громкоговоритель близко к монитору или изменение ориентации монитора может вызвать неравномерность цве...

Страница 148: ...аму ЭЛТ чтобы создать нейтральное поле для восстановления равномерного цвета При необходимости дальнейшей дегауссизации надо соблюдать интервал в не менее 20 минут для получения наилучшего результата При появлении красных или голубых теней по кромкам изображения отрегулировать сведение лучей с помощью экранного дисплея СВЕДЕНИЕ стр 5 9 Подавление муара может вызвать нечеткое изображение Уменьшить ...

Страница 149: ...жное соединение может вызвать данную неисправность Подавить муар с помощью экранного дисплея ПРОЧЕЕ стр 5 9 По отношению между разрешающей способностью шагом точек монитора и шагом некоторых форм изображений муар иногда наблюдается на определенных экранных фонах Изменить полную форму экрана Эти демпферные проволоки стабилизируют вертикальнополосатую решетку апертуры стр 5 15 Данная решетка апертур...

Страница 150: ...5 Ом стандартный 0 7 Вп п положительный Синхросигнал внешний НD VD композитный бесполяр ный TTL видеокомпозитный синхрониза ция на зелен 0 3 Вп п отрицательный Частота отклонения Частота строк 30 96 кГц Частота полей 48 120 Гц Напряжение ток питания 100 120 В 50 60 Гц 1 7 А 200 240 В 50 60 Гц 1 2 А Ток включения 120 В перем т 50 А 240 В перем т 80 А Потребляемая мощность Макс 125 Вт 426 BTU час Но...

Страница 151: ...и лицами или самим потребителями случайных или злоумышленных повреждений или нормального изнашивания и истирания Предъявление претензии Претензии по качеству продукции фирмы должны быть предъявлены в странах Европейского союза Норвегии или Швейцарии с обращением к продажному магазину или офису фирмы ДЕЛЛ в течение срока действия гарантии При этом покупатель обязательно должен представить доказател...

Страница 152: ...оящая Г арантия является единственным и исключательным средством защиты покпателя от фирмы ДЕЛЛ или любых ее филиальных компании и ни фирма ДЕЛЛ ни ее филиальные компании не несут ответственности за потерю прибыли или контрактов или любую другую косвенную или последующую потерю вызванную из за несоблюдения нерушения контракта или подобного Настоящая Г арантия не нарушает или затрагивает обязательн...

Страница 153: ... гарантии фирмы Делл на аппаратуру с логотипом NSTL отказываются все другие гарантии условия и средства относящиеся прямо или косвенно к готовности или соответственности с 2000 г В случае предъявления претензии на аппаратуру с логотипом NSTL по настоящей гарантии потребители должны консультироваться с фирмой Делл до 1 го числа января 2001 года Независимо от того что работоспособность системы удовл...

Страница 154: ... обращении к организациям претендующим на свои торговые марки названия или их изделия Фирма Делл Компьютер Корпорейшн отказывается от всех имущественных интересов в торговых марках и названиях за исключением собственных Приведенная в этом документе информация является пересмотренной и достоверной Однако ни сама фирма Делл Компьютер Корпорейшн ни ее филиальные компании не берут на себя ответственно...

Страница 155: ... Association Związku Standardów Wideo Elektronicznych IBM jest zarejestrowanym znakiem firmowym International Business Machines Corporation nazwa i logo ENERGY STAR są zarejestrowanymi znakami firmowymi Amerykańskiej Agencji Ochrony Środowiska EPA Jako partner ENERGY STAR Dell Computer Corporation ustaliła że niniejszy produkt odpowiada wskazówkom odnośnie wydajności energii ustalonym przez ENERGY...

Страница 156: ......

Страница 157: ...nie systemu wyświetlenia na ekranie On Screen Display OSD 6 6 Sterowanie menu 6 6 COLOR RETURN Przywrócenie kolorowego obrazu 6 10 MOIRE ADJUST Regulacja mory 6 10 Rodzaj graficznego wspomagania GEM 6 12 Informacja monitora 6 12 Ponowne nastawianie wyregulowania 6 13 Ponowne nastawianie pojedynczego wyregulowania 6 13 Ponowne nastawianie wszystkich danych wyregulowania dla aktualnego sygnału wejśc...

Страница 158: ...i Europejskiej Norwegii i Szwajcarii 6 21 Oświadczenie usług odnośnie sprzętu komputerowego produkcji DELL w związku z rokiem 2000 6 22 Załącznik A 1 Statutowe uwagi A 1 Tabele Tabela 3 1 Regulacja geometrii 6 7 Tabela 3 2 Regulacja zbieżności 6 9 Tabela 3 3 Regulacja opcji 6 9 Tabela 3 4 System umiejetnego posługiwania się mocą wyświetlacza DPMS 6 14 Tabela 3 5 Programowanie funkcji timera 6 14 T...

Страница 159: ...acja Powierzchnia ekranu jest pokryta cienką warstwą przeciwodblaskową aby podnieść poziom ergonomicznej charakterystyki monitora Czyść powierzchnię ekranu delikatnie miękką ściereczką Jesli zachodzi potrzeba użyj miękką ściereczkę i wodę aby usunąć pozostakości tłuszczu rąk odciski palców itp Nie używaj żadnych szorstkich tkanin Proszków czyszczących i środków takich jak alkohol benzyna lub amoni...

Страница 160: ...ia odnośnie podłączenia zasilania Używaj przewodu zasilania właściwego dla Twojego lokalnego źródła energii Dla użytkowników w U S A Jeżeli nie zastosujesz właściwego przewodu zasilania to monitor może nie odpowiadać obowiązującym standardom FCC Federalnej Komisji Komunikacji Przed odłączeniem przewodu zasilania odczekaj 30 sekund po wyłączeniu zasilania aby rozładowało się napięcie statyczne na p...

Страница 161: ...ieskim 2 Upewnij się że monitor jest wyłączony i podłącz przewód zasilania do monitora Następnie podłącz drugi koniec przewodu zasilania do gniazdka do gniazdka zasilania prądem zmiennym przewód zasilania kabel sygnału wideo 3 Włącz komputer i monitor 4 Wyreguluj regulatory użytkownika zgodnie z własnymi preferencjami Instalowanie jest zakończone UWAGA Jeżeli masz jakiekolwiek problemy ze swoim mo...

Страница 162: ...ji innych zagadnien funkcjonują jako przyciski 4 Przycisk MENU strony 6 6 Wyświetla MENU OSD 5 Przyciski KONTRAST strona 6 5 Regulują kontrast Podczas regulacji innych zagadnień funkcjonują jako przyciski 6 Przełącznik i wskaźnik u ZASILANIE strona 6 14 Włącza i wyłącza monitor Wskaźnik zapala się na zielono gdy monitor jest włączony a na pomarańczowo gdy monitor jest w fazie oszczędzania energii ...

Страница 163: ...oniżej pokazanych kątów Aby przechylić monitor pionowo lub poziomo uchwyć go na dole obiema rękami 90 15 5 90 Regulacje jasności i kontrastu 1 Naciskaj przyciski LUMINACJA lub KONTRAST Pojawi się OSD BRIGHTNESS CONTRAST 2 Aby wyregulować jasność kontrast Naciskaj przyciski LUMINACJA KONTRAST BRIGHTNESS CONTRAST 26 26 ...

Страница 164: ...ub podobnym programem użytkujacym grafikę interfejs posiadajacym pełnoekranowy obraz Może ona nie dzialłać prawidłowo jeżeli kolor tła jest ciemny lub jeśli wprowadzony obraz nie wypełnia ekranu po brzegi tak jak znak zgłoszenia MS DOS Wprowadzenie systemu wyświetlenia na ekranie On Screen Display OSD Sterowanie menu Naciśnij przycisk MENU aby wyświetlić główne MENU na ekranie Wyświetlanie częstot...

Страница 165: ...OMETRY Wybierz menu GEOMETRY aby wyregulować obrót i ksztalt obrazu Tabela 3 1 Regulacja geometrii Wybierz ROTATION PINCUSHION PIN BALANCE KEYSTONE KEY BALANCE Aby Obrócić obraz Rozszerzyć lub zwęzić boki obrazu Przemieścić boki obrazu w lewo lub w prawo Wyregulować szerokość obrazu na górze i na dole ekranu Przemieścić dół lub górę obrazu w lewo lub w prawo ekranu CENTER 26 73 SIZE 26 73 ROTATION...

Страница 166: ...nkcji dla dopasowania koloru drukarki i monitora ZOOM ZOOM VARIABLE COLOR 1 2 Możesz także subtelnie regulować temperaturę barwy w zakresie od 9 300K do 5 000K wybierąjąc VARIABLE i używając przycisków do ręcznej regulacji temperatury barwy Podczas korzystania z któregoś z rodzajów graficznego wspomagania GEM możesz subtelnie wyregulować temperaturę barwy w zakresie od 11 000K do 9 300K COLOR 1 2 ...

Страница 167: ...egulacja opcji CONVERGENCE 26 73 OSD POSITION 26 73 MANUAL DEGAUSS ON OPTION Tabela 3 2 Regulacja zbieżności Wybierz H CONVERGENCE V CONVERGENCE Aby wyeliminować poziome czerwone lub niebieskie cienie wyeliminować pionowe czerwone lub niebieskie cienie Wybierz MANUAL DEGAUSS CONTROL LOCK LANGUAGE COLOR RETURN CANCEL MOIRE Aby Odmagnetyzować ekran Zablokować regulatory Zmienić język OSD Przywrócić ...

Страница 168: ...ąt pojawi się w centrum ekranu UWAGA Przed korzystaniem z tej funkcji monitor musi znajdować się w fazie normalnego działania zielony wskaźnik zasilania przez conajmniej 30 minut Jeżeli monitor przejdzie w fazę oszczędzania energii musisz przywrócić go do fazy normalnego działania i odczekać pełne 30minut Jeśli monitor nie jest gotowy pojawi się następująca informacja COLOR RETURN AVAILABLE AFTER ...

Страница 169: ... mory Wybierz menu CANCEL MOIRE aby włączyć regulację mory Aby wyregulować stopień likwidowania mory najpierw naciskaj przyciski aby wyświetlić MOIRE ADJUST Następnie naciskaj przyciski aby wyregulować stopień likwidacji mory dopóki efekt mory jest minimalny OFF ON CANCEL MOIRE OPTION MOIRE ADJUST OPTION 26 ...

Страница 170: ...s wyświetlania programów zorientowanych na teksty Te rodzaje zmieniają jasność obrazu dynamicznie zgodnie ze zmianami obrazu na ekranie Jeżeli pojawią się zjawy nastaw GEM na STANDARD MODE PRESENTATION MODE i GRAPHIC VIDEO MODE zmieniają zakres regulacji temperatury barwy z 9 300K 5 000K na 11 000K 9 300K Po szczegóły odwołaj się do opisu regulacji COLOR Zmiany rodzajów wideo lub cykliczne zasilan...

Страница 171: ...gulowania dla aktualnego sygnału wejściowego Naciśnij przycisk ZEROWANIE gdy na ekranie nie jest wyświetlone menu Zauważ że następujące pozycje nie dają się w ten sposób ponownie nastawić język menu na ekranie strona 6 9 pozycja menu na ekranie strona 6 9 blokada regulatorów strona 6 9 Ponowne nastawianie wszystkich danych wyregulowania dla wszystkich sygnałów wejściowych Naciśnij i przytrzymaj pr...

Страница 172: ...ączone 5 stan uszkodzenia Konsumpcja mocy 140 W 50 W 6 0 14 W 6 0 14 W 4 0 7 9 W 0 01 0 5 W Wskaźnik u zasilanie zielony zielony przemiennie zielony i pomarańczowy przemiennie zielony i pomarańczowy pomarańczowy brak pomarańczowy pulsujący Programowanie funkcji timera Tabela3 5 Programowanie funkcji timera Częstotliwość pozioma 31 5 kHz 31 5 kHz 37 5 kHz 43 3 kHz 46 9 kHz 53 7 kHz 48 4 kHz 60 0 kH...

Страница 173: ...kalności kineskopu Trinitron gdyż przepuszcza więcej światła do ekranu co daje jaśniejszy bardziej szczegółowy obraz Komunikaty na ekranie Jeżeli coś jest nie w porządku z sygnałem wejścia na ekranie pojawi się jeden z następujących komunikatów Aby rozwiązać problem odwołaj się do W razie trudności na stronie 6 16 do 6 19 1 OUT OF SCAN RANGE poza zakresem strojenia oznacza że sygnał wejścia nie je...

Страница 174: ...k u jest pomarańczowy lub zmienny pomiędzy zielonym a pomarańczowym Jeżeli na ekranie pojawi się komunikat OUT OF SCAN RANGE Jeżeli nie pojawia się żaden komunikat a wskaźnik u jest zielony lub pulsuje na pomarańczowo Sprawdź Upewnij się czy przewód zasilania jest prawidłowo podłączony Upewnij się czy przełącznik u ZASILANIE jest w pozycji ON Upewnij się czy kabel sygnału wideo jest prawidłowo pod...

Страница 175: ...nchronizacji zbyt wąski aby zsynchronizować go właściwie z monitorem Odmagnetyzuj monitor strona 6 9 Jeżeli umieścisz w pobliżu monitora urządzenia wytwarzające pole magnetyczne takie jak megafon albo zmienisz kierunek monitora kolor może być nierównomierny Funkcja odmagnetyzowania odmagnetyzowuje metalową ramę monitora w celu otrzymania neutralnego pola dla równomiernego koloru odtwarzania Jeżeli...

Страница 176: ...trzępiony Zmniejsz stopień likwidacji mory używając OPTION OSD strona 6 9 Odizoluj i wyeliminuj wszelkie możliwe źródła pola elektrycznego lub magnetycznego Objaw ten powodują zwykle wentylatory elektryczne oświetlenie jarzeniowe i drukarki laserowe Jeżeli inny monitor znajduje się w pobliżu niniejszego monitora zwiększ odległość między nimi aby zmniejszyć interferencje Spróbuj podłączyć monitor d...

Страница 177: ...ertury strona 6 15 Ruszt apertury przepuszcza więcej światła do ekranu dając monitorowi Trinitron więcej koloru i jasności Gdy włączone zostaje zasilanie uaktywnia się cykl automatycznego odmagnetyzowania Podczas czynności automatycznego odmagnetyzowania może być słyszalny przydźwięk Ten sam przydźwięk słyszalny jest gdy monitor jest ręcznie odmagnetyzowywany Nie jest to wadliwe funkcjonowanie Wyr...

Страница 178: ... Synchroniczny Zewnętrzny HD VD Syghał zespolony niepolaryzowany TTL Sygnał zespolony wideo Sygnał synchronizacji przesyłany z kolorem zielonym 0 3 vp p ujemny Częstotliwość odchylenia Pozioma 30 do 96 kHz Pionona 48 do 120 Hz Napięcie wejścia prądu zmiennego 100 do 120 V 50 60Hz 1 7 A 220 do 240 V 50 60Hz 1 2 A Uderzenie prądu 120 V prądu zmiennego 50 A 240 V prądu zmiennego 80 A Konsumpcja mocy ...

Страница 179: ...ytkownika przypadkowe lub celowe zniszczenie lub naturalne zużycie Zgłaszanie napraw gwarancyjnych W Unii Europejskiej Norwegii i Szwajcarii należy zgłaszać naprawę gwarancyjną kontaktując się bezpośrednio z punktem sprzedaży lub z dowolnym biurem DELL w okresie ważności gwarancji Użytkownik musi zawsze dostarczyć dowód zakupu zawierający nazwę i adres sprzedawcy datę zakupu model i numer fabryczn...

Страница 180: ... testu National Software Testing Laboratories NSTL YMARK 2000 DELL traktować będzie niepomyślny wynik testu jako defekt podlegający gwarancji i podmiot zwyczajnych limitacji gwarancyjnych Po kompletny wykaz gwarancji ze strony DELL odwołaj się do dokumentacji wynobu Dla sprzętu komputerowego produkcji DELL rok 2000 będzie rokiem przestępnym Standard YMARK 2000 testuje możliwości sprzęgtu komputero...

Страница 181: ... z punktem serwisowym reprezentującym Dell w Twojej okolicy 1995 1998 Dell Computer Corporation Wszelkie prawa zastrzeżone Znaki firmowe użyte w niniejszym dokumencie Dell jest zarejestrowanym znakiem firmowym Dell Computer Corporation Znaki i nazwy firmowe mogą zostaić wykorzystane w ninejszym dokumencie do odwoływania się zarówno do jednostek mających prawo do tych znaków i nazw jak i do ich pro...

Страница 182: ...6 24 Instrukcja obsługi monitora kolorowego Dell Model UltraScan P990 ...

Страница 183: ...C Rules These limits are designed to provide reasonable protection against harmful interference in a residential installation This equipment generates uses and can radiate radio frequency energy and if not installed and used in accordance with the instruction may cause harmful interference to radio com munications However there is no guarantee that interference will not occur in a particular insta...

Страница 184: ...ent complies with the requirements of FCC Federal Communication Commission equipments provided that following conditions are met 1 Power cord Unshielded power cord must be used 2 Video inputs The input signal amplitude must not exceed the specified level CAUTION Changes or modifications not expressly approved by the party responsible for compliance could void the user s authority to operate the eq...

Страница 185: ...Appendix A 3 DELL P990 E book Page 3 Friday December 4 1998 2 36 PM ...

Страница 186: ...A 4 Dell Model UltraScan P990 Color Monitor User s Guide DELL P990 E book Page 4 Friday December 4 1998 2 36 PM ...

Страница 187: ...Appendix A 5 DELL P990 E book Page 5 Friday December 4 1998 2 36 PM ...

Страница 188: ...Department of Communications Note that Canadian Department of Communications DOC regulations provide that changes or modifications not expressly approved by Dell Computer Corporation could void your authority to operate this equipment This Class B digital apparatus meets all requirements of the Canadian Interference Causing Equipment Regulations Cet appareil numérique de la classe B respecte toute...

Страница 189: ...and so on should have the same power supply source The phasing conductor of the room s electrical installation should have a reserve short cir cuit protection device in the form of a fuse with a nominal value no larger than 16 amperes A To completely switch off the equipment the power supply cable must be removed from the power supply socket which should be located near the equipment and easily ac...

Страница 190: ...A 8 Dell Model UltraScan P990 Color Monitor User s Guide 012345167 89 01 24 18 7 0 31 0 0 0 0 DELL P990 E book Page 8 Friday December 4 1998 2 36 PM ...

Страница 191: ... No 302 4 Piso Col Cuauhtemoc 16500 México D F Ship to Dell Computer de México S A de C V al Cuidado de Kuehne Nagel de México S de R I Avenida Soles No 55 Col Peñon de los Baños 15520 México D F Supply voltage 100 120 200 240 VAC Frequency 50 60 Hz Current consumption 1 4 A Exportador Dell Computer Corporation One Dell Way Round Rock TX 78682 U S A Importador Dell Computer de México S A de C V Ri...

Страница 192: ...tor are recommended to be used in the follow ing confitions Vertical frequency 70 Hz or higher Display mode Dark characters in bright background Ergonomie Hinweis nur Deutschland Um den Anforderungen der deutschen Ergonomie Norm ZH1 818 zu antsprechen 1 wird empfahlen die Grundfarbe Blau nicht auf dunklem Hintergrund zu verwenden schiechte Erkennbarkelt Augenbelastung bei zu geringem Zeicheenkontr...

Страница 193: ...DELL P990 E book Page 1 Friday December 4 1998 2 36 PM ...

Страница 194: ...DELL P990 E book Page 1 Friday December 4 1998 2 36 PM ...

Страница 195: ...DELL P990 E book Page 1 Friday December 4 1998 2 36 PM ...

Страница 196: ...Printed in the U S A Imprimé aux Etats Unis Gedruckt in den USA Impreso en EE UU Drukowano w U S A www dell com P N 2221D 3221D 4221D 3 865 242 13 Backcvr 13 fm Page 2 Thursday December 10 1998 10 27 AM ...

Отзывы: