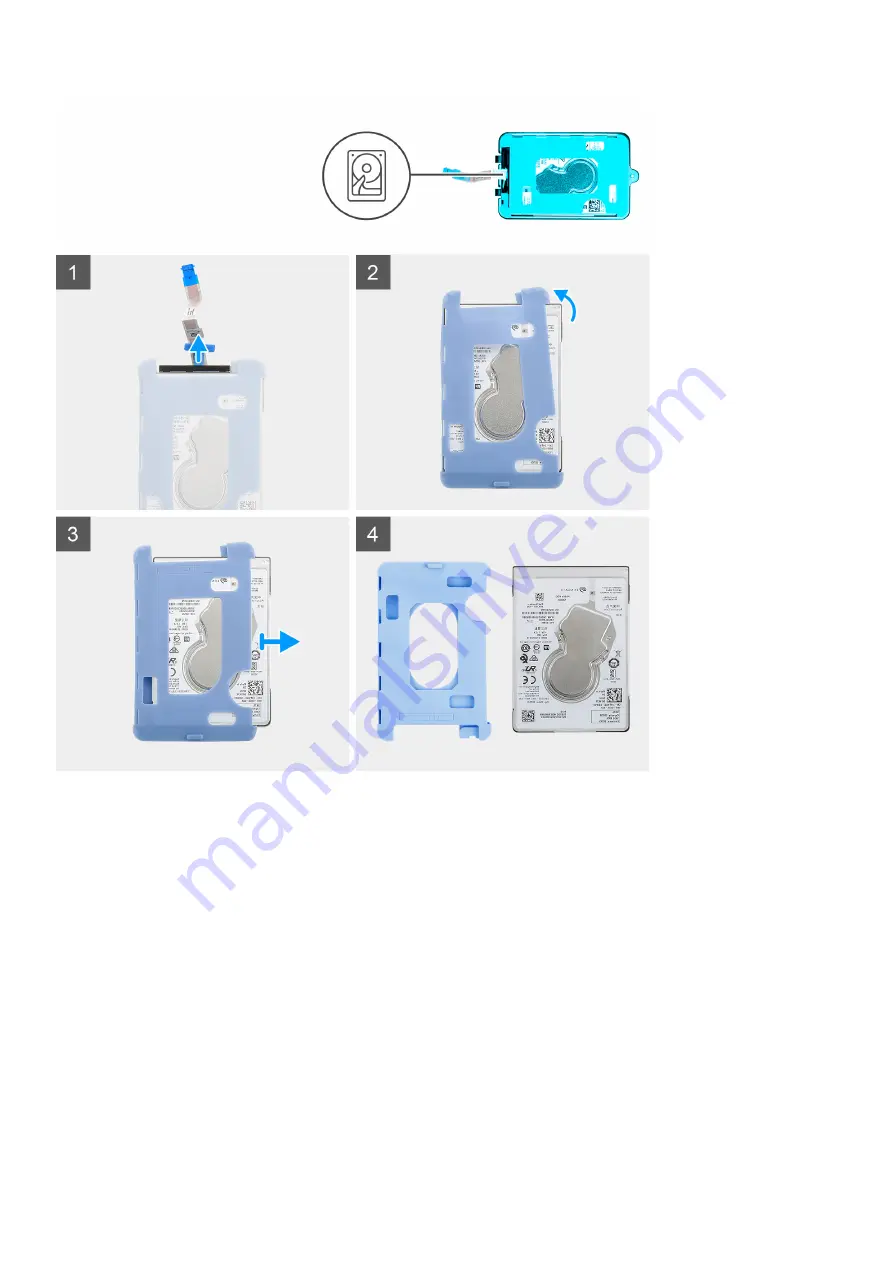
Steps
1. Disconnect the hard-drive cable from the connector on the hard drive.
2. Release the protective sleeve from the hard-drive.
3. Gently pull the hard-drive out of the protective sleeve.
Installing the hard drive
Prerequisites
If you are replacing a component, remove the existing component before performing the installation procedure.
About this task
The figure indicates the location of the hard-drive module and provides a visual representation of the installation procedure.
96
Removing and installing components
Содержание OptiPlex 3090 Ultra
Страница 1: ...OptiPlex 3090 Ultra Service Manual Regulatory Model D13U Regulatory Type D13U003 August 2021 Rev A01 ...
Страница 16: ...17 Lock the device and the stand cover 16 Stands ...
Страница 17: ...18 Press the power button to turn on the device Stands 17 ...
Страница 27: ...12 Slide the back cover along with the device into the stand until you hear a click Stands 27 ...
Страница 28: ...13 Lock the device and the stand cover 28 Stands ...
Страница 29: ...14 Press the power button to turn on the device Stands 29 ...
Страница 39: ...Stands 39 ...
Страница 40: ...40 Stands ...
Страница 45: ...Stands 45 ...
Страница 47: ...Stands 47 ...
Страница 49: ...9 Slide and release the inner bar on the lower edge of the stand cover Stands 49 ...
Страница 50: ...10 Align the vents on the device with the vents on the stand cover and slide the device in the cover 50 Stands ...
Страница 51: ...11 Slide the inner bar back to the lower edge of the stand cover to lock the device to the cover Stands 51 ...
Страница 52: ...12 Connect the power network keyboard mouse and display cables to the device and to the power outlet 52 Stands ...
Страница 54: ...Large Height Adjustable Stand 54 Stands ...
Страница 55: ...14 Slide the stand cover along with the device into the stand until you hear a click Stands 55 ...
Страница 56: ...15 Lock the device and the stand cover 56 Stands ...
Страница 57: ...16 Press the power button to turn on the device Stands 57 ...
Страница 59: ...4 Disconnect the keyboard mouse network power and display cable from the device Stands 59 ...
Страница 63: ...For 30 inch to 32 inch monitor Large height adjustable stand Stands 63 ...
Страница 64: ...For monitors 32 inch Large height adjustable stand 64 Stands ...
Страница 70: ...i Connect the power network keyboard mouse and display cables to the device and to the power outlet 70 Stands ...
Страница 72: ...k Close the stand cover 72 Stands ...
Страница 73: ...l Lock the device and the stand cover Stands 73 ...
Страница 74: ...2 Simple Function a Align the screw holes on the wall mount in the wall and mark them using a pencil 74 Stands ...
Страница 75: ...b Drill the screw marks on the wall and insert the two screws into the screw holes in the wall Stands 75 ...
Страница 77: ...e Connect the power network keyboard mouse and display cables to the device and to the power outlet Stands 77 ...
Страница 79: ...h Press the power button to turn on the device Stands 79 ...
Страница 81: ...b Open the wall mount cover Stands 81 ...
Страница 82: ...c Disconnect the keyboard mouse network power and display cable from the device 82 Stands ...
Страница 83: ...d Snap open the wall mount bracket module from the slots on the wall mount Stands 83 ...
Страница 90: ...Major components of your system 1 Cover 90 Removing and installing components ...


