
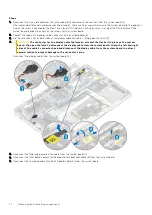


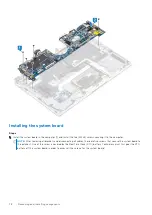


Installing the system board
Steps
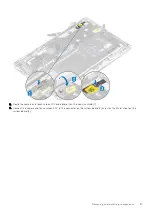
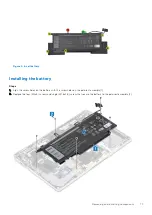
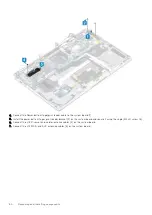
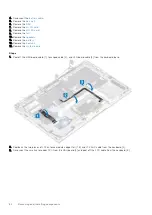
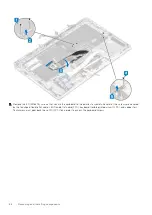
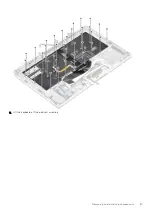
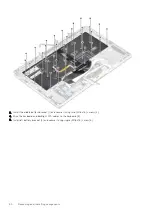
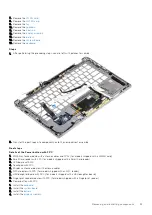
1. Install the system board in the computer [1] and install the five (M2x3) screws securing it to the computer.
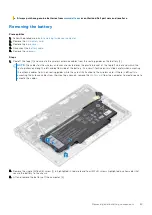
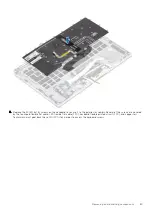
NOTE:
After removing all brackets and disconnecting all cables, there are five screws that secure the system board to
the palmrest. One of the screw is covered by the Real Time Clock (RTC) battery. Technicians must first peel the RTC
battery off the system board in order to access all the screws for the system board.
78
Removing and installing components
Содержание Latitude 7400 2-in-1
Страница 15: ...Major components of your system 1 Base cover 2 Heatsink shield 3 Major components of your system 15 ...
Страница 24: ...4 Pry along the left right and bottom edges of the base 24 Removing and installing components ...
Страница 27: ...2 Press along the edges of the base cover until it clicks into place Removing and installing components 27 ...
Страница 28: ...3 Tighten the 10 captive screws to secure the base cover to the computer 28 Removing and installing components ...
Страница 43: ...5 Place the metal shield on the WWAN card Removing and installing components 43 ...
Страница 51: ...8 Adhere the Mylar sheet on the system board Removing and installing components 51 ...
Страница 56: ...4 Remove the metal foil from the heatsink shield 56 Removing and installing components ...
Страница 57: ...5 Remove the heatsink shield from the system board Removing and installing components 57 ...
Страница 60: ...3 Place the heatsink shield on the heatsink 60 Removing and installing components ...
Страница 61: ...4 Adhere the metal foils on the heatsink shield Removing and installing components 61 ...
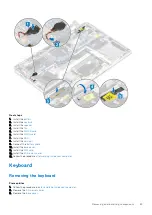
Страница 87: ...8 Lift the keyboard off the palmrest assembly Removing and installing components 87 ...


