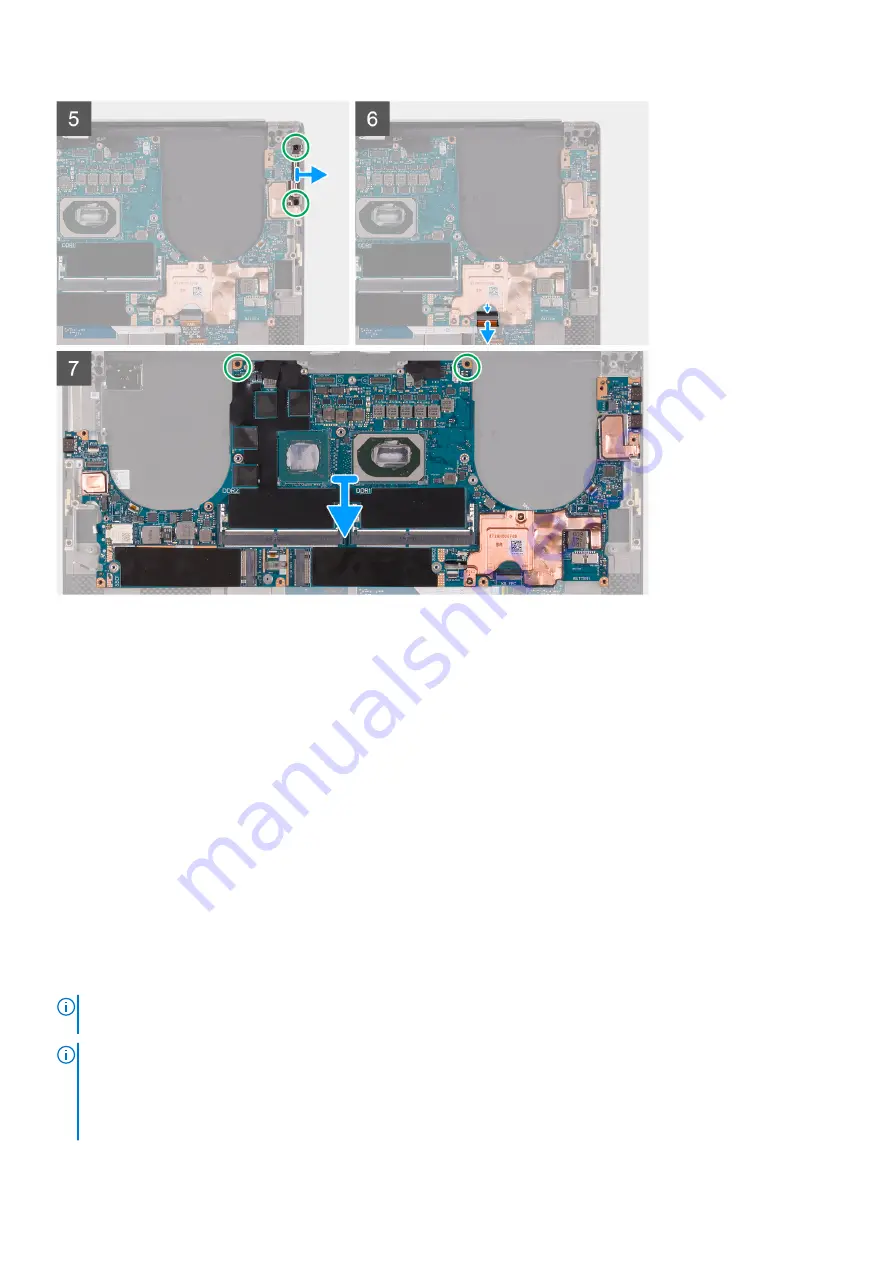
Steps
1. Loosen the three captive screws that secure the display-assembly cable bracket to the system board.
2. Lift the display-assembly cable bracket off the system board.
3. Remove the two screws (M1.6x3) that secure the display-assembly cable holder to the palm-rest and keyboard assembly.
4. Disconnect the touch screen cable and camera cable.
5. Remove the screw (M1.6x3) that secures the wireless-card bracket to the system board.
6. Using a plastic scribe, disconnect the antenna cables from the wireless card.
7. Open the latch, and disconnect the fingerprint reader-board cable from the system board.
8. Remove the two screws (M2x4) that secure the USB Type-C bracket to the palm-rest and keyboard assembly.
9. Lift the USB Type-C bracket from the palm-rest and keyboard assembly.
10. Open the latch, and disconnect the keyboard-control board cable the system board.
11. Remove the two screws (M2x4) that secure the system board to the palm-rest and keyboard assembly.
12. Lift the system board off the palm-rest and keyboard assembly.
Installing the system board
Prerequisites
If you are replacing a component, remove the existing component before performing the installation procedure.
NOTE:
The Service Tag of your computer is stored in the system board. Enter the Service Tag in the BIOS setup
program after you replace the system board.
NOTE:
Replacing the system board removes any changes that you have made to the BIOS using the BIOS setup
program. Make the appropriate changes again after you replace the system board. After your computer is reassembled
and powered on, it prompts for the Real Time Clock (RTC) reset. When the RTC reset cycle occurs, the computer
restarts several times and then an error message is displayed- "Time of day not set". Enter the BIOS when this error
appears and set the date and time on your computer to resume normal functionality.
Removing and installing components
41
Содержание Latitude 5550
Страница 1: ...Dell Precision 5550 Service Manual Regulatory Model P91F Regulatory Type P91F001 May 2020 Rev A00 ...
Страница 12: ...12 Removing and installing components ...
Страница 35: ...Removing and installing components 35 ...
Страница 37: ...Removing and installing components 37 ...
Страница 40: ...40 Removing and installing components ...


