


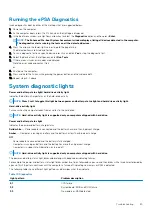

Light pattern
Problem description
2,4
Memory or RAM failure
2,5
Invalid memory installed
2,6
System board or chipset error
2,7
LCD failure
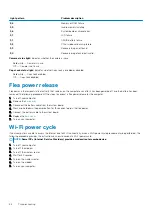
3,1
CMOS battery failure
3,2
PCI or video card or chip failure
3,3
Recovery image not found
3,4
Recovery image found but invalid
Camera status light:
Indicates whether the camera is in use.
•
Solid white — Camera is in use.
•
Off — Camera is not in use.
Caps Lock status light:
Indicates whether Caps Lock is enabled or disabled.
•
Solid white — Caps Lock enabled.
•
Off — Caps Lock disabled.
Flea power release
Flea power is the residual static electricity that remains on the computer even after it has been powered off and the battery has been
removed. The following procedure list the steps to conduct a flea power release for the computer.
1. Turn off your computer.
2. Remove the
3. Disconnect the battery cable from the system board.
4. Press and hold down the power button for 15 seconds to drain the flea power.
5. Connect the battery cable to the system board.
6. Replace the
.
7. Turn on your computer.
Wi-Fi power cycle
If your computer is unable to access the Internet due to Wi-Fi connectivity issues a Wi-Fi power cycle procedure may be performed. The
following procedure provides the instructions on how to conduct a Wi-Fi power cycle:
NOTE:
Some ISPs (Internet Service Providers) provide a modem/router combo device.
1. Turn off your computer.
2. Turn off the modem.
3. Turn off the wireless router.
4. Wait for 30 seconds.
5. Turn on the wireless router.
6. Turn on the modem.
7. Turn on your computer.
86
Troubleshooting
Содержание Inspiron 15-5568
Страница 1: ...Inspiron 15 5568 2 in 1 Service Manual Regulatory Model P58F Regulatory Type P58F001 ...
Страница 27: ...7 wireless card bracket Post requisites Replace the base cover Replacing the wireless card 27 ...
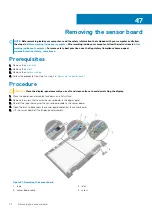
Страница 70: ...3 display cable 4 display panel assembly 70 Removing the camera ...
Страница 73: ...5 sensor board 6 display panel assembly Removing the sensor board 73 ...


