
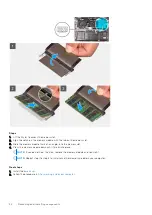


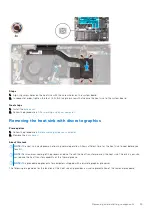


Steps
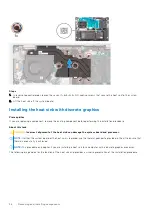
1. Align the screw holes on the heat sink with the screw holes on the system board.
2. In sequential order, tighten the seven (1>2>3>4>5>6>7) captive screws that secure the heat sink to the system board.
Next steps
1. Install the
.
After working inside your computer
.
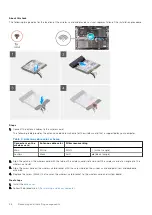
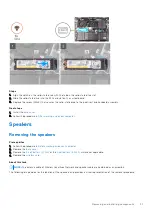
Display assembly
Removing the display assembly
Prerequisites
Before working inside your computer
.
2. Remove the
.
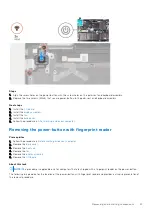
About this task
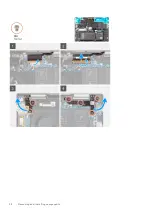
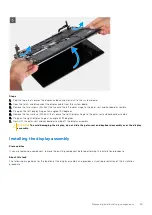
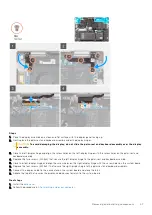
The following image indicates the location of the display assembly and provides a visual representation of the removal
procedure.
Removing and installing components
37
Содержание Inspiron 14 7420 2-in-1
Страница 13: ...Removing and installing components 13 ...
Страница 15: ...Removing and installing components 15 ...
Страница 38: ...38 Removing and installing components ...
Страница 40: ...40 Removing and installing components ...