


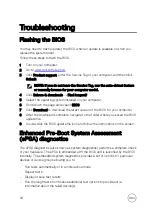


Troubleshooting
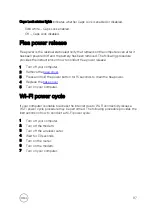
Flashing the BIOS
You may need to flash (update) the BIOS when an update is available or when you
replace the system board.
Follow these steps to flash the BIOS:
1
Turn on your computer.
2
Go to
.
3
Click
Product support
, enter the Service Tag of your computer, and then click
Submit
.
NOTE: If you do not have the Service Tag, use the auto-detect feature
or manually browse for your computer model.
4
Click
Drivers & downloads
→
Find it myself
.
5
Select the operating system installed on your computer.
6
Scroll down the page and expand
BIOS
.
7
Click
Download
to download the latest version of the BIOS for your computer.
8
After the download is complete, navigate to the folder where you saved the BIOS
update file.
9
Double-click the BIOS update file icon and follow the instructions on the screen.
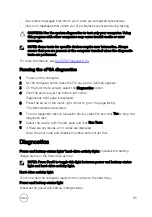
Enhanced Pre-Boot System Assessment
(ePSA) diagnostics
The ePSA diagnostics (also known as system diagnostics) performs a complete check
of your hardware. The ePSA is embedded with the BIOS and is launched by the BIOS
internally. The embedded system diagnostics provides a set of options for particular
devices or device groups allowing you to:
•
Run tests automatically or in an interactive mode
•
Repeat tests
•
Display or save test results
•
Run thorough tests to introduce additional test options to provide extra
information about the failed device(s)
94
Содержание Inspiron 13 7000 Series
Страница 19: ...3 Lift the battery off the palm rest assembly 19 ...
Страница 22: ...2 Peel the coin cell battery off the keyboard bracket 22 ...
Страница 25: ...2 Lift the heat sink off the system board 25 ...
Страница 28: ...4 Lift the fan off the keyboard bracket 28 ...
Страница 31: ...5 Lift the right speaker off the palm rest assembly 31 ...
Страница 34: ...3 Lift the power adapter port off the palm rest assembly 34 ...
Страница 42: ...7 Gently lift the display assembly off the palm rest assembly 42 ...
Страница 46: ...5 Lift the I O board off the palm rest assembly 46 ...
Страница 54: ...14 Lift the system board off the palm rest assembly 54 ...
Страница 62: ...5 Slide and lift the touchpad from the slot on the palm rest assembly 62 ...
Страница 70: ...5 Lift the keyboard off the palm rest assembly 70 ...
Страница 74: ...Procedure After performing all the prerequisites we are left with the palm rest 74 ...


