Table 9. Expansion card installation order
Card
descriptio
n
Card type
Maximum
allowed
Slot
Priority
Slot width
Link width Card width
Card
length
Card height
10G
Network
card
NIC: 10Gb
1
2
x16
x8
SW
HL
FH
1
1
x8
x4
SW
HL
LP
1
2
x16
x8
SW
HL
FH
1
1
x8
x4
SW
HL
LP
FC8 HBA
HBA: FC8
1
2
x16
x8
SW
HL
FH
1
1
x8
x4
SW
HL
LP
BOSS2 card Internal
Storage
1
2
x16
x8
SW
HL
FH
1
1
x8
x4
SW
HL
LP
1G Network
card
NIC: 1Gb
1
2
x16
x8
SW
HL
FH
1
1
x4
x4
SW
HL
LP
1
1
x8
x4
SW
HL
LP
Removing the expansion card riser
Prerequisites
1. Follow the safety guidelines listed in
.
2. Follow the procedure listed in the
Before working inside your system
3.
.
Steps
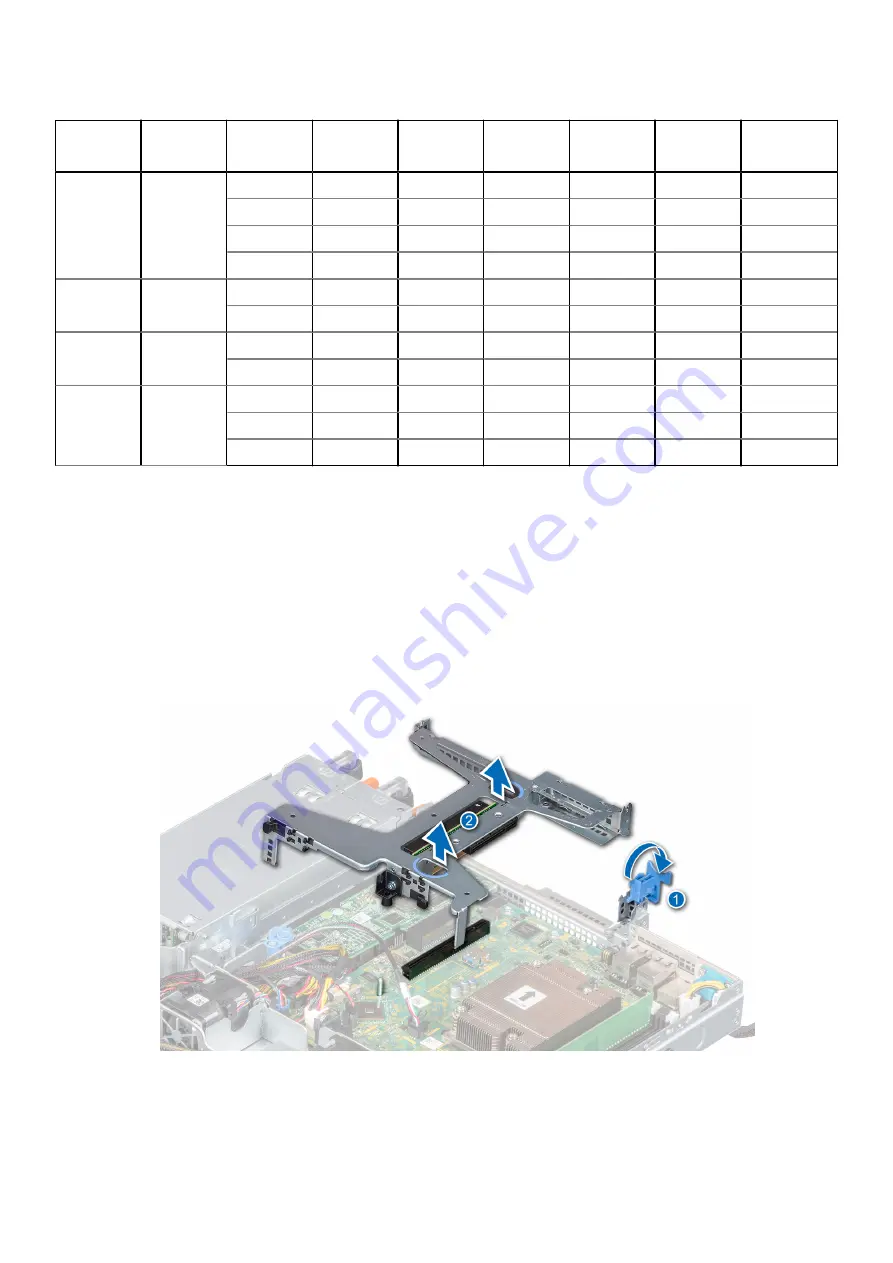
1. Open the blue expansion card riser retention-latch located on the system.
2. Holding the blue touch points, lift the expansion card riser from the system.
Figure 37. Removing the expansion card riser
3. If you are not replacing the expansion card riser, install a expansion card riser filler bracket by performing the following steps:
a. Align the expansion card riser filler bracket with the slot on the system.
Installing and removing system components
41
Содержание EMC PowerEdge R340
Страница 12: ...Figure 9 Jumper settings Figure 10 Memory information 12 Dell EMC PowerEdge R340 system overview ...
Страница 13: ...Figure 11 System information Dell EMC PowerEdge R340 system overview 13 ...
Страница 14: ...Figure 12 Electrical overview 14 Dell EMC PowerEdge R340 system overview ...


