Table 43. Configuration type C2 (continued)
Card Type
Slot priority
Maximum number of cards
Foxconn external adapter
H840
1, 2, 4, 6, 3
5
Foxconn external adapter
HBA355e
1, 2, 4, 6, 3
5
aPERC HBA11 HBA355i
6
1
Removing a expansion card
Prerequisites
1. Follow the safety guidelines listed in
.
2. Follow the procedure that is listed in
Before working inside your system
.
3.
.
Steps
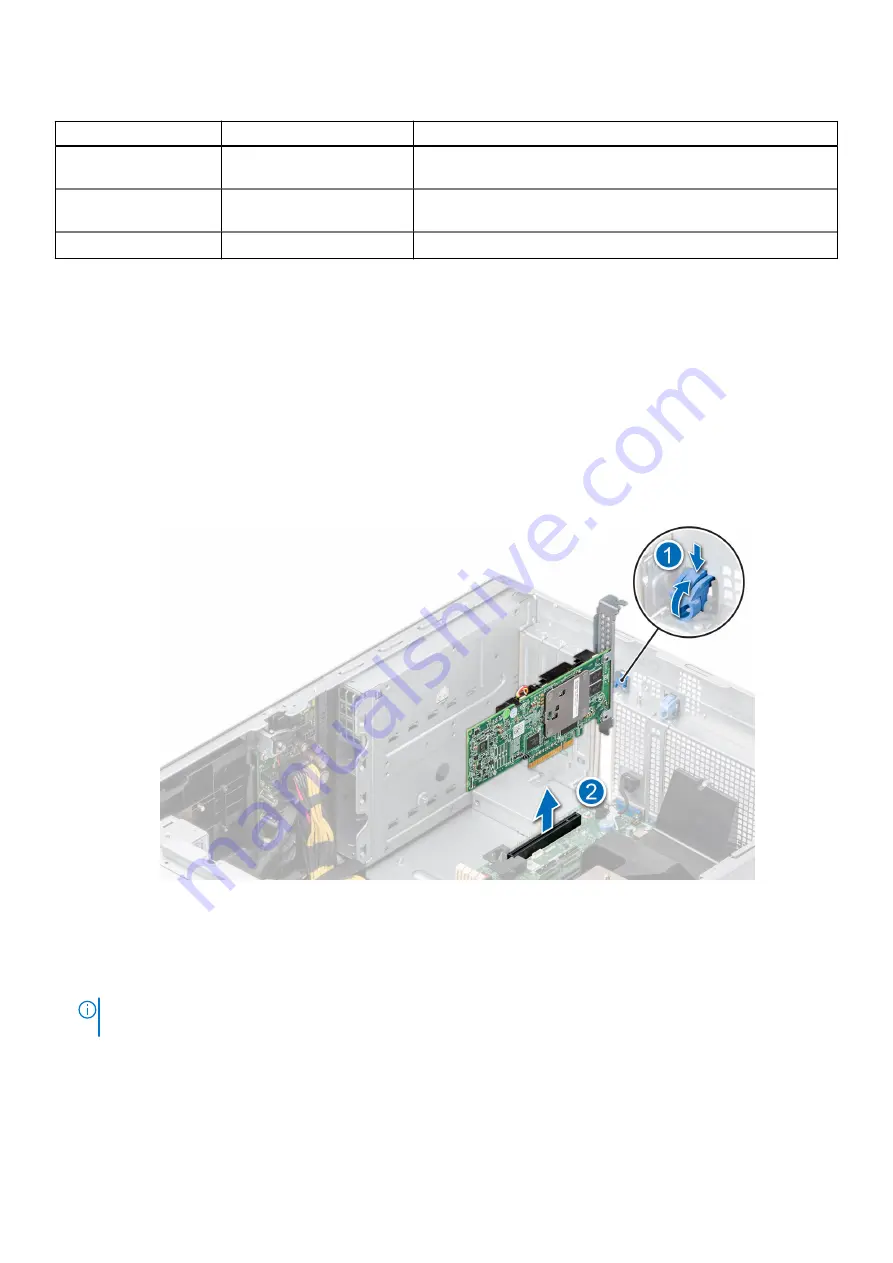
1. Disconnect the cables from the expansion card.
2. Press the expansion card latch and push down the latch to open it.
3. Hold the expansion card by the edge, and pull the card up to remove it from the expansion card connector and the system.
Figure 128. Removing an expansion card
4. Install the filler brackets by performing the following steps:
a. Align the slot on the filler bracket with the tab on the expansion card slot.
b. Press the expansion card latch till the filler bracket locks into place.
NOTE:
Filler brackets must be installed in empty expansion-card slots to maintain FCC certification of the system. The
brackets also keep dust and dirt out of the system and aid in proper cooling and airflow inside the system.
128
Installing and removing system components
Содержание E76S
Страница 7: ...Chapter 9 Documentation resources 186 Contents 7 ...
Страница 24: ...Figure 13 Memory information Figure 14 BOSS S2 module 24 PowerEdge T550 system overview ...
Страница 27: ...Figure 24 GPU PowerEdge T550 system overview 27 ...
Страница 73: ...Figure 66 Removing a drive bay Figure 67 Removing a drive bay Installing and removing system components 73 ...
Страница 75: ...Figure 69 Installing a drive bay Figure 70 Installing a drive bay Installing and removing system components 75 ...


