

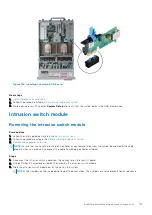

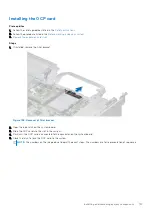

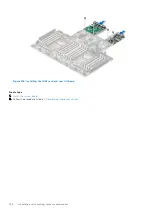

Installing the OCP card
Prerequisites
1. Follow the safety guidelines listed in the
.
2. Follow the procedure listed in the
Before working inside your system
3.
Remove the expansion card riser
.
Steps
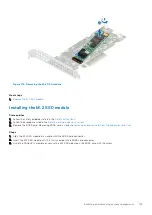
1. If installed, remove the filler bracket.
Figure 138. Removal of filler bracket
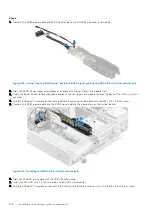
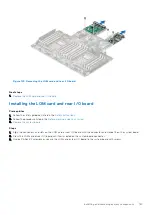
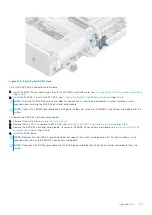
2. Open the blue latch on the system board.
3. Slide the OCP card into the slot in the system.
4. Push until the OCP card is connected to the connector on the system board.
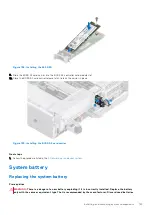
5. Close the latch to lock the OCP card to the system.
NOTE:
The numbers on the image do not depict the exact steps. The numbers are for representation of sequence.
Installing and removing system components
157
Содержание E68S
Страница 19: ...Figure 14 Service information System overview 19 ...
Страница 28: ...Cable routing Figure 18 12x 3 5 inch Figure 19 8 x 3 5 inch 28 Installing and removing system components ...
Страница 30: ...Figure 22 24 x 2 5 inch with NVMe Figure 23 16 x 2 5 inch 30 Installing and removing system components ...
Страница 31: ...Figure 24 8 x 2 5 inch with NVMe Figure 25 8 x 2 5 inch with NVMe Installing and removing system components 31 ...


