


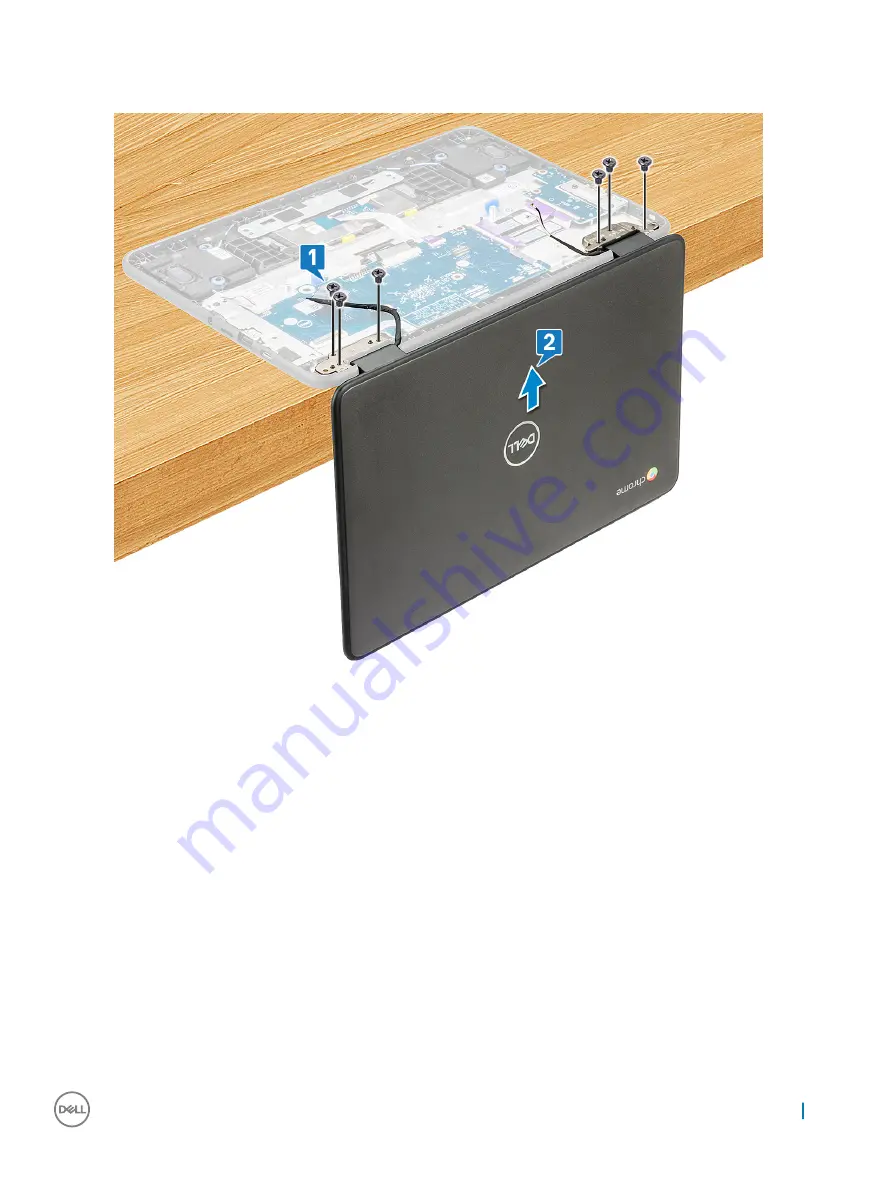
g Place the system in a 90° position on the edge of a plane surface with the display facing down.
h Remove the 6 (M2.5x5) display hinge bracket screws that secure the display assembly to the system [1].
i
Lift the display assembly away from the system [2].
Installing display assembly
1
Place the chassis on the edge of a plane surface.
2
Align the display assembly with the screw holders on the system.
3
Replace the 6 display hinge bracket screws to secure the display assembly to the system.
4
Lift the system and close the display.
5
Connect the eDP cable to the connector on the system board.
6
Affix the adhesive tape to secure the eDP cable to the system.
7
Place the eDP metal bracket to secure the eDP cable.
8
Replace the single screw to secure the eDP bracket to the system.
9
Install the:
a
b
c
10 Follow the procedure in
After working inside your computer
.
Removing and installing components
31
Содержание Chromebook 5190
Страница 1: ...Chromebook 5190 Owners Manual Regulatory Model P28T Regulatory Type P28T001 ...
Страница 11: ...c Lift the base cover away from the system Removing and installing components 11 ...
Страница 16: ...d Lift the speaker away from the system 16 Removing and installing components ...
Страница 30: ...f Turn the system 30 Removing and installing components ...
Страница 33: ...c Pry the edges to release the display bezel from the display assembly Removing and installing components 33 ...
Страница 36: ...d Lift the display panel away from the display assembly 36 Removing and installing components ...
Страница 55: ...Commands Action and Purpose Screenshot Chrome net internals View advanced networking information Software 55 ...
Страница 78: ...2 Click Settings as highlighted from the screenshot below 78 Diagnostic and troubleshooting ...
Страница 79: ...3 Click Show advanced settings to expand the menu Diagnostic and troubleshooting 79 ...
Страница 80: ...4 Click the Powerwash button 80 Diagnostic and troubleshooting ...


