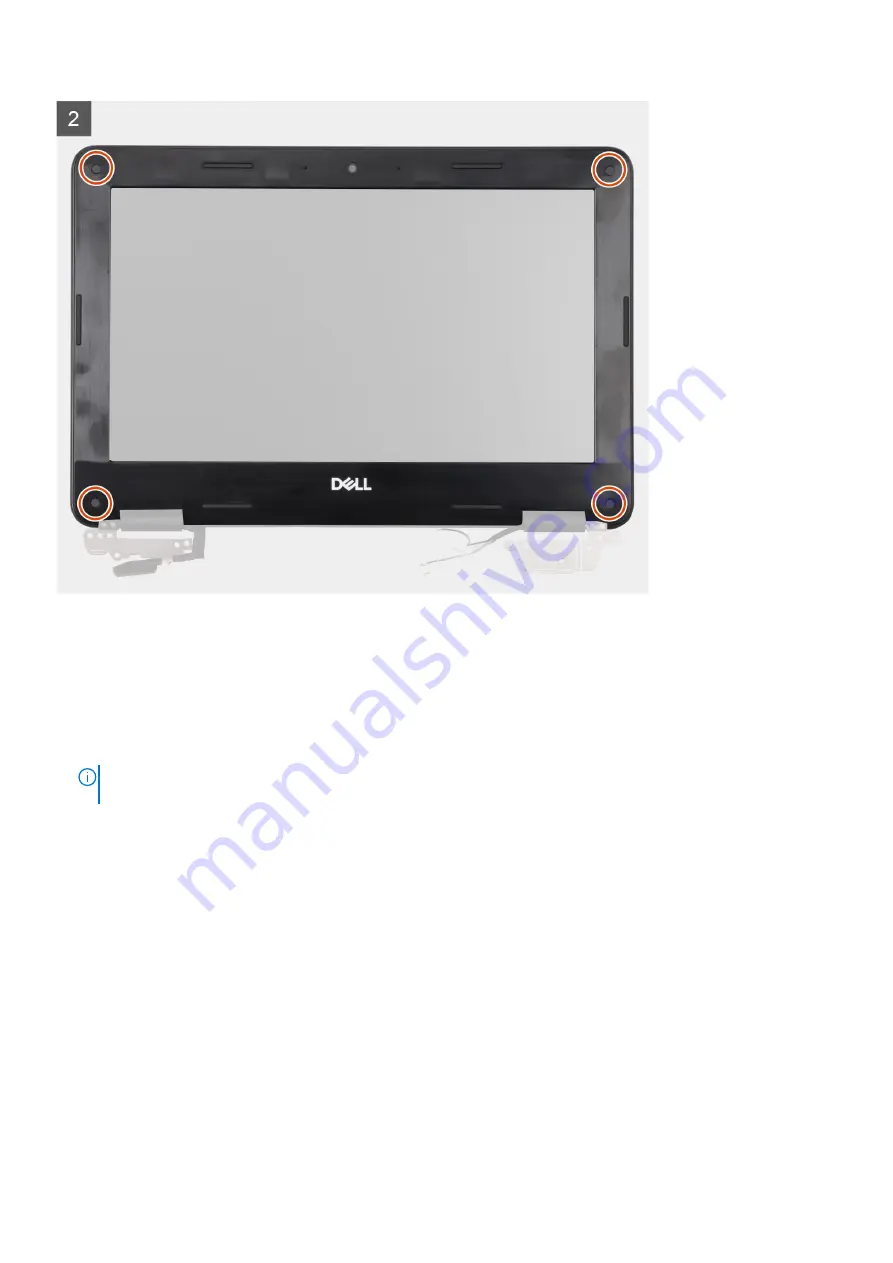
Steps
1. Align and place the display bezel on the display assembly.
2. Starting from the top corner, press on the display bezel and work around the entire bezel until it clicks onto the display
assembly.
3. Press both the hinge caps of the display bezel until it clicks into place.
4. Replace the four screws (M2.5x3.8) to secure the display bezel to the display assembly.
5. Adhere the stickers on the screws that secure the display bezel.
NOTE:
A new set of stickers is included with replacement display bezel. When replacing the new display bezel, adhere
the new stickers over the screws once the screws have been secured.
Next steps
1. Install the
.
2. Install the
for systems enabled with 4G LTE.
3. Install the
.
After working inside your computer
.
Display panel
Removing the display panel
Prerequisites
Before working inside your computer
.
2. Remove the
.
3. Remove the
for systems enabled with 4G LTE.
50
Removing and installing components
Содержание Chromebook 3110
Страница 15: ...Removing and installing components 15 ...
Страница 25: ...Removing and installing components 25 ...
Страница 28: ...28 Removing and installing components ...
Страница 30: ...30 Removing and installing components ...
Страница 33: ...Removing and installing components 33 ...
Страница 37: ...Removing and installing components 37 ...
Страница 44: ...44 Removing and installing components ...
Страница 49: ...Removing and installing components 49 ...
Страница 53: ...Removing and installing components 53 ...
Страница 67: ...Troubleshooting 67 ...


