Keyboard
Dell keyboards have a few extra features to help you browse the web effortlessly and efficiently. The keyboard contains a dedicated
search key and a new row of web shortcut keys. A standard USB Windows keyboard can also be used with the Chromebook, using the
same keyboard shortcuts. The image below shows the keyboard layout.
Keyboard keys function
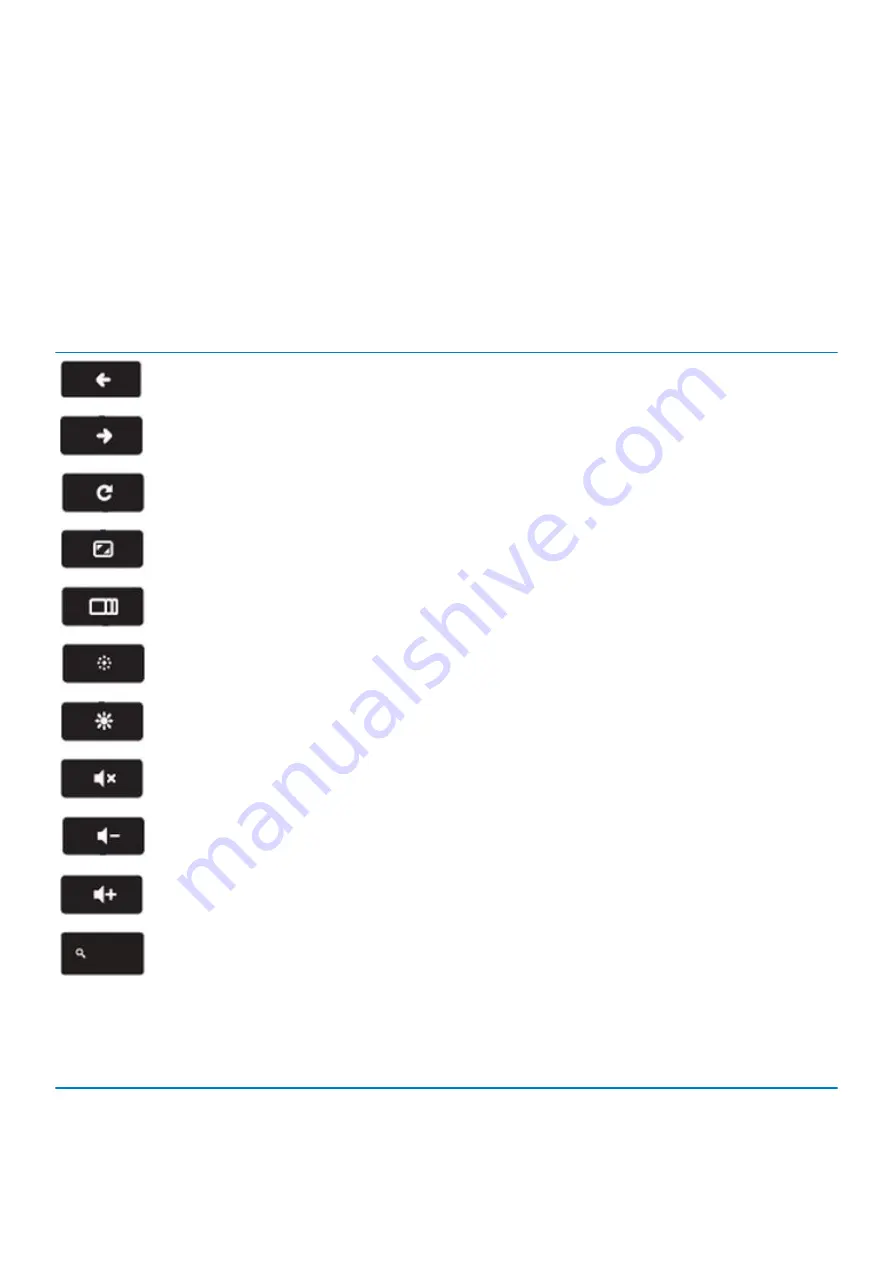
The Chrome device keyboard is designed to help you get to the things you need the most. The table below is an overview of the special
keys on the top row of the keyboard:
Table 2. Special keys
Special keys
Go to the previous page in browser history
Go to the next page in browser history
Reload current page
Enter Immersive mode, which hides the tabs and launcher
Enter Overview mode, which shows all windows
Decrease screen brightness
Increase screen brightness
Mute
Decrease the volume
Increase the volume
Search applications and the web at the same time. On a Chromebook, this key is on the side, where the Caps Lock
key is normally located.
Keyboard shortcut keys
Table 3. Shortcut keys
Shortcut keys
Function
Combination keys
Page up
Press Alt and the up arrow
Technology and components
9
Содержание Chromebook 3100 2-in-1
Страница 1: ...Dell Chromebook 3100 2 in 1 Service Manual Regulatory Model P30T Regulatory Type P30T001 ...
Страница 12: ...Major components of your system 1 Base cover 2 System board 3 12 Major components of your system ...
Страница 16: ...2 Pry the base cover from the edge using a plastic scribe 1 2 16 Removing and Installing ...
Страница 18: ...2 Tighten the nine captive screws to secure the base cover to the computer 18 Removing and Installing ...
Страница 21: ...9 Pry the battery from the bottom edge 1 and remove the battery from the computer 2 Removing and Installing 21 ...
Страница 23: ...3 Replace the three M2 0x4 0 screws to secure the battery to the palmrest 1 Removing and Installing 23 ...
Страница 26: ...5 Lift the speakers away from the computer 26 Removing and Installing ...
Страница 27: ...Installing the speakers Steps 1 Place the speakers into the slots on the computer Removing and Installing 27 ...
Страница 28: ...2 Reroute the speaker cable through the retention clips in the routing channel 28 Removing and Installing ...
Страница 41: ...7 Lift the system board bracket away from the computer Removing and Installing 41 ...
Страница 44: ...3 Place the IO board bracket in its place on the system board 44 Removing and Installing ...
Страница 65: ...Removing and Installing 65 ...
Страница 69: ...3 Reroute the display cable and the rubber stopper back into the hinge cap Removing and Installing 69 ...
Страница 87: ...3 Press CTRL ALT T to open CROSH 4 Type memory_test into CROSH and then press Enter Troubleshooting 87 ...


