background image

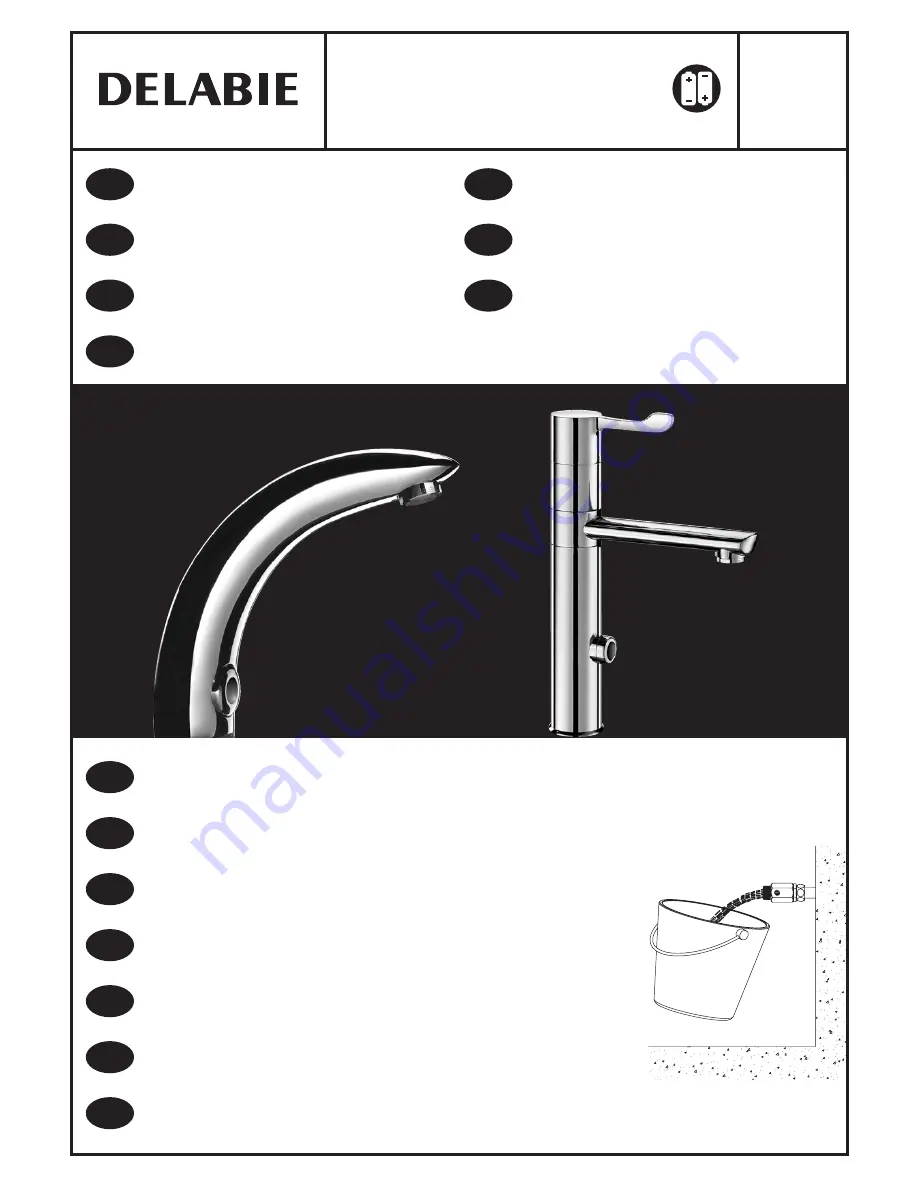
NT 446

Indice G

Robinetterie électronique 

avec alimentation à piles
Battery-operated electronic 

mixer or tap
Sensor-Armatur 

mit Batteriebetrieb
Armatura elektroniczna 

zasilana na baterie

Elektronisch kraanwerk 

met batterijen
Torneira electrónica 

com alimentação por pilhas

Сенсорная арматура 

c питанием от батарей

DE

FR

EN

PL

NL

PT

RU

Purger soigneusement les canalisations  

avant la pose et la mise en service du produit.
Thoroughly flush the pipes to remove any impurities 

before installing and commissioning the product.
Vor Montage und Inbetriebnahme des Produkts 

die Anschlussleitungen regelkonform spülen.
Dokładnie wypłukać instalację przed 

montażem i uruchomieniem produktu.
Spoel zorgvuldig de leidingen alvorens 

tot installatie of ingebruikname van de kraan over te gaan.
Purgar cuidadosamente as canalizações 

antes da colocação e utilização do produto.

Перед установкой и подключением устройства тщательно промыть  

канализационные трубы напором воды.

FR

EN

DE

PL

NL

PT

RU

TEMPOMATIC 

BINOPTIC - 20464

Содержание 20464

Страница 1: ... service du produit Thoroughly flush the pipes to remove any impurities before installing and commissioning the product Vor Montage und Inbetriebnahme des Produkts die Anschlussleitungen regelkonform spülen Dokładnie wypłukać instalację przed montażem i uruchomieniem produktu Spoel zorgvuldig de leidingen alvorens tot installatie of ingebruikname van de kraan over te gaan Purgar cuidadosamente as ...

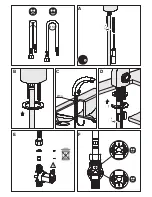
Страница 2: ...A B E F Ø 50 34 Ø C D ...

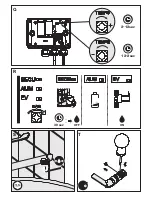
Страница 3: ...5000 G I J K2 K1 H Dessins ...

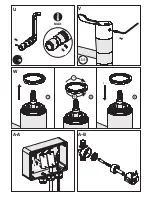
Страница 4: ...N L M P 500 mini O _ ...

Страница 5: ...R Q S T _ ON OFF 2 12sec 12 2sec 30sec ...

Страница 6: ...U V W A A A B MAX _ _ ...

Страница 7: ...ique 1 fig A et B étanche IP65 Modèle sur plage fig A Perçage Ø 34 mm Monter le corps de la robinetterie sur le lavabo et bloquer les écrous 2 sur la bride de fixation Prévoir une étanchéité adaptée entre la robinetterie et le plan de travail en fonction du support de pose Continuer l installation comme indiqué au RACCORDEMENT Modèle sur panneau fig B Perçage Ø 30 mm Monter le détecteur 3 sur le p...

Страница 8: ... la les électrovanne s se ferme nt fig O Raccorder la les électrovanne s à la borne EV dans le boîtier fig D fil s ROUGE S borne EV fil s BLEU S borne EV Mitigeur vérifier périodiquement et aussi souvent que nécessaire l usure du sélecteur de température ainsi que les 2 sièges internes du mitigeur sur lesquels on tourne le sélecteur latéral de température Les remplacer si nécessaire Les clapets an...

Страница 9: ... electronic unit 1 Fig A B Deck mounted model Fig A Drill a Ø 34mm hole Mount the mixer tap body onto the washbasin and tighten the two screws 2 onto the fixing flange Ensure a suitable waterproof seal between the mixer and the work plan appropriate to the type of installation Complete the installation as shown in the CONNECTION section Panel mounted model Fig B Drill a hole Ø 30mm Mount the senso...

Страница 10: ...close Fig O Connect the solenoid valve s to the EV terminal in the electronic unit Fig D RED wire s EV terminal BLUE wire s EV terminal Mixer regularly check as often as necessary the temperature selector and the mixer s two internal seats on which the side temperature selector turns Replace as necessary The non return valves should be checked at least once a year Beware do not grease the inside o...

Страница 11: ...ktronik Box Für eine hohe Batterielebensdauer sollte die Umgebungstemperatur 5 C sein Wassergeschützte Elektronik Box 1 Abb A und B IP65 Modell für Standmontage Abb A Hahnlochbohrung Ø 34 mm Armaturenkörper auf dem Waschtisch montieren und die Muttern 2 auf dem Befestigungsflansch festziehen Bei unebener Oberfläche geeignete Abdichtung verwenden Mit der Installation wie im Abschnitt ANSCHLUSS besc...

Страница 12: ...rähte 26 an die Klemme anschließen Schließen des der Magnetventil e Abb O Magnetventil e an die Klemme EV in der Elektronik Box anschließen Abb D ROTE R Draht Drähte Klemme EV BLAUE R Draht Drähte Klemme EV Mischbatterie Abnutzung des Temperatur Mischhebels und die beiden inneren Ventilsitze regelmäßig so oft wie nötig überprüfen Diese falls nötig ersetzen Die Rückflussverhinderer müssen mindesten...

Страница 13: ...erii temperatura musi wynosić 5 C Wodoszczelna skrzynka elektroniczna IP65 1 rys A i B Model stojący rys A Otwór Ø34 mm Zamocować korpus na umywalce i dokręcić nakrętki 2 do kołnierza mocującego Należy przewidzieć odpowiednie uszczelnienia między armaturą a materiałem na którym jest instalowana Kontynuować instalację jak jest wskazane w paragrafie PODŁĄCZENIE Model na płycie rys B Otwór Ø30 mm Zam...

Страница 14: ...o gniazdka elektrozawór ory zamyka ją się rys O Podłączyć elektrozawór ory do gniazdka EV w skrzynce rys D kabel le CZERWONY E gniazdko EV kabel le NIEBIESKI E gniazdko EV Bateria sprawdzać okresowo i jak tylko jest to konieczne zużycie dźwigni do zmiany temperatury oraz 2 uszczelki O ring na których obraca się dźwignia Wymienić je w razie potrzeby Zawory zwrotne muszą być sprawdzane przynajmniej ...

Страница 15: ...B IP65 Model voor bladmontage fig A Boring Ø 34 mm Monteer het kraanlichaam op de wastafel en zet de 2 moeren 2 vast op de bevestigingsflens Zorg voor een geschikte afdichting tussen de kraan en het werkblad afhankelijk van het type ondersteuning Werk de installatie af zoals beschreven in AANSLUITING Model op paneel fig B Boring Ø 30 mm Monteer de detectie 3 op het paneel ongeveer 50 mm boven de b...

Страница 16: ...lauwe draad en 26 op de klem het de elektroventiel en wordt worden gesloten fig O Het de elektroventiel en opnieuw aansluiten op de klem EV in de sturing fig D RODE draad en klem EV BLAUWE draad en klem EV Mengkraan controleer regelmatig en zo vaak als nodig de slijtage van de temperatuur selectieknop alsook de 2 interne zittingen van de mengkraan waarop de mengsleutel draait Vervangen indien nodi...

Страница 17: ... Para boa conservação das pilhas a temperatura ambiente deve ser 5ºC Módulo electrónico 1 fig A e B estanque IP65 Modelo de bancada fig A Furação Ø 34 mm Montar o corpo da torneira no lavatório e bloquear as porcas 2 no suporte de fixação Prever uma estanquicidade adaptada entre a torneira e o plano de trabalho em função do suporte de colocação Continuar a instalação como indicado em LIGAÇÃO Model...

Страница 18: ...gar a s electroválvula s ao borne EV no módulo fig D fio s VERMELHO S borne EV fio s AZUL S borne EV Misturadora verificar periodicamente e assim que necessário o desgaste do selector de temperatura assim como as 2 sedes internas da misturadora nas quais se faz girar o selector lateral de temperatura Substituir se necessário As válvulas anti retorno devem ser verificadas pelo menos uma vez por ano...

Страница 19: ...рей окружающая температура должна быть 5 С Герметичный электронный блок IP65 1 схемы A и B Модель на горизонтальную поверхность Схема A Отверстие Ø 34 мм Монтировать корпус крана на раковину и затянуть гайки 2 на закрепляющий фланец Обеспечить герметичность между сантехникой и рабочей плоскостью в зависимости от опорной поверхности Продолжить установку как указано в ПОДКЛЮЧЕНИЕ Модель с установкой...

Страница 20: ...коннектору EV на блоке схема D КРАСНЫЙ ЫЕ провод а коннектор EV СИНИЙ ИЕ провод а коннектор EV Смеситель периодически и так часто как необходимо проверять износ селектора температуры и 2 внутренних седел смесителя на которых поворачивается ключ смешивания Заменять их при необходимости Обратные клапаны должны проверяться минимум раз в год ВНИМАНИЕ Никогда не смазывать механизм изнутри УХОД И ЧИСТКА...

Отзывы: