Figure 1T
1V
Figure 1U
Detail 1V
Figure 1W
Page 24
MobileTrak5 Manual End Panel Installation
Instructions
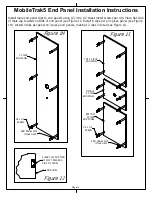
1/4-20 T-NUT
END PANEL
PRE-DRILLED HOLES
END PANEL WITH
T-NUTS INSTALLED
BE SURE TO ALIGN
BOTTOM OF PANEL
WITH BOTTOM OF
CARRIAGE.
1/4-20 T-NUT
(THREADED INSERT)
CLEARANCE HOLE
(DRILLED ON SITE)
#8 x 1/2 WOOD SCREW
(MINIMUM OF 8 PER
END PANEL)
1/4-20 x 1/2" ALLEN CAP SCREW
PULL HANDLE
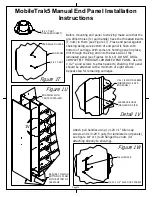
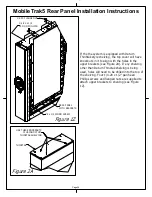
Before mounting end panel to shelving make sure that the
pre-drilled holes (for pull handle) have the threaded inserts
(T-nuts) in them (see Figure 1T). Place end panel against
shelving being sure bottom of end panel is flush with
bottom of carriage. With someone holding panel in place,
drill through shelving and into the back side of the
laminated panel (see Figures 1U & 1V). DO NOT DRILL
COMPLETELY THROUGH LAMINATED END PANEL. Use #8
x 1/2" wood screws to attach panel to shelving. End panel
should be attached with a minimum of eight screws.
Repeat step for remaining carriages.
Attach pull handles using 1/4-20 x 1" Allen cap
screws and 1/4-20 T-nuts (for laminated end panels),
see figure 1W or 1/4-20 flanged hex nuts (for
attaching directly to shelving).
Содержание MobileTrak5
Страница 7: ...THIS PAGE INTENTIONALLY LEFT BLANK Page 7 MobileTrak5 Installation Instructions ...
Страница 18: ...MobileTrak5 Installation Instructions THIS PAGE INTENTIONALLY LEFT BLANK Page 18 ...
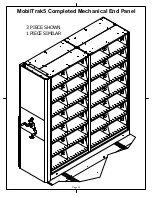
Страница 22: ...MobilTrak5 Completed Mechanical End Panel Page 22 3 PIECE SHOWN 1 PIECE SIMILAR ...
Страница 23: ...Page 23 MobileTrak5 Installation Instructions THIS PAGE INTENTIONALLY LEFT BLANK ...

