37
5.
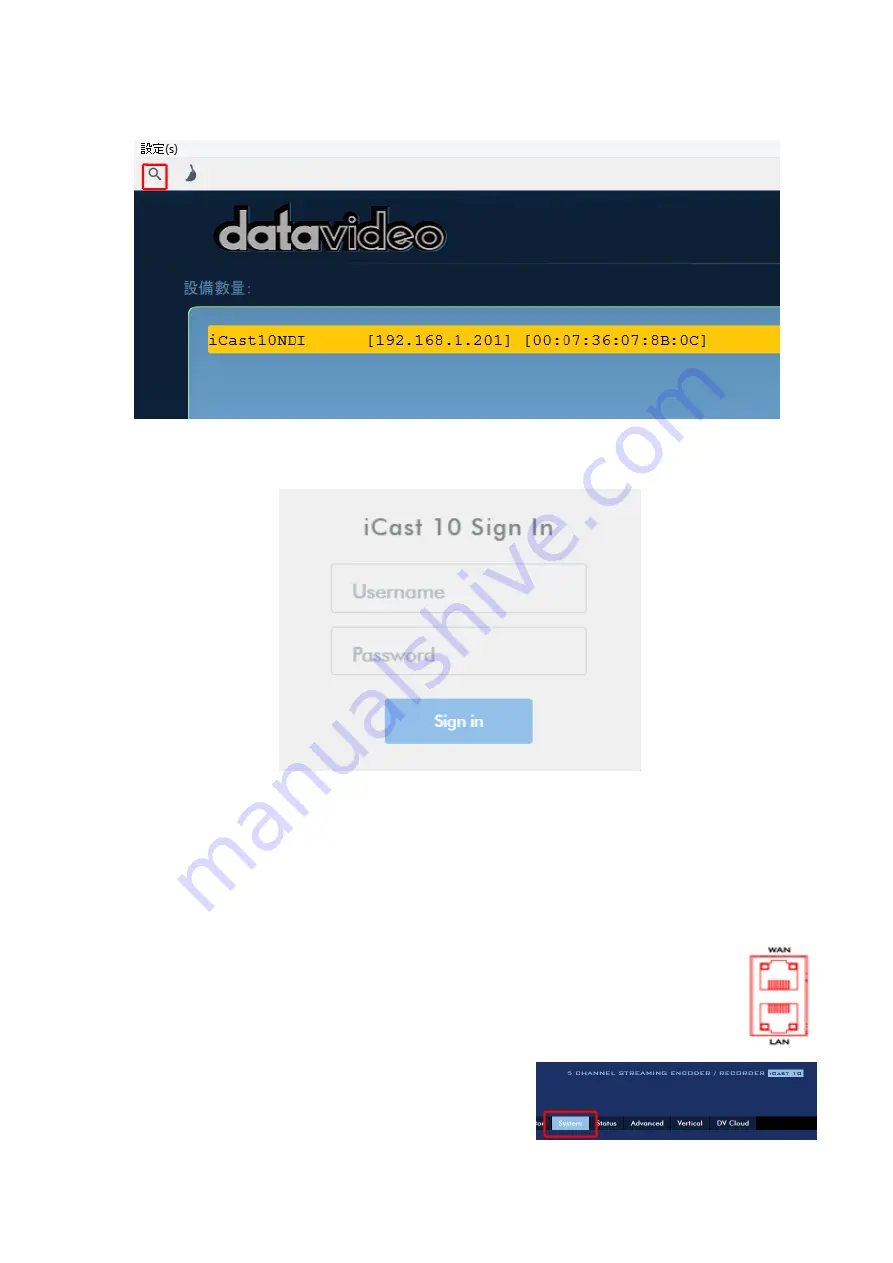
Click the SCAN icon at the top left corner to start searching for the connected iCast 10NDI.
6.
Manually enter the iCast 10NDI’s IP address
into the address bar of a browser on your PC
then hit the ENTER button.
7.
Enter the login credentials (Username: admin/Password: 000000) to log in to the web UI.
Connecting to a NON-DHCP Network (Static IP)
Upon connection to a non-DHCP network, the iCast 10NDI will not be assigned of any IP address. As
such it is recommended that you manually assign a fixed IP address to the device or use the default IP
address (192.168.1.201).
To configure the iCast 10NDI from DHCP to a static IP, please follow the steps outlined below:
1.
Connect the iCast 10NDI’s LAN or WAN port to the network via an Ethernet cable.
2.
Turn on the iCast 10NDI’s power and the device should be turned ON in DHCP.
3.
Search for the iCast 10NDI device according to the method as detailed in the previous DHCP
section. Once found, log in to the user interface on the web browser.
4.
Open the system page by clicking the “System” tab on the
home of the user interface.
5.
In the “Network Setting” pane, disable the DHCP mode.
Содержание iCast 10NDI
Страница 1: ...1 STREAMING SWITCHER 5 CHANNEL ALL IN ONE iCast 10NDI Instruction Manual...
Страница 10: ...10 1 2 System Diagram...
Страница 11: ...11...
Страница 35: ...35 7 Enter the login credentials Username admin Password 000000 to log in to the web UI shown below...
Страница 60: ...60 5 7 Multiview Connect an HDMI monitor to the Multiview port then select a layout for the Multiview screen...
Страница 73: ...73...
Страница 91: ...91 Appendix 4 Dimensions All measurements in millimeters mm...
Страница 94: ...94 Notes...
Страница 95: ...95 Notes...


