45
4.3
Example Setup
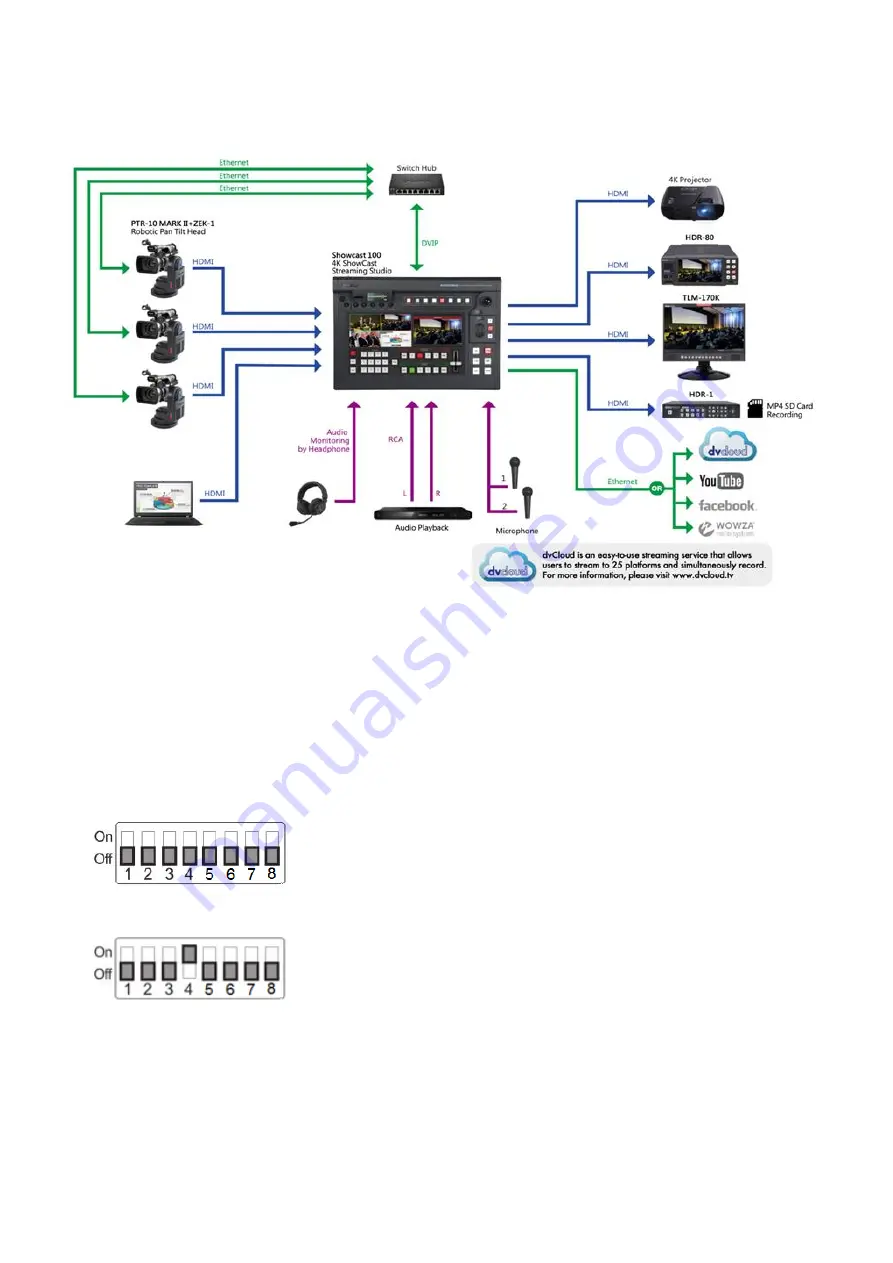
See the diagram below for an example system setup using DVIP.
For illustrative purposes, we use PTR-10 MARK II in the above system setup. Follow the steps outlined
below to initially configure the PTR-10 MARK II before moving it to an existing DHCP / LAN network.
1.
First download the DVIP Configuration Tool from the product page to the PC and install it.
2.
The PTR-10 MARK II usually has a default static IP address of 192.168.100.XXX. Using an RJ-45
Ethernet cable, connect the DVIP port of your PTR-10 MARK II to the PC assigned of an IP address
with the same first three octets as the unit’s default IP address.
3.
Locate the DIP switch on your PTR-10 MARK II.
4.
Set DIP Switch position 4 to ON.
5.
On the PTR-10 MARK II, follow the OSD menu path Remote Control
Set DVIP
DVIP BAUD Rate
and set DVIP baud rate to 115200.
6.
Open the DVIP Configuration Tool on the PC.
7.
At the startup screen, select your network interface card and click “OK”.
Содержание 4K ShowCast STUDIO
Страница 1: ...1 4K ShowCast STUDIO ShowCast 100 Instruction Manual...
Страница 11: ...11 1 2 System Diagram...
Страница 12: ...12...
Страница 21: ...21...
Страница 73: ...73...
Страница 94: ...94 Appendix 6 Dimensions All measurements in millimeters mm...


