background image

DI-789 Hardware Manual

Installation

12

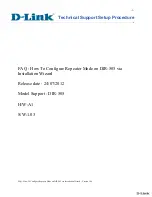
may be installed in a single daisy chain. Each device may be 100 meters apart. Use the illustration below for ref-
erence.

Note: DO NOT connect the Expansion port on the last product in the chain back to your network or PC. These Ether-
net products use an Ethernet switch. Looping any Ethernet switch will cause your network or PC to crash.

Use the TCP/IP Manager to run W

IN

D

AQ

 Acquisition Software (see “TCP/IP Manager” on page 13) and manage IP 

addresses in your synchronous chain. The DI-789 does not acquire any data.

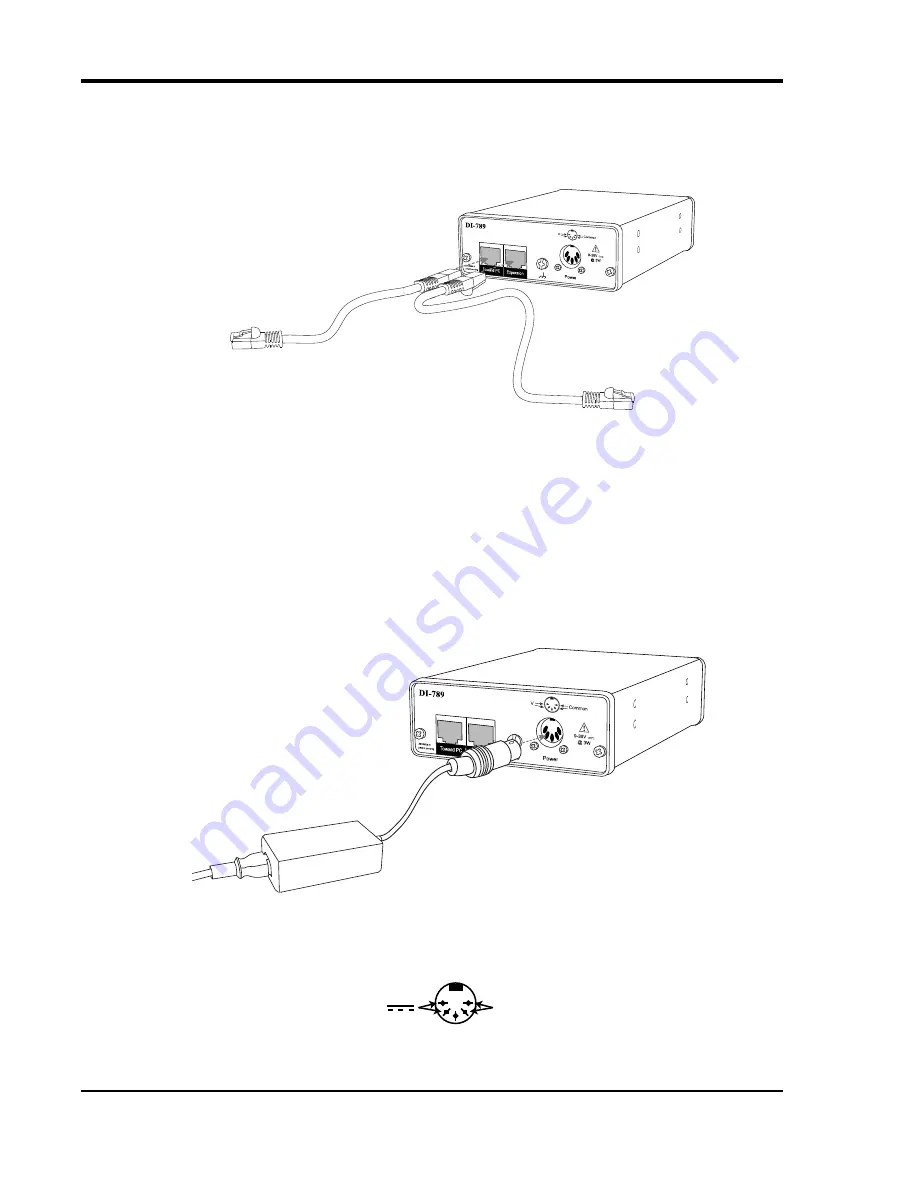
Applying Power to the Instrument

Once you have installed the software, use the following procedure to apply power to your DI-789 instrument:

1.

Plug the five-pin DIN end of the power adapter cable into the five-pin jack labeled POWER on the rear panel of 
the instrument.

2.

Plug the appropriate end of the supplied power cord into the power adapter and the other end into any standard 
120VAC, 60Hz, single-phase outlet. If an alternate power source is to be used, refer to the following pin-out dia-
gram for power requirements:

When power is properly applied, the power LED on the front of the instrument will glow green.

CAT-5 Ethernet Cables

(each cable can be up 

to 100 meters long)

Connect to 

Expansion 

port

on previous DI-720/730 or to 

the Ethernet port on your PC 

or Network (up to 100 meters)

Connect to 

Toward PC

port on next DI-720/730

(up to 100 meters)

Power Adapter 

To power supply (outlet)

Power Adapter Cable

+9 to +36 V

Common

Содержание Ethernet DI-789

Страница 1: ...ical manual or otherwise without expressed written authorization from the com pany The distribution of this material outside the company may occur only as authorized by the company in writing DATAQ In...

Страница 2: ......

Страница 3: ...products that have been repaired or altered by persons other than DATAQ Instru ments employees or products that have been subjected to misuse neglect improper installation or accident DATAQ Instrument...

Страница 4: ......

Страница 5: ...Hub Switch 5 Installing a DI 789 to a Synchronous chain on network without a DHCP server 8 Installing a DI 789 to a Synchronous Chain on a network with a DHCP Server 9 Installing Software 10 Connecti...

Страница 6: ......

Страница 7: ...to setup DI 789 instruments is included with purchase TCP IP Manager The DATAQ Instruments TCP IP Manager allows you to effectively manage and run multiple DI 72x 730 78x instru ments installed or con...

Страница 8: ......

Страница 9: ...hernet activity LED green Downstream Ethernet activity LED green Lost Synchronization LED red Rear Panel none Power Voltage Range 9 36 VDC Power Requirements 5 Watts Environmental Operating Temperatur...

Страница 10: ......

Страница 11: ...9 to a Synchronous Chain that is Directly Connected to your PC or Connected via a Hub Switch Installation of an Ethernet Synchronous chain of devices directly connected to the network card on your com...

Страница 12: ...n 4 Select Internet Protocol TCP IP in the This connection uses the following items window and click on the Properties button 5 Click on the General tab 6 Select the radio button Use the following IP...

Страница 13: ...connect your PC to a network or router you should change the TCP IP proper ties back to their original state 10 Install WINDAQ software see Installing Software on page 10 11 Run the TCP IP Manager sof...

Страница 14: ...s could instead be routers with DHCP turned off i e a static IP assigned network Contact your system admin istrator for details about your network 1 Have the system administrator designate an IP addre...

Страница 15: ...gned automatically by a DHCP server or router you will need to change the device settings using the Dataq TCP IP Manager See the Dataq Instruments TCP IP Manager help file for complete details Install...

Страница 16: ...OK 7 The Welcome dialog box allows you to cancel the installation Click OK to continue installation or Cancel to abort 8 Read through the Software License agreement carefully and either Accept and Co...

Страница 17: ...ynchronous distributed data acquisition system Any combination of multiple DI 789s or Synchronous Ethernet instruments may be placed in the same daisy chain To maintain synchronicity Ethernet hubs and...

Страница 18: ...g procedure to apply power to your DI 789 instrument 1 Plug the five pin DIN end of the power adapter cable into the five pin jack labeled POWER on the rear panel of the instrument 2 Plug the appropri...

Страница 19: ...ch daisy chain Each Synced Group is named using the first device in the chain in parentheses Use the drop down command menu to change the description of a device All commands are performed by first se...

Страница 20: ......

Страница 21: ...ity The Ethernet Activity LEDs Toward PC and Expansion correspond with the Ethernet ports on the rear of the instrument Sync Lost LED This LED will glow red when the unit is inside a chain of Ethernet...

Страница 22: ...th the included power adapter or you can use an appropriate alternate source use the following diagram for pin out If power is on the Power LED on the front panel of the instrument will be on Ground L...

Отзывы: