


INSTALLATION
5
2
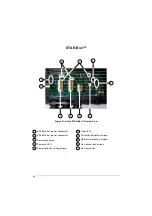
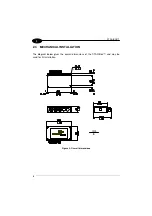
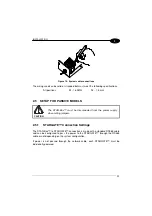
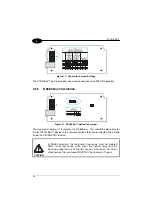
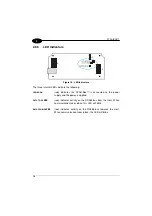
STAR-Box™ can be installed by physically mounting it to a wall or panel using either
the adhesive strips or screws and dowels provided. The two screw holes inside the
housing of the STAR-Box™ are for mechanical fixture (Figure 3).
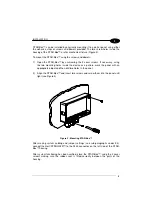
To mount the STAR-Box™ using the screws and dowels:
1) Open the STAR-Box™ by unscrewing the 4 cover screws. If necessary, using
the two mounting holes inside the device as a pattern, mark the panel with an
appropriate object and then drill two holes in the panel.
2) Align the STAR-Box™ and insert two screws and screw them into the panel until
tight (see Figure 3).
Figure 3 - Mounting STAR-Box™
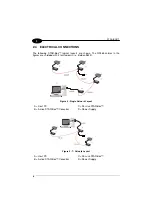
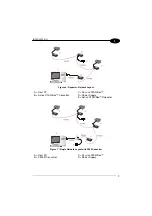
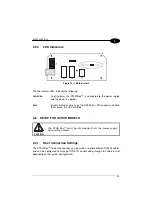
After making system cabling and jumper settings (see sub-paragraphs under 2.4),
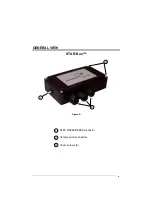
connect the Host/STARGATE™ to the RJ45 connector on the left side of the STAR-
Box™ housing.
After system functioning has been verified, close the STAR-Box™ using the 4 cover
screws making sure the rubber seal is fitted correctly between the parts of the
housing.
Содержание STAR-Box
Страница 1: ...STAR Box Installation Manual ...
Страница 2: ......
Страница 3: ...STAR Box INSTALLATION MANUAL ...