DV9500
38
3
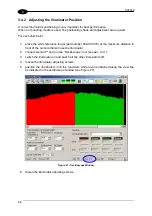
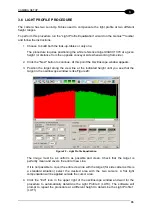
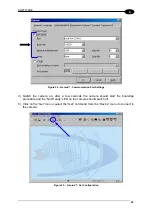
If the target image doesn't cover the entire View Line, it is possible to limit the working area
moving the cursors which appear as blue and yellow lines at the extremes of the target (see
Figure 32).
Click the "Exit" icon in the upper right of the oscilloscope window and wait for the procedure
to automatically determine the optimal focus and sensitivity values.
Repeat this procedure for each height requested by the procedure, progressively moving the
target placed on the AST-9000 up to the last requested height.
At the end, the procedure will ask confirmation to save the acquired data.
3.8 POSITION PARAMETERS FINE-TUNING
This procedure allows the fine-tuning of the most important position parameters.
In particular it allows verifying:
- Optics \ ViewAngle
- Sensors \ Position sensor \ Distance
- Sensors \ Position sensor \ Angle
- Sensors \ Trigger source \ Distance
This test requires the acquisition of one or more package images. If a Datalogic decoder is
used, you can run the decoding program SDView to get these images (for more details refer
to the DD9500 Installation Manual).
CAUTION
The precision of this procedure increases as the conveyor speed
decreases.
If the conveyor speed can’t be reduced, run many packages and get an
average of each measurement.
1. If the “Optics \ Camera position” includes FRONT or BACK, change this parameter to the
nearest position between LEFT, RIGHT, TOP or BOTTOM. (without front/back).
2. Set “Acquisition \ Start margin” and “Acquisition \ Stop margin” to 0.
3. Evaluate ‘reasonable’ values for the parameters to be checked and set them on the
camera.
4. Run the “Test” wizard and select the "PS-HS distance check" page.
5. Run the conveyor and acquire one or more packages. The packages should be perfectly
justified. If “Sensors \ Position sensor \ Angle” is not 0, and should be evaluated, large
packages should be preferred.
The wizard measures “Sensors \ Position sensor \ Distance” and “Sensors \ Position
sensor \ Angle” supposing that “Sensors \ Trigger source \ Distance” is correct.
If these values are different from the ones set on the camera, insert them in the camera
and apply the change.
From this point on, all changes applied to “Sensors \ Trigger source \ Distance” must be
applied also to “Sensors \ Position sensor \ Distance”.
6. Run SDView and activate the “Conveyor view” window. When SdView is not used an
equivalent window is usually available on the decoder.
Содержание DV9500 Series
Страница 1: ...DV9500 Installation Manual ...
Страница 2: ......
Страница 3: ...DV9500 Series Installation Manual ...

