


E-GENIUS
84
AV500 2D CAMERA
E-GENIUS BASICS
e-Genius Menu Tree
The functions that you can select are displayed in a menu tree on the left–hand side of
e-Genius
. The function list is organized much like the hierarchy of a file system, where
you can expand items that are preceded by a box (
) to further sub–levels until you
find a function of interest.
Sub–levels appear indented below the items from which they are expanded. Clicking
the box again collapses that branch of the menu. You can expand no further when an
item is not preceded by a box.
The
e-Genius
menu tree appears with no items expanded. Click the folders to display
the active window for the setup function and/or expand the folders to view any addi
‐
tional setup features.
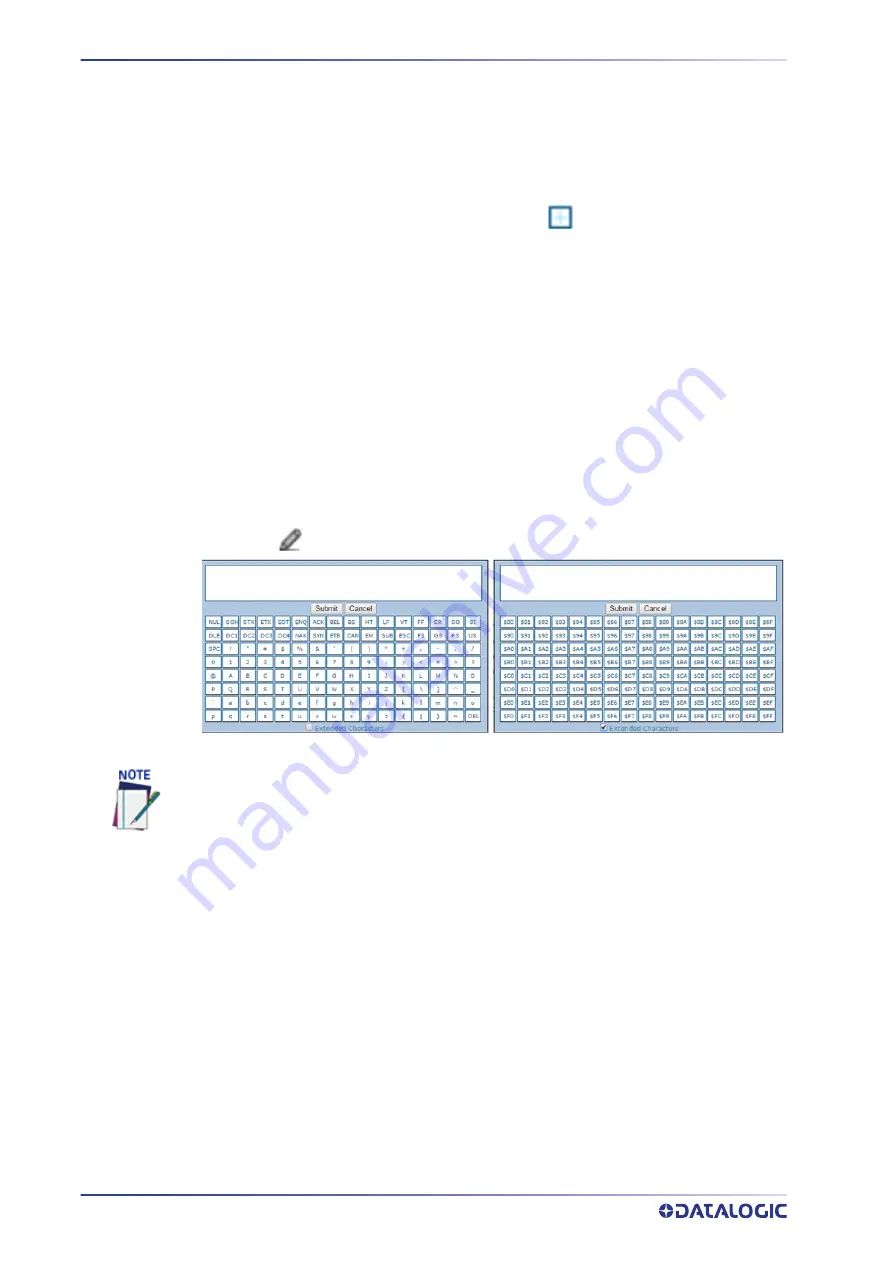
The Text Entry Tool
In cases where text needs to be entered to create message headers, trailer, custom mes
‐
sages, or for other reasons, the
Text Entry Tool
pencil icon will be displayed.
1. Click
to open the Text Entry Tool.
You can enter text in the text field by typing, or click on the character buttons to create
your message. Select the
Extended Characters
check box to reveal a new set of control
characters.
Click
Submit
to save your text to the origin window text field, or click
Cancel
to return to
origin window without transferring text.
Getting Help
e-Genius
provides complete online help (this document).
To access the complete help system:
1. Select
Utilities | Help
in the
e-Genius
menu tree. The help
Welcome
window
appears. The
Welcome
page provides important product information as well as
three ways to find specific help information:
Contents
and
Search.
The Text Entry Tool is needed to enter unprintable characters or characters that cannot be
typed. For example, <CR> is a single character presented as a string for easier reading. The
character must be entered with the Text Entry Tool, if typed normally it will be recognized as
a string and not as a single character.
Содержание AV500
Страница 1: ...AV500 PRODUCT REFERENCE GUIDE 2D CAMERA...
Страница 53: ...MOUNTING PRODUCT REFERENCE GUIDE 33...
Страница 73: ...CBX510 CONNECTION BOX PRODUCT REFERENCE GUIDE 53 Photoelectric Sensor to CBX510 NPN...
Страница 74: ...ELECTRICAL INSTALLATION 54 AV500 2D CAMERA Photoelectric Sensor to CBX510 PNP...
Страница 84: ...ELECTRICAL INSTALLATION 64 AV500 2D CAMERA Photoelectric Sensor to CBX100 and CBX800 NPN...
Страница 86: ...ELECTRICAL INSTALLATION 66 AV500 2D CAMERA...
Страница 91: ...FOCUSING DEVICE WIRING PRODUCT REFERENCE GUIDE 71 Unpowered Outputs...
Страница 113: ...OPERATING MODE PRODUCT REFERENCE GUIDE 93...
Страница 203: ...PRODUCT REFERENCE GUIDE 183 12 Click Next Step and the following screen appears...
Страница 205: ...PRODUCT REFERENCE GUIDE 185...
Страница 218: ...E GENIUS 198 AV500 2D CAMERA...
Страница 230: ...E GENIUS 210 AV500 2D CAMERA...
Страница 231: ...PRODUCT REFERENCE GUIDE 211...
Страница 234: ...E GENIUS 214 AV500 2D CAMERA...
Страница 241: ...PRODUCT REFERENCE GUIDE 221 Click on Diagnostic Messages and a Diagnostic Messages window opens...
Страница 249: ...PRODUCT REFERENCE GUIDE 229...
Страница 253: ...PRODUCT REFERENCE GUIDE 233...
Страница 260: ...E GENIUS 240 AV500 2D CAMERA...
Страница 263: ...PRODUCT REFERENCE GUIDE 243 4 Select Auto Learn from the drop down and the following auto learn options appear...
Страница 266: ...E GENIUS 246 AV500 2D CAMERA...
Страница 299: ...AV500 CALIBRATION PRODUCT REFERENCE GUIDE 279...
Страница 321: ...NOTES...
Страница 322: ...NOTES...
Страница 323: ...NOTES...


