


6
Changing the frequency of the transmitter
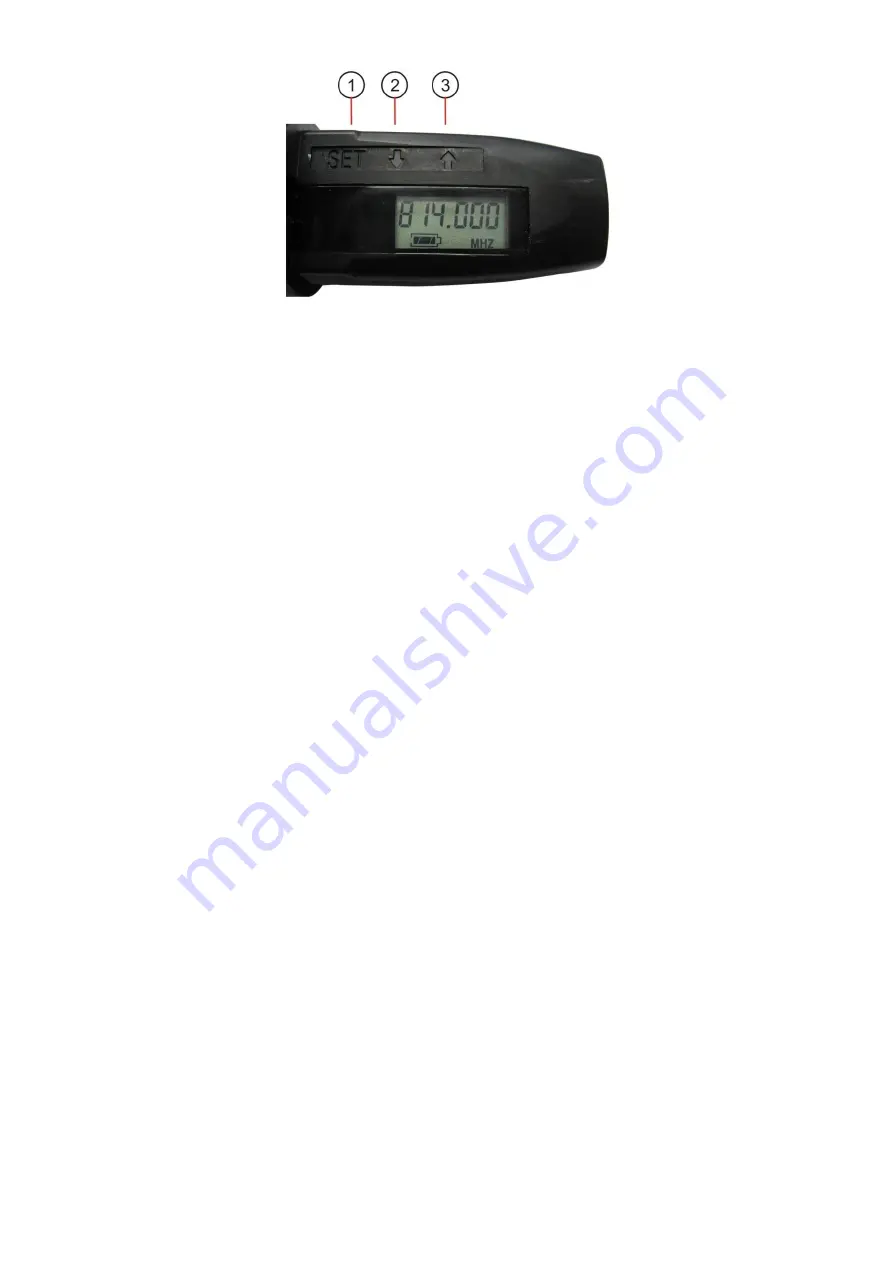
1)
Press and hold the
set(1)
button for 3 seconds. The display shows FREQUE. After a second, the display
shows the actual frequency while the MHz symbol blinks.
2)
Use the
up(3)
and
down(2)
buttons to select the desired frequency.
3)
Press the
set(1)
button again to store the setting. The display will briefly show STORE. Now the setting is
stored in memory.
Changing the sensitivity of the microphone
1)
Press and hold the
set(1)
button for 3 seconds. The display shows FREQUE. After a second, the display
shows the actual frequency while the MHz symbol blinks.
2)
Tap the
set(1)
button until the display shows SENSIT.
2)
Use the
up(3)
and
down(2)
buttons to select the sensitivity.
3)
Press the
set(1)
button again to store the setting. The display will briefly show STORE. Now the setting is
stored in memory.
Locking the EM-193B
The EM-193B has a locking function. When activated, the locking function blocks all keys so you can’t
accidentally switch the EB-16 off or change the frequency while performing.
1)
Press and hold the
set(1)
button for 3 seconds. The display shows FREQUE.
2)
Tap the
set(1)
button until the display shows LOC OFF.
3)
Press the
up(3)
button to turn the lock function on.
4)
Press the
set(1)
button again. The display will briefly show STORE. Now the setting is stored in memory.
Unlocking the EM-193B
1)
Press and hold the
set(1)
button for 3 seconds. The display shows FREQUE.
2)
Tap the
set(1)
button again until the display shows LOC ON.
3)
Press the
down(2)
button to turn the lock function on.
4)
Press the
set(1)
button again. The display will briefly show STORE. Now the setting is stored in memory.
Tips for achieving maximum performance.
Make sure you can always see a receiver antenna from the transmitter position.
Keep the distance from transmitter to receiver antenna as short as possible.
Point the receiver antennas away from each other at 45 degrees angle from vertical position.
Avoid placing the receiver antennas near metal surfaces and obstructions.
Replace battery as soon as low battery LED lights.
If stacking or rack mounting receivers in a multiple system setup. Do not allow antennas to cross.
Perform a walk-through before performance or presentation. If dead spots are found, adjust the
location of the receiver. If dead spots remain, mark the dead spots and avoid them.
Содержание EM-193B
Страница 13: ...2014 DapAudio...