


Page 36 of 65
NAVTEX TESTS
In the NAVTEX test mode, the test box can send NAVTEX messages on 490 kHz, 518 kHz or
4209.5 kHz to a NAVTEX receiver in order to check the receiver/printer.
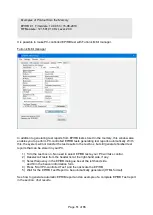
Set Number
As you may wish to test several NAVTEX receivers, each receiver can be given its own
individual set number for recognition. Default number is 1. Press
“OK”
to confirm or press
↑ or
↓
to change to another number. Then, press
“OK”
and go to the test.
Connect the wire antenna supplied with the test box to RF OUT and use this setup:
If the signal is not strong enough to enable the test, you may connect the RF Amplifier (optional
accessory) as shown below.
1) In the
Send
mode, select frequency and press
“OK”
.
2a) Select
“Carr”
To send the un-modulated carrier. Press EXIT to stop transmission.
2b) Select
“Msg”
to send a pair of test messages
– a navigational warning and a SAR
message.
3) Use
↑ or ↓ to set the number of times you wish to transmit the test messages.
4) Use
↑ or
↓
to set the transmitter site letter in your NAVTEX message.
5) Press OK to send. The display will count down for every pair of test messages being sent.
6) Check that the NAVTEX receiver receives/prints the following messages:
NAVTEX MESSAGE XZ01 *
0123456789ABCDEFGHIJKLMNOPQRSTU
NAVTEX TEST SEQ BY FUTRONIC
GMDSS TEST BOX
NAVTEX MESSAGE XD00 *
0123456789ABCDEFGHIJKLMNOPQRSTU
NAVTEX TEST SEQ BY FUTRONIC
GMDSS TEST BOX
SECOND TIME
FIRST MESSAGE ID 01
ANT.
NAVTEX RECEIVER
ANT.
NAVTEX RECEIVER
Содержание Futronic MKII
Страница 58: ...Page 58 of 65 Example of Test Report based on the default HTML design ...
Страница 63: ...Page 63 of 65 ...
Страница 64: ...Page 64 of 65 ...
Страница 65: ......


