12
•
Z-Trak2 quick start
Z-Trak2 3D Profiler Sensors
Z-Trak2 quick start
For detailed instructions on how to set up and use a 3D laser profiler sensor, go to section
Installation.
The follow section provides steps for a quick setup and for acquiring 3D profiles with Z-Expert.
1. REQUIRED MATERIAL
Material
Model/Part (examples)
Z-Trak2 3D laser profiler sensor
Z-TRAK2 2K0-0015-B3
I/O cable: M12 17-pin female to flying lead
(Control and I/O cable)
3D-AC0F-M1217-5M
Data cable: Ethernet M12 X-coded 8-pin male to RJ45
3D-AC00-M12X5M
Mounting Adaptor
Contact Teledyne DALSA sales
5 GigE (S series) or 1 GigE (V series) Network Switch
1 GigE with POE+ : NETGEAR GS305PP
1/2.5/5 GigE with PoE+: NETGEAR MS510TXPP
1/2.5/5 GigE : NETGEAR MS510TX
Power supply 24 V/20 W (if not using PoE switch)
Mean Well MDR-20-24 (for single device setup)
Network cable
RJ45 to RJ45 (CAT 6 required)
2. DOWNLOAD
3. INSTALL SAPERA LT
Sapera LT SDK
https://www.teledynedalsa.com/en/products/imaging/vision-
Z-Trak2 Firmware
Download Z-Trak2 firmware.
•
Double-click SaperaSDKSetup.exe. You will be asked to
reboot at some point during installation.
•
When prompted, choose to install the
Teledyne DALSA
3D profile sensors
, which will also install Z-Expert.
•
After installation, verify that the GigE Server tray icon
appears in the notification area (show hidden icons). At
this point, its status will be
No device found
.
No device found
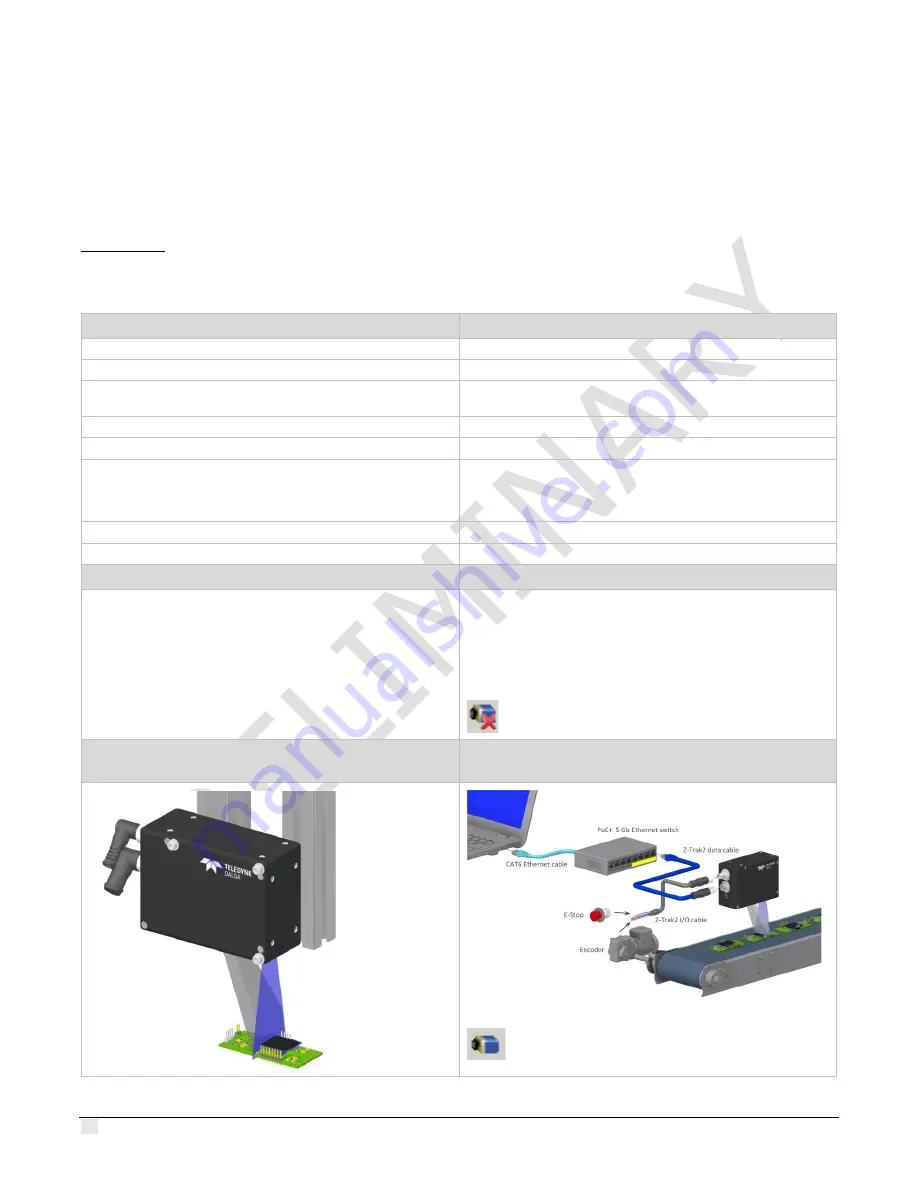
4. MOUNT DEVICE ON METALLIC, HEAT
CONDUCTING ASSEMBLY
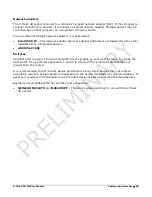
5. POWER DEVICE AND CONNECT TO HOST
COMPUTER (EX. WITH POE+ SWITCH)
After a few seconds, check the notification area to
verify Z-Trak2 device is available.


