


44
•
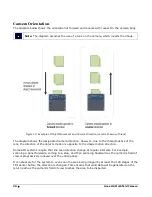
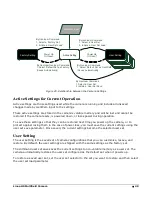
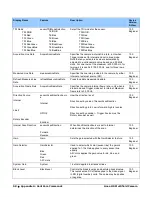
Camera Performance and Features
Linea HS Multifield Camera
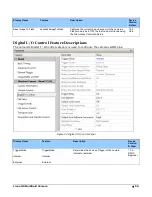
Customized Linearity Response (LUT)
See the section Camera Control Category in Appendix A for GenICam features associated with this
section and how to use them
Related Features: lutMode, lutType, gammaCorrection
Note: These features may only be useful in applications that use the frame grabber’s
Mono Image Buffer Format. (See the Pixel Format section.)
The camera allows the user to access a LUT (Look Up Table) to allow the user to customize the
linearity of how the camera responds. This can be done by uploading a LUT to the camera using
the file transfer features or by using the gammaCorrection feature.
The gamma correction value can be adjusted by the user at any time.
When the LUT is enabled, there is no change in maximum line rate or amount of data output from
the camera. The LUT can be used with any mode of the camera. Further, when the LUT is enabled,
it is recommended that the fixed Offset available in the Camera Control category be set to zero.
To upload a LUT, use File Access Control Category > Upload / Download File > Settings and select
Look Up Table to upload a file.
The file format is described in 03-084-20133 Linea Binary File
Format which can be obtained from
Teledyne DALSA Technical Support. This document also includes Excel spreadsheet examples.
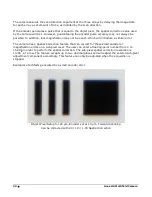
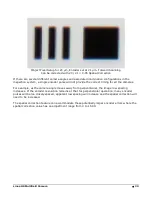
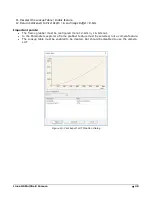
How to Generate LUT with CamExpert
CamExpert can also be used to create a LUT file. The camera uses a 12-bit in / 12-bit out LUT (even if
the camera is outputting an 8-bit image). CamExpert can be configured to create a 12-bit in / 16-bit out
LUT - the camera will convert it to the required format.
1.
Open CamExpert > version 8.40.
2.
Device
should be an
Xtium2
connected to a
Linea
camera.
3.
Under
Board
select
Basic Timing
and set
Pixel Depth
to
12.
4.
Under
Board
select
Image Buffer and ROI
and set
Image Buffer Format
to
Monochrome 16-bits
5.
Leave
Image Buffer and ROI
selected.
6.
In the top menu select
Pre-Processing
|
Lookup Table
and set
Enable.
7.
In the same menu select
Setting…
8.
C
onfigure the output LUT here by scrolling through the different options under
Value.
a.
Some selections have additional parameters to configure (e.g.
Gamma correction
requires a
Correction factor
).
9.
Click on the
Save LUT
button to create a LUT file.
10.
This file can loaded into the camera using the
File Access
features. It is saved with the current
Load / Save Configuration
user set; ensure that a user set and not the factory set is selected,
otherwise the upload will fail.


