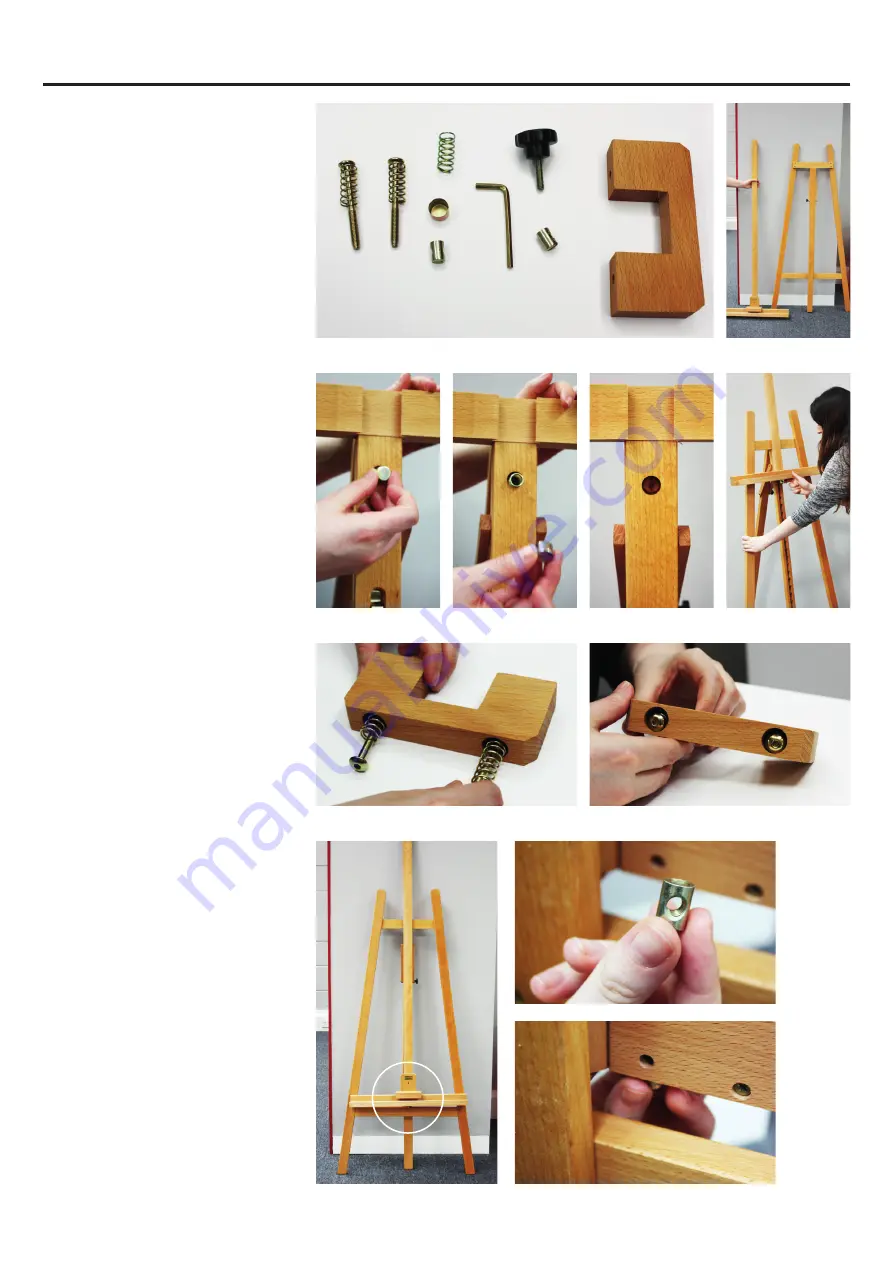
Once you have laid out all your pieces,
slide piece J out of piece K. This will
expose a shallow hole at the top of the
main a-frame (piece K). Slot Piece I
into the shallow hole and place the cap
(piece H) onto the end of the spring.
Placing pressure on the end of piece H,
slot piece K back into place so that the
spring is compressed behind it.
This adds tension to the easel.
DALER ROWNEY COTSWOLD STUDIO EASEL INTRUCTIONS
Now you have got over the excitement of
receiving all of your wonderful Cass Art
goodies, it’s now time to assemble your
Daler Rowney Cotswold Easel.
We would like to offer some helpful
alternative instructions to those provided
with your easel.
Firstly, unpack the easel and make sure
you have all the pieces displayed.
Take pieces C and D (the two long pins
fed through the two long springs) and
slot them into the holes on piece A.
Turn the main part of the easel (pieces
J and K) over so it is lying on its front.
Locate the two holes on the underside
of the bottom horizontal bar on piece K,
either side of the vertical support. Insert
pieces G and F into these holes. Make
sure the holes in G and F are facing
upwards so that you can screw into
them later.
A
J
K
B
G
E
H
F
C
D
I
Page 01 / 02


