ESIE11-02
Troubleshooting
3–37
3
3
4
5
1
4.8
Replacing the PCB: EUWA*5-24KBZW1 and EUWY*5-24KBZW1
Replacing the PCB
To replace the PCB, proceed as follows:
Dipswitches
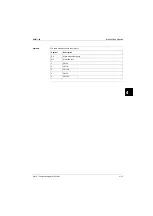
The illustration below shows the dipswitches on the PCB.
Function of the
dipswitches
The table below describes the function of the dipswitches and pushbuttons on the PCB.
Step
Action
1
Switch off the power.
2
Remove the connections of the old PCB.
3
Remove the old PCB.
4
Place the new PCB in the same way as the old PCB.
5
Reconnect the PCB.
6
Set the dipswitches on the PCB on the right position (depending on the unit type).
1
2
3
S1A
4
1
2
S2A
S1A
Dipswitch 1
S2A
Dipswitch 2
1
0 = 1 circ.
1 = 2 circ.
1
Defrost setting (only for
EUWA*5-24KBZW1)
0 = Start condition 1 & fan defrost 1
(5HP, 8HP, 16HP)
1 = Start condition 2A/B & fan defrost 2
(10HP, 12HP, 20HP, 24HP)
2
3
4
010 = EUWA
100 = EUWY (without defrost com-
pressor stop)
101 = EUWY (with defrost
compressor stop)
2
Fan setting (See "Head Pressure
Control: EUWA*5-24KBZW1 and
EUWY*5-24KBZW1" on page 2–11 for
fan settings.)
0 = Fan setting 1
(5HP, 8HP, 16HP)
1 = Fan setting 2
(10HP, 12HP, 20HP, 24HP)
Содержание EUWY 24KBZW1 Series
Страница 2: ......
Страница 8: ...ESIE11 02 vi Table of Contents 3 1 4 5...
Страница 10: ...Introduction ESIE11 02 viii 3 1 4 5...
Страница 12: ...ESIE11 02 1 2 Part 1 System Outline 3 1 1 5...
Страница 86: ...Wiring Layout ESIE11 02 1 76 Part 1 System Outline...
Страница 88: ...ESIE11 02 2 2 Part 2 Functional Description 3 1 2 5...
Страница 128: ...The Digital Controller ESIE11 02 2 42 Part 2 Functional Description 3 1 2 4 5...
Страница 130: ...ESIE11 02 3 2 Part 3 Troubleshooting 3 1 3 5...
Страница 168: ...ESIE11 02 4 2 Part 4 Commissioning and Test Run 3 1 4 5...
Страница 198: ...Test Run and Operation Data ESIE11 02 4 32 Part 4 Commissioning and Test Run 3 1 4 5...
Страница 200: ...ESIE11 02 5 2 Part 5 Maintenance 3 1 5...
Страница 210: ...ESIE11 02 4 Index 3 1 4 5...


