D2CND0 D2CND0 D2TND0
D2TND0 D2TND024A4AA
Wall-mounted condensing boiler
ESIE17-09 / 2017.11
Servicing manual
12
(1)
(2)
(3)
4.3
Cable Group Removal
•
Isolate the appliance from power supply and closedown
the gas valve.
•
Remove the front cover forwards. (Refer to Section 4.2).
•
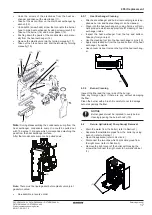
Disconnect wire connector of 3-way valve motor(step mo
-
tor) (Refer to Section 4.6).
•
Open the control panel (Refer to Section 4.10).
•
Disconnect all wire connectors that inserted on PCB.
•
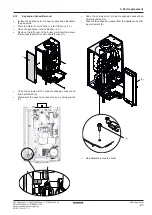
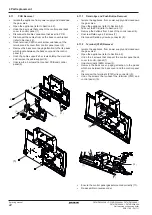
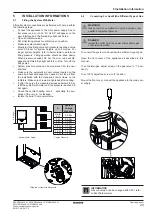
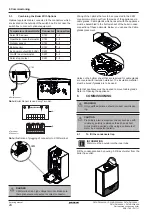
Disconnect pump wire connectors by pushing pawls help
of flat screwdriver (1).
•
Disconnect the wire connector of flow sensor (2) and
pressure sensor (3).
•
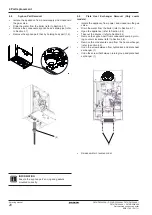
Disconnect the wire connector of 3 way valve (refer to
4.6.1).
•
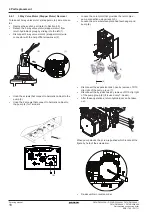
Dismantle the ignition electrode and earth cable from the
power supply (4).
•
Firstly loosen the screw which is at figure to disconnect
earth cable of ionization electrode from power supply (5).
•
Firstly loosen the screw which is at figure to disconnect
high voltage earth cable of boiler from power supply (6).
•
Dismantle two cable clips from the right side cover be
careful not to touch cables and heat exchanger each oth-
er (7).
•
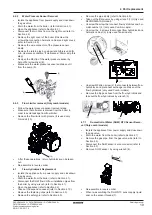
Demount wire connector of CH return, CH flow, flue gas
sensors and high limit thermostat (8).
•
Dismantle wire connector of gas valve (9).
•
Dismantle wire connector of ionization electrode (10).
4 Part replacement
(8)
(10)
(9)
(8)
(7)
(6)
(5)
(4)
refer to 4.6.1


