background image

8 Preparation

Installer and user reference guide

9

BRBRBRC1HHDAK
Human Comfort Interface
4P534402-1 – 2018.06

8

Preparation

8.1

Wiring requirements

All wiring must comply with the following requirements:

Wire specification

Value

Type

Sheathed vinyl cord or cable (2
wires)

Section

0.75~1.25 mm

2

Maximum length

500 m

8.1.1

To prepare the wiring for installation

1

Peel  the  sheath  of  the  part  of  the  cable  that  needs  to  pass
through the inside of the rear casing (L), according to the figure
and the table.

2

Keep a 10 mm distance between the length of the 2 wires.

10 mm

L

Wiring outlet

L

Top

±150 mm

Left

±120 mm

Bottom

±100 mm

Rear

No requirements

9

Installation

9.1

Overview: Installation

The  installation  of  the  user  interface  typically  consists  of  the
following stages:

1

Determining  how  you  want  to  route  the  electrical  wiring,  and
nipping away a piece of the rear casing accordingly.

2

Mounting the rear casing to the wall.

3

Connecting the electrical wiring.

4

Closing the user interface.

9.2

Mounting the user interface

9.2.1

About mounting the user interface

Before you can mount the user interface, you have to determine the
wiring  routing,  and  accordingly,  remove  a  piece  of  the  user
interface's rear casing.

The  wiring  can  be  routed  from  the  top,  the  rear,  the  left,  or  the
bottom.  Remove  a  piece  of  the  rear  casing  according  to  the
illustration:

a

b

c

a

Wiring from the top

b

Wiring from the left

c

Wiring from the bottom

In  case  you  are  routing  the  wiring  from  the  rear,  you  don't  have  to
remove anything.

INFORMATION

When  routing  the  wiring  from  the  top  or  from  the  rear,
insert  the  wiring  through  the  knockout  hole  before
mounting the rear casing to the wall.
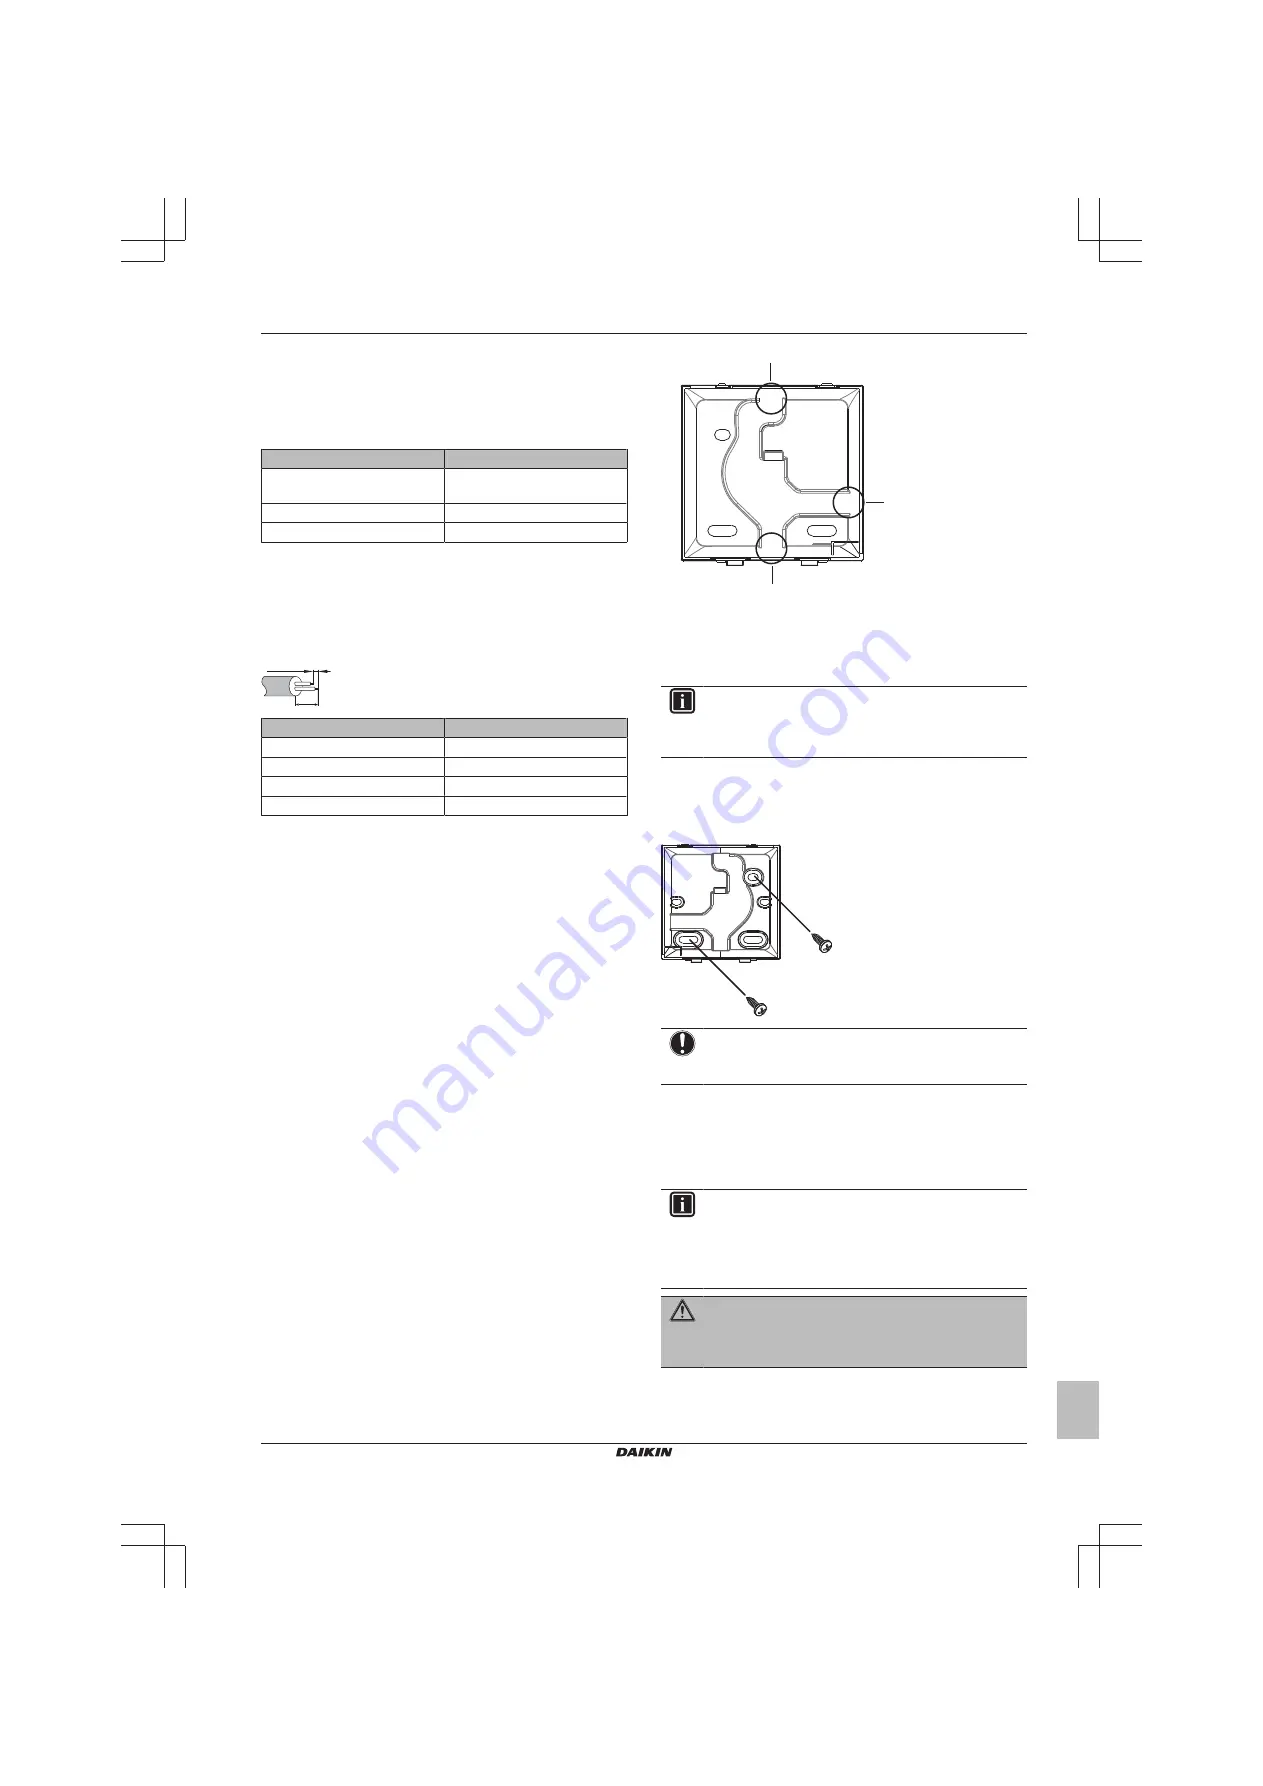
9.2.2

To mount the user interface

1

Take the screws and plugs from the accessory bag.

2

Mount the rear casing to a flat surface.

NOTICE

Be  careful  not  to  distort  the  rear  casing  by  overtightening
the mounting screws.

9.3

Connecting the electrical wiring

9.3.1

Precautions when connecting the
electrical wiring

INFORMATION

Also  read  the  precautions  and  requirements  in  the
following chapters:

▪ General safety precautions

▪ Preparation

WARNING

All  field  wiring  and  components  MUST  be  installed  by  a
licensed  electrician  and  MUST  comply  with  the  applicable
legislation.

Содержание BRC1HHDAK

Страница 1: ...Installer and user reference guide Human Comfort Interface English Installer and user reference guide Human Comfort Interface BRC1HHDAW BRC1HHDAS BRC1HHDAK ...

Страница 2: ... 11 11 2 Home screen 11 11 3 Status icons 12 11 4 Status indicator 12 12 Operation 12 12 1 Basic usage 12 12 1 1 Operation screens 12 12 1 2 Main menu 12 12 2 Space heating cooling control 13 12 2 1 About space heating cooling control 13 12 2 2 To turn ON OFF space heating cooling operation 13 12 2 3 To change the room temperature 14 12 2 4 To change the space operation mode 14 12 3 Domestic hot w...

Страница 3: ...able legislation NOTICE The user interface MUST be mounted indoors NOTICE When the user interface is used as room thermostat select an installation location where the average temperature in the room can be detected Do NOT install the user interface in the following places In places that are exposed to direct sunlight In places that are near a heat source In places that are affected by outside air ...

Страница 4: ...c hot water operation screen activate the setpoint screen In the main menu cycle left In any of the menus operation screens adjust a function value or setting default decrease d ACTIVATE CYCLE ADJUST On the room temperature domestic hot water operation screen activate the setpoint screen In the main menu cycle right In any of the menus operation screens adjust a function value or setting default i...

Страница 5: ...ION In case of system errors the status indicator blinks red As soon as you press any button the status indicator will shift to continuous red 4 Operation 4 1 Basic usage 4 1 1 Operation screens From the home screen press shortly to cycle through the operation screens Operation screen Description Room temperature See the actual room temperature and control the desired room temperature Domestic hot...

Страница 6: ... For more information on the temperature control methods see the documentation of the indoor units INFORMATION When the temperature sensor inside the user interface is broken the system goes in error and the operation screen displays instead of the actual temperature Space operation mode Space operation modes are selected from the space operation mode menu The system can run in the following space...

Страница 7: ...home screen 4 3 Domestic hot water control 4 3 1 About domestic hot water control Domestic hot water control involves Controlling the domestic hot water temperature Activating or deactivating Powerful operation Domestic hot water temperature The indoor unit creates domestic hot water in the domestic hot water tank The temperature of the domestic hot water can be increased or decreased INFORMATION ...

Страница 8: ...election Result The user interface implements changes and returns to the home screen INFORMATION To indicate Powerful operation is active the user interface displays the Powerful icon on the domestic hot water operation screen INFORMATION For more information on Powerful operation see the installer reference guide and the user reference guide of the units 5 Maintenance and service 5 1 Overview Mai...

Страница 9: ... user interface 9 2 1 About mounting the user interface Before you can mount the user interface you have to determine the wiring routing and accordingly remove a piece of the user interface s rear casing The wiring can be routed from the top the rear the left or the bottom Remove a piece of the rear casing according to the illustration a b c a Wiring from the top b Wiring from the left c Wiring fr...

Страница 10: ...2 From the bottom P1P2 9 4 Closing the user interface 9 4 1 Precautions when closing the user interface CAUTION Never touch the internal parts of the user interface CAUTION When closing the user interface be careful not to pinch the wiring NOTICE To prevent damage make sure the front of the user interface is clicked into the rear casing securely 9 4 2 To close the user interface 1 Click the front ...

Страница 11: ...is ON press to turn it OFF b CYCLE ENTER ACTIVATE CONFIRM From the home screen short press to cycle through the operation screens From the home screen long press to go to the main menu In the main menu short press to enter one of the menus In any of the menus activate confirm a function value or setting c ACTIVATE CYCLE ADJUST On the room temperature domestic hot water operation screen activate th...

Страница 12: ...t not in operation The unit is OFF Blinking red System error Continuous red System malfunction INFORMATION Status indicator behaviour is different when night mode is active For more information see 13 2 4 Night mode on page 16 INFORMATION In case of system errors the status indicator blinks red As soon as you press any button the status indicator will shift to continuous red 12 Operation 12 1 Basi...

Страница 13: ...o the heat emitters Leaving water temperature control weather dependent Change the room temperature by lowering or raising the weather dependent curve represented on the user interface by a shift value INFORMATION For more information on the temperature control methods see the documentation of the indoor units INFORMATION When the temperature sensor inside the user interface is broken the system g...

Страница 14: ...space operation mode menu 3 Press to enter the menu 4 Use and to select a space operation mode and press to activate it Result The user interface implements changes and returns to the home screen 12 3 Domestic hot water control 12 3 1 About domestic hot water control Domestic hot water control involves Controlling the domestic hot water temperature Activating or deactivating Powerful operation Dom...

Страница 15: ...o go to the Powerful operation screen 2 To activate Powerful operation use and to select activate 3 To deactivate Powerful operation use and to select deactivate 4 Press to confirm your selection Result The user interface implements changes and returns to the home screen INFORMATION To indicate Powerful operation is active the user interface displays the Powerful icon on the domestic hot water ope...

Страница 16: ...htness 4 Press to confirm Result The user interface implements changes and returns to the home screen To set screen contrast Prerequisite You are in the settings menu 1 Navigate to the screen contrast menu 2 Press to enter the menu 3 Use and to adjust screen contrast 4 Press to confirm Result The user interface implements changes and returns to the home screen 13 2 3 Status indicator settings To s...

Страница 17: ... and follow the instruction from there INFORMATION The Madoka Assistant app is available from Google Play and the Apple Store INFORMATION When it is the first time you connect a user interface to your device app and user interface initiate a numeric comparison procedure To successfully connect the user interface to the app follow the procedure After each successful connection to a mobile device th...

Страница 18: ...numeric string Result The user interface and the mobile device are connected via Bluetooth 8 To update the software follow the instructions from the app To terminate the Bluetooth connection 1 From the home screen press and keep it pressed until you enter the main menu 2 Use and to navigate to the Bluetooth menu 3 Press to enter the menu 4 Press to stop the user interface from sending out a Blueto...

Страница 19: ...interface do NOT use organic solvents such as paint thinner Possible consequence damage electric shock or fire WARNING Do not wash the user interface Possible consequence electric leakage electric shock or fire INFORMATION When the dirt on the surface cannot be removed easily while cleaning the user interface soak the cloth in neutral detergent diluted with water squeeze the cloth tightly and clea...

Страница 20: ...4P534402 1 2018 06 Copyright 2018 Daikin ...

Отзывы: