


3.4 Creating the setup data
3-10
3.4 Creating the setup data
This section describes the procedure for creating the data required for connecting a Welbee Inverter series
welding power source to the interface and using the power source (this is called the "setup data").
The setup data consists of the following 2 data types.
Data to be written onto the interface
This is the data for converting the welding mode registered in the robot controller (see 3.3.2 ) into the
welding mode that will actually be used in the Welbee Inverter series welding power source.
Welding characteristic data file to be written onto the robot controller
This is the welding characteristic data file with the current and voltage output characteristics changed
to match the welding mode of the Welbee Inverter series welding power source that will be used.
The "Welding Interface (Digital) Setup" tool is used in the operations in this section.
3.4.1 Configuring the setup tool
Select the folder for saving the backup created in "3.3 Configuring the robot controller", and the
folder for saving the setup data of Welding Interface (Digital).
Selecting a backup folder
1
Connect the CF card that stores the backup data obtained in "3.3.3 Creating a
backup" to a computer.
2
Double-click "MakeConfigWIF.exe" in the "Welding Interface (Digital) Setup"
folder.
>> The setup tool starts and the folder browse window opens.
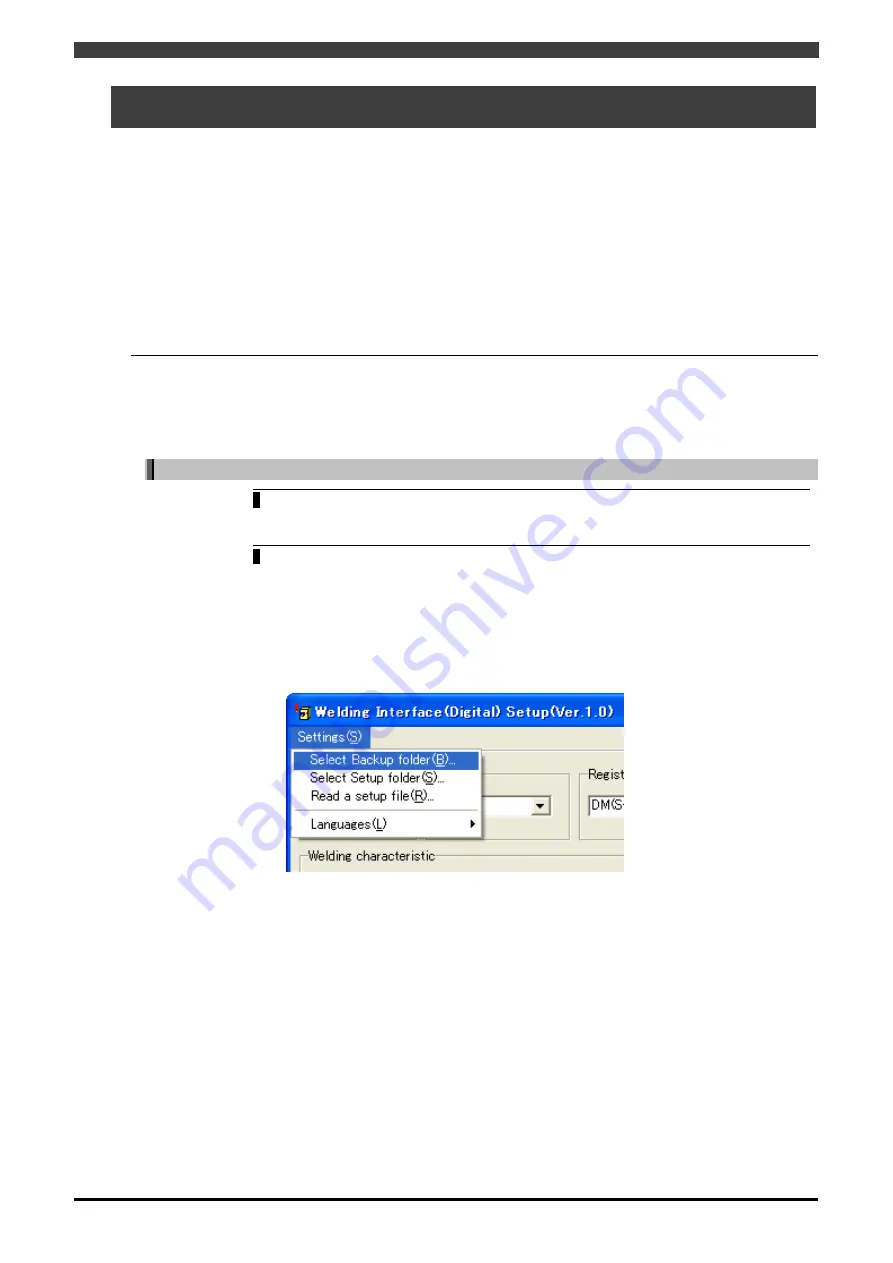
Alternatively, after "Welding Interface (Digital) Setup" starts, select "Select
Backup folder" in the "Settings" menu.
>> The folder browse window opens.
Содержание OTC Almega AX Series
Страница 10: ......
Страница 69: ...1 4 Welding mode lists 1 59...
Страница 109: ...2 2 Electrical connection diagram 2 10 Robot controller Figure 2 2 5 Electrical connection diagram of AXC...


