


Port Name
Connection
Function
HDMI
High Definition
Media Page
High definition audio and video signal output
port. It transmits uncompressed high definition
video and multiple-channel data to the HDMI port
of the display device. HDMI version is 1.4.
VGA
VGA video output
port
VGA video output port. Output analog video
signal. It can connect to the monitor to view
analog video.
GND
Ground end.
/
Power input port
Power socket.
●
For NVR41-4KS2: 12 VDC/2 A power.
●
For NVR41-P-4KS2: 48 VDC/72 W power.
●
For NVR41-8P-4KS2: 48 VDC/96 W power.
MIC IN
Audio input port
Bidirectional talk input port. It is to receive the
analog audio signal output from the devices such
as microphone, pickup.
MIC OUT
Audio output port
Audio output port. It is to output the analog
audio signal to the devices such as the sound box.
●
Bidirectional talk output.
●
Audio output on 1-window video monitor.
●
Audio output on 1-window video playback.
PoE PORTS
PoE port
Built-in switch. Support PoE function.
For PoE series product, you can use this port to
provide power to the network camera.
2.2.7 NVR42-4KS2/NVR42-P-4KS2/NVR42-8P-4KS2/
NVR42-16P-4KS2/NVR42-4KS2/L/NVR42-P-4KS2/L/
NVR42-8P-4KS2/L/NVR42-16P-4KS2/L/NVR42-EI/NVR42-P-EI/
NVR42-8P-EI Series
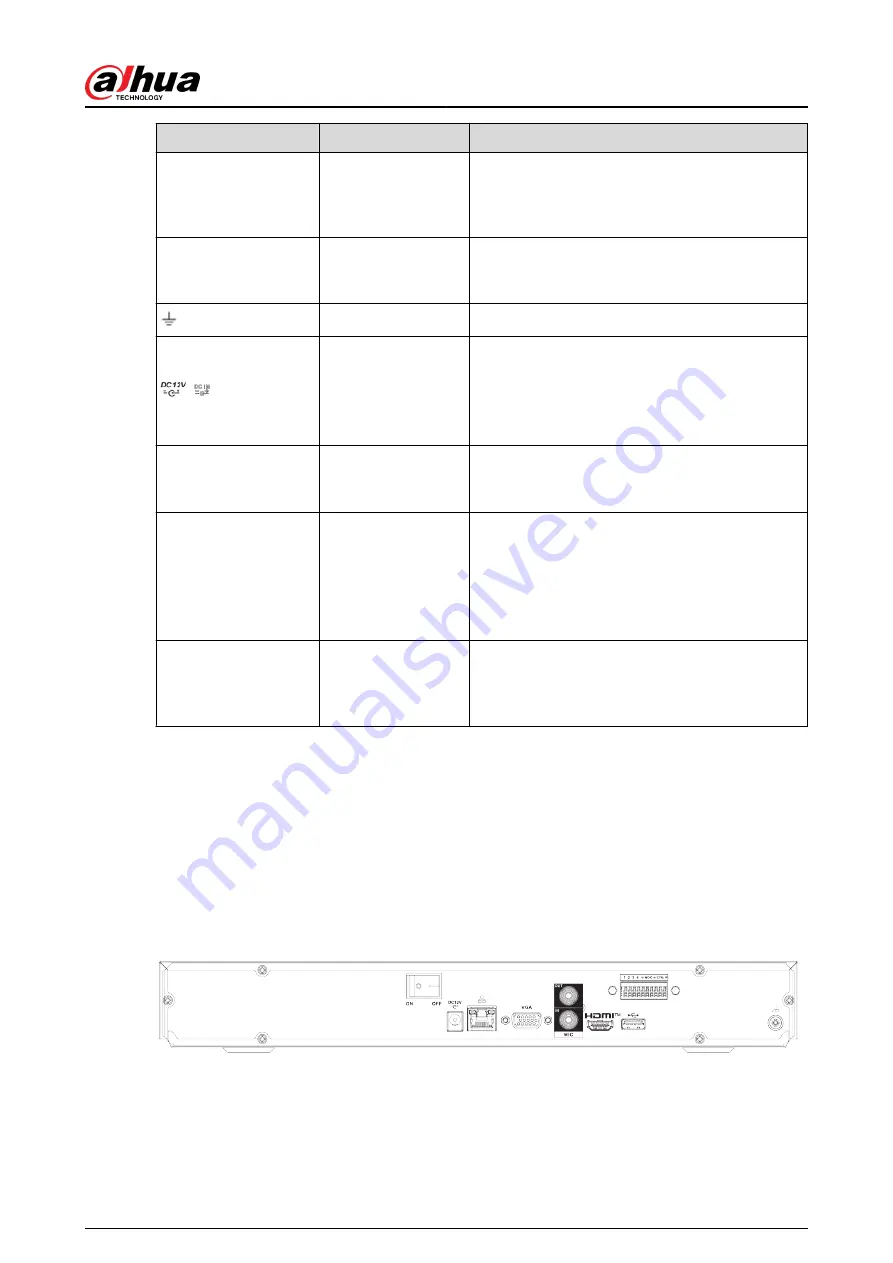
The NVR42-4KS2/NVR42-4KS2/L/NVR42-EI series rear panel is shown as below.
Figure 2-53 Rear panel
The NVR42-P-4KS2/NVR42-P-4KS2/L/NVR42-P-EI series rear panel is shown as below.
User's Manual
31
Содержание NVR2104-I2
Страница 1: ...ZHEJIANG DAHUA VISION TECHNOLOGY CO LTD V2 3 3 Network Video Recorder User s Manual...
Страница 84: ...Figure 2 98 Alarm input port 1 User s Manual 71...
Страница 122: ...Figure 3 60 Typical connection 3 5 15 NVR616 4KS2 Series Figure 3 61 Typical connection User s Manual 109...
Страница 132: ...Figure 5 8 Unlock pattern login User s Manual 119...
Страница 147: ...Figure 5 23 AcuPick human detection User s Manual 134...
Страница 148: ...Figure 5 24 AcuPick motor vehicle detection Step 5 Configure the search conditions as needed User s Manual 135...
Страница 151: ...Figure 5 27 Shortcut menu 1 User s Manual 138...
Страница 179: ...Figure 5 59 Modify IP Step 7 Click Next Figure 5 60 Device initialization Step 8 Click Finished User s Manual 166...
Страница 212: ...Figure 5 88 AcuPick motor vehicle detection Step 5 Configure the search conditions as needed User s Manual 199...
Страница 216: ...Figure 5 92 Thumbnails Step 7 Point to the target you want and then click to check the details User s Manual 203...
Страница 217: ...Figure 5 93 Custom search 2 Step 8 Configure the search conditions as needed User s Manual 204...
Страница 326: ...Figure 5 197 TCP IP Step 2 Click to configure the NIC card and then click OK User s Manual 313...
Страница 376: ...Figure 5 247 Pattern login User s Manual 363...
Страница 412: ...Figure 5 285 File management Step 2 Click Add User s Manual 399...
Страница 433: ...Figure 5 308 Shutdown 2 User s Manual 420...


