301
One click to create RAID
Click it to automatically create RAID5.
For create RAID function, you can select the physical HDD that does not included in the RAID group
or the created disk array to create a RAID5. You can refer to the following situations:
There is no RAID, no hotspare disk: System directly creates the RAID5 and creates one hotspare
disk at the same time.
There is no RAID, but there is a hotspare disk: System creates the RAID5 only. It uses previous
hotspare disk.
There is RAID: System cancel the previous RAID setup and then create the new RAID5. System
creates the hotspare disk if there is no one. System uses previous hotspare disk if there is hotspare
disk available.
The background will format the virtual disk.
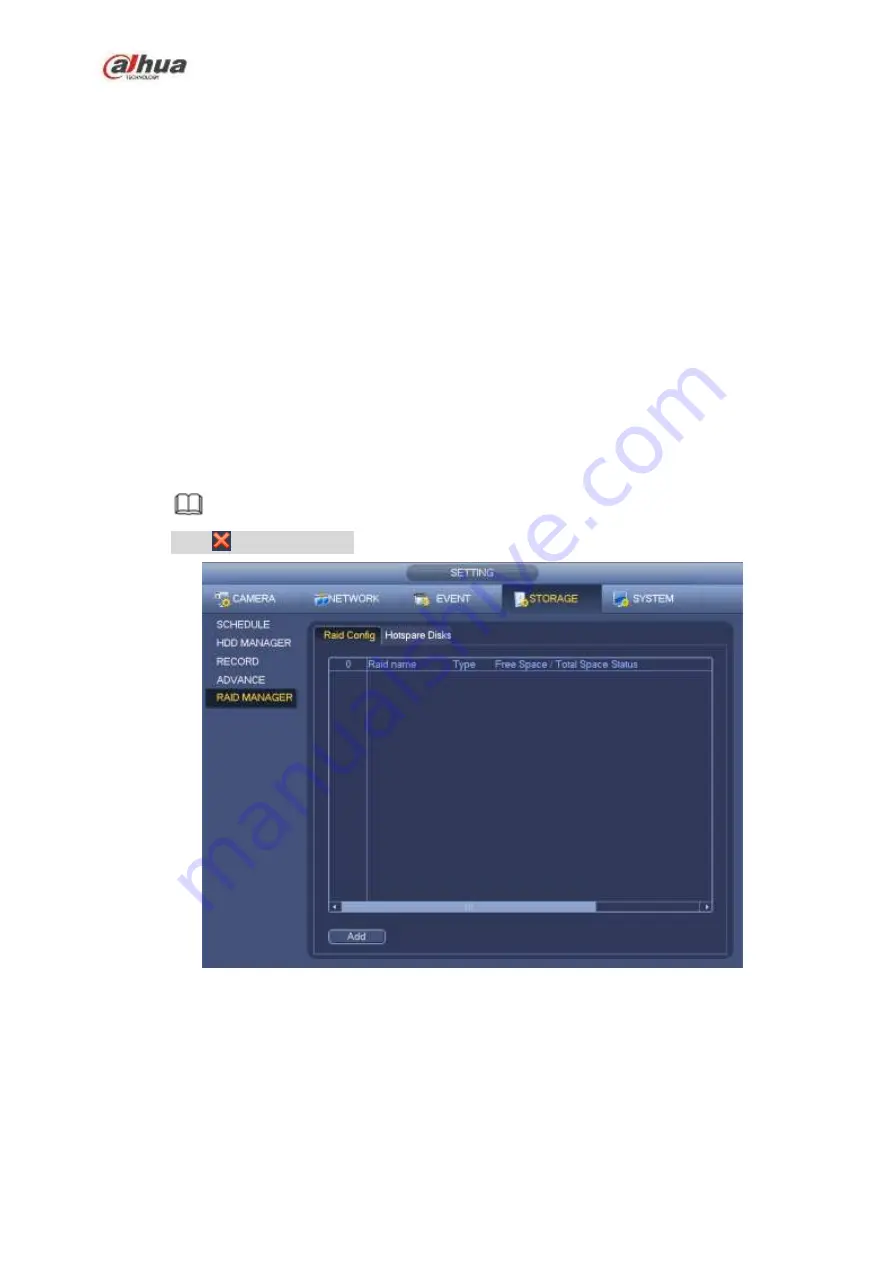
Create manually
Step 1 Select RAID type first and then follow the prompts to set HDD amount.
Step 2 Click Create Manually button, system pops up dialogue box to warning you it is going to clear all
data.
Step 3 Click OK button to complete the operation.
Note
Click
to delete RAID.
Figure 4-194
4.9.9.2 Hotspare disks
When a HDD of the RAID group is malfunction or abnormal, the hotspare HDD can replace the
malfunction or abnormal HDD in case there is any data loss. It is to guarantee storage system reliability.
Click Hotspare disks tab name, you can add the hot spare HDD. See Figure 4-195. The type includes two
options:
Содержание NVR1A-4P Series
Страница 1: ...Dahua Network Video Recorder User s Manual V 4 3 0 ...
Страница 138: ...124 Figure 3 5 3 6 6 NVR42N Series Please refer to Figure 3 6 for connection sample Figure 3 6 ...
Страница 142: ...128 Figure 3 11 3 6 12 NVR42V 8P Series Please refer to Figure 3 12 for connection sample ...
Страница 143: ...129 Figure 3 12 ...
Страница 157: ...143 Figure 4 15 Step 2 Click device display edit interface See Figure 4 16 ...
Страница 220: ...206 Figure 4 93 Figure 4 94 ...
Страница 240: ...226 Figure 4 110 Figure 4 111 Figure 4 112 ...
Страница 251: ...237 Figure 4 123 Figure 4 124 ...
Страница 253: ...239 Figure 4 126 Click draw button to draw the zone See Figure 4 127 ...
Страница 257: ...243 Figure 4 130 Click Draw button to draw a zone See Figure 4 131 Figure 4 131 ...
Страница 262: ...248 Figure 4 136 Click draw button to draw the zone See Figure 4 137 ...
Страница 275: ...261 Figure 4 148 Figure 4 149 ...
Страница 276: ...262 Figure 4 150 Figure 4 151 ...
Страница 387: ...373 Figure 5 60 Figure 5 61 ...
Страница 388: ...374 Figure 5 62 Figure 5 63 ...
Страница 412: ...398 Figure 5 96 Figure 5 97 ...
Страница 418: ...404 Figure 5 106 5 10 4 4 Record Control The interface is shown as in Figure 5 107 Figure 5 107 ...


