266
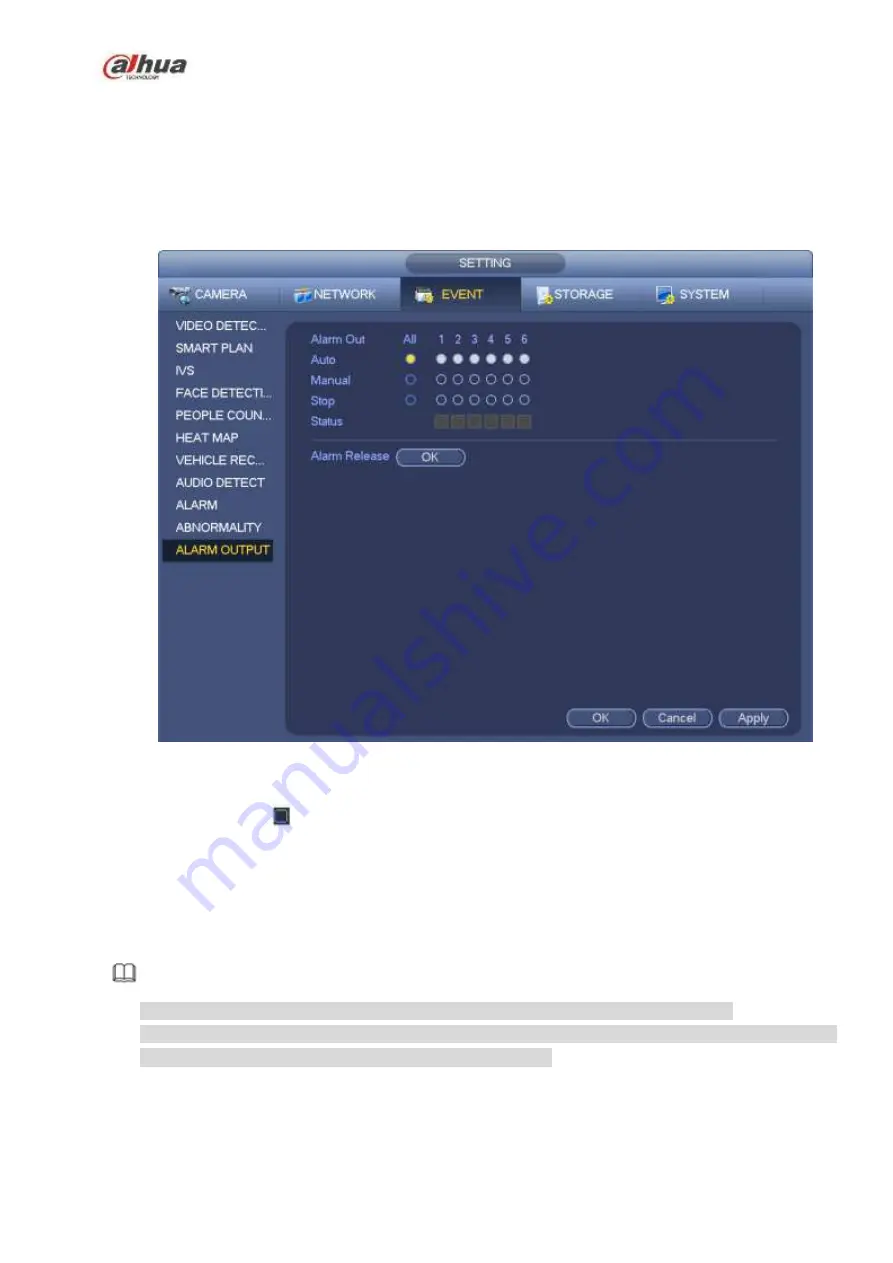
Here is for you to set proper alarm output (Auto/manual/stop). Connect the alarm device to the system
alarm output port, and set the mode as auto, system can trigger the corresponding operations when an
alarm occurs.
Auto: Once an alarm event occurs, system can generate an alarm.
Manual: Alarm device is always on the alarming mode.
Stop: Disable alarm output function.
Click OK button of the alarm reset, you can clear all alarm output status.
Figure 4-157
Please highlight icon
to select the corresponding alarm output.
After all the setups please click OK button.
4.7.12
POS
Connect the device with the POS, the device can receive the POS information and overlay corresponding
info on the video.
Note
For the local-end, this function supports 1/4-window display and 1-window playback.
This function is for the cashier of the supermarket and etc. The device can get the information from
the POS and then overlay the txt information on the video.
Step 1 From main menu->Setting->System->POS, the interface is shown as below. See Figure 4-158.
Содержание NVR1A-4P Series
Страница 1: ...Dahua Network Video Recorder User s Manual V 4 3 0 ...
Страница 138: ...124 Figure 3 5 3 6 6 NVR42N Series Please refer to Figure 3 6 for connection sample Figure 3 6 ...
Страница 142: ...128 Figure 3 11 3 6 12 NVR42V 8P Series Please refer to Figure 3 12 for connection sample ...
Страница 143: ...129 Figure 3 12 ...
Страница 157: ...143 Figure 4 15 Step 2 Click device display edit interface See Figure 4 16 ...
Страница 220: ...206 Figure 4 93 Figure 4 94 ...
Страница 240: ...226 Figure 4 110 Figure 4 111 Figure 4 112 ...
Страница 251: ...237 Figure 4 123 Figure 4 124 ...
Страница 253: ...239 Figure 4 126 Click draw button to draw the zone See Figure 4 127 ...
Страница 257: ...243 Figure 4 130 Click Draw button to draw a zone See Figure 4 131 Figure 4 131 ...
Страница 262: ...248 Figure 4 136 Click draw button to draw the zone See Figure 4 137 ...
Страница 275: ...261 Figure 4 148 Figure 4 149 ...
Страница 276: ...262 Figure 4 150 Figure 4 151 ...
Страница 387: ...373 Figure 5 60 Figure 5 61 ...
Страница 388: ...374 Figure 5 62 Figure 5 63 ...
Страница 412: ...398 Figure 5 96 Figure 5 97 ...
Страница 418: ...404 Figure 5 106 5 10 4 4 Record Control The interface is shown as in Figure 5 107 Figure 5 107 ...


