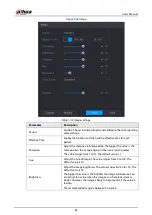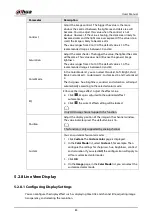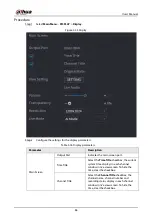
background image

User's Manual 

81 

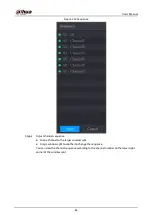
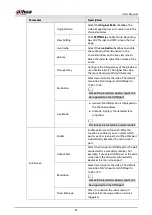
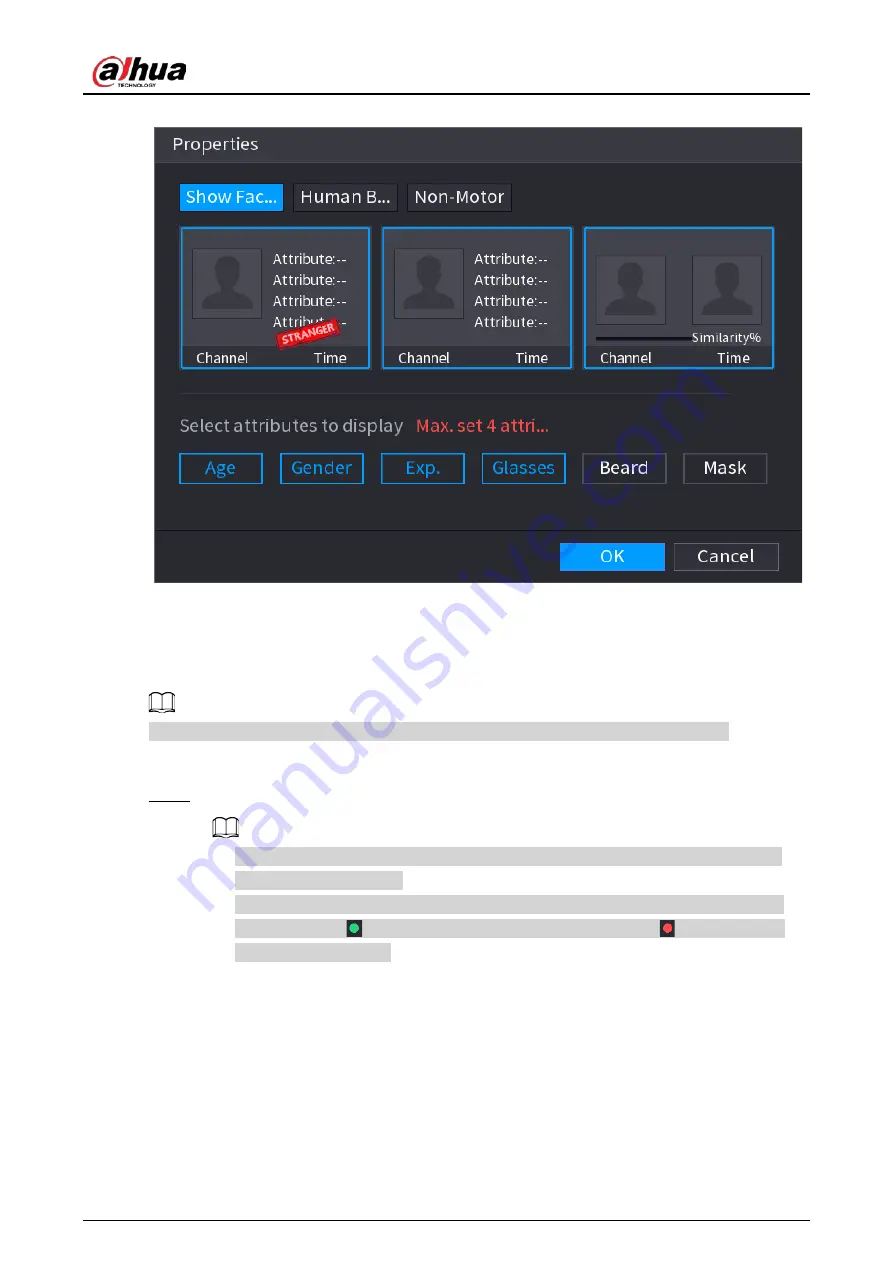
Figure 5-39 Properties 


5.2.6 Channel Sequence 

You can adjust the channel sequence displayed on live page on actual needs. 


The live view page displays the default channel sequence after restoring factory defaults. 

Procedure 

Step 1 

Right-click on the live view page and select 

Sequence


  The system displays the maximum number of window splits supported by the DVR 

after selecting 

Sequence

  The Sequence page displays only the channel name and channel number of added 

remote devices. 

  represents the remote device is online, and    represents the 

remote device is offline. 

Содержание DH-XVR Series

Страница 1: ...AI Digital Video Recorder User s Manual ZHEJIANG DAHUA VISION TECHNOLOGY CO LTD V2 3 1...

Страница 2: ...uctions in performance or unpredictable results Provides methods to help you solve a problem or save you time Provides additional information as a supplement to the text Revision History Version Revis...

Страница 3: ...implementing measures which include but are not limited Providing clear and visible identification to inform people of the existence of the surveillance area and provide required contact information...

Страница 4: ...arks and company names in the manual are properties of their respective owners Please visit our website contact the supplier or customer service if any problems occur while using the device If there i...

Страница 5: ...he rated range of power input and output Do not disassemble the Device Use the Device under allowed humidity and temperature conditions Installation Requirements Do not connect the power adapter to th...

Страница 6: ...a power socket with protective earthing Use power cords that conform to your local requirements and are rated specifications Before connecting the power supply make sure the input voltage matches the...

Страница 7: ...H 4KL I3 DH XVR51xxHE I2 DH XVR51xxHE I3 DH XVR51xxHE 4KL I2 DH XVR51xxHE 4KL I3 DH XVR51xxHS I2 DH XVR51xxHS I3 DH XVR51xxHS 4KL I2 DH XVR51xxHS 4KL I3 DH XVR71xxH 4K I2 DH XVR71xxH 4K I3 DH XVR71xxH...

Страница 8: ...I2 DH XVR52xxAN 4KL I3 DH XVR72xxA 4K I2 DH XVR72xxA 4K I3 DH XVR72xxA 4KL I DH XVR72xxAN 4K I2 DH XVR72xxAN 4K I3 26 3 2 4 DH XVR82xxA 4K I DH XVR82xxA 4KL I 27 3 2 5 DH XVR58xxS I2 DH XVR58xxS 4KL I...

Страница 9: ...9 Configuring Recorded Video Storage Schedule 67 5 1 4 10 Configuring Snapshot Storage Schedule 70 5 2 Live View 72 5 2 1 Live View Screen 72 5 2 2 Live View Control bar 73 5 2 2 1 Instant Playback 74...

Страница 10: ...n 104 5 4 4 6 Using AUX Button 104 5 4 5 Calling OSD Menu 104 5 5 Configuring Camera Settings 105 5 5 1 Configuring Image Settings 105 5 5 2 Configuring Encode Settings 109 5 5 3 Configuring Snapshot...

Страница 11: ...ant Playback 141 5 9 3 Video Playback 142 5 9 3 1 Introducing Playback Controls Bar 144 5 9 3 2 Selecting Search Type 145 5 9 3 3 Clipping Recorded Video 146 5 9 3 4 Backing up Recorded Video 146 5 9...

Страница 12: ...11 2 1 Face Detection 178 5 11 2 1 1 Configuring Face Detection Parameters 179 5 11 2 1 2 Searching for and Playing Detected Faces 181 5 11 2 2 Face Recognition 184 5 11 2 2 1 Creating a Face Databas...

Страница 13: ...y Data 236 5 12 2 4 Configuring Alarm Linkage 237 5 12 2 4 1 Configuring Alarm Linkage for Temperature Data 237 5 12 2 4 2 Configuring Alarm Settings for Humidity Data 240 5 12 2 5 Searching IoT Infor...

Страница 14: ...ring Group Account 278 5 16 2 1 Adding a Group 278 5 16 2 2 Modifying a Group 280 5 16 2 3 Deleting a Group 281 5 16 3 Configuring ONVIF Users 281 5 17 Audio Management 282 5 17 1 Configuring Audio Fi...

Страница 15: ...ring RS 232 Settings 314 5 20 3 Configuring System Maintenance Settings 315 5 20 4 Exporting and Importing System Settings 316 5 20 5 Restoring Default Settings 318 5 20 6 Updating the Device 319 5 20...

Страница 16: ...ble HDD List 345 Appendix 3 4 Compatible USB DVD List 346 Appendix 3 5 Compatible SATA DVD List 346 Appendix 3 6 Compatible SATA HDD List 346 Appendix 4 Compatible CD DVD Burner List 353 Appendix 5 Co...

Страница 17: ...rehouse resources and water conservancy facilities 1 2 Functions The functions might be different depending on the software and hardware versions of the model you purchased AI Function Support face de...

Страница 18: ...onitor record search and download Support various playback modes slow play fast play backward play and frame by frame play Support time title overlay so that you can view event accurate occurred time...

Страница 19: ...ser s Manual 3 UPnP Universal Plug and Play Establish mapping connection between LAN and WAN through UPnP protocol Camera Self adaptive Auto recognize and work with the PAL or NTSC camera and HD camer...

Страница 20: ...Labels Labels on the device Not torn up Do not tear up or throw away the labels otherwise the warranty services are not ensured You need to provide the serial number of the product when you call the a...

Страница 21: ...72xxA 4K I3 DH XVR72xxA 4KL I DH XVR72xxAN 4K I2 DH XVR72xxAN 4K I3 DH XVR82xxA 4K I DH XVR82xxA 4KL I Procedure Step 1 Remove the screws to take off the cover Figure 2 1 Remove screws Step 2 Put two...

Страница 22: ...ice and put in the other two screws and then fasten all screws to fix the HDD to the device Figure 2 4 Fasten screws Step 5 Use power cable and data cable to connect the device and HDD Figure 2 5 Conn...

Страница 23: ...XVR58xxS 4KL I3 DH XVR58xxS 4KL I3 LP DH XVR78xxS 4K I2 DH XVR78xxS 4K I3 DH XVR78xxS 4KL X LP V2 DH XVR88xxS 4KL I Procedure Step 1 Remove the screws from the chassis Figure 2 7 Remove screws Step 2...

Страница 24: ...he drive bracket and fix the disk on the bracket Figure 2 10 Fix disk Step 5 Fix other disks on the bracket as needed Figure 2 11 Fix other disks Step 6 Fix the two drive brackets This is only need on...

Страница 25: ...ows the connection of 4 bay model for example Figure 2 14 Connect cables Step 9 Put the cover back and fasten the screws Figure 2 15 Put back cover 2 2 3 DH XVR54xxL I2 DH XVR54xxL 4KL I2 DH XVR54xxL...

Страница 26: ...the bracket Figure 2 18 Remove bracket Step 4 Match the four screw holes on the HDD with the four holes on the bracket and then fasten the screws The HDD is fixed to the bracket Figure 2 19 Fix HDD S...

Страница 27: ...2 2 4 DH XVR1Bxx I DH XVR1BxxH I DH XVR41xxC I DH XVR41xxHS I DH XVR51xxH I DH XVR51xxH I2 DH XVR51xxH I3 DH XVR51xxH 4KL I2 DH XVR51xxH 4KL I3 DH XVR51xxHE I2 DH XVR51xxHE I3 DH XVR51xxHE 4KL I2 DH...

Страница 28: ...rews Step 2 Remove the cover Figure 2 25 Remove cover Step 3 Align the screws of the HDD with the holes on the back of the device and fasten them Figure 2 26 Fasten screws Step 4 Connect the HDD cable...

Страница 29: ...al 13 Figure 2 27 Connect cables Step 5 Put back the cover Figure 2 28 Put back cover Step 6 Fasten the screws Figure 2 29 Fasten screws 2 2 5 DH XVR51xxC I3 DH XVR51xxC 4KL I3 Procedure Step 1 Remove...

Страница 30: ...User s Manual 14 Figure 2 30 Remove screws Step 2 Remove the cover Figure 2 31 Remove cover Step 3 Align the screws of the HDD with the holes on the DVR and fasten them...

Страница 31: ...User s Manual 15 Figure 2 32 Install HDD Step 4 Use the HDD cable and power cable to connect HDD and mainboard...

Страница 32: ...User s Manual 16 Figure 2 33 Connect cables Step 5 Put back the cover Figure 2 34 Put back cover Step 6 Fasten the screws...

Страница 33: ...User s Manual 17 Figure 2 35 Fasten screws...

Страница 34: ...s is abnormal 2 NET Glows blue when network status is abnormal 3 POWER Glows blue when the power is connected properly 4 USB port Connects to peripheral devices such as USB storage device keyboard and...

Страница 35: ...I DH XVR82xxA 4KL I Figure 3 4 Front panel Table 3 4 Front panel description No Port Name Function 1 USB port Connects to peripheral devices such as USB storage device keyboard and mouse 2 IR receive...

Страница 36: ...status is abnormal 3 POWER Glows when the power is connected properly 4 USB port Connects to peripheral devices such as USB storage device keyboard and mouse 3 1 6 DH XVR78xxS 4K I2 DH XVR78xxS 4K I3...

Страница 37: ...ntrol 2 USB port Connects to peripheral devices such as USB storage device keyboard and mouse 3 1 8 DH XVR54xxL I2 DH XVR54xxL 4KL I2 DH XVR54xxL I3 DH XVR54xxL 4KL I Figure 3 8 Front panel Table 3 8...

Страница 38: ...3 9 Front panel Table 3 9 Front panel description No Port Name Function 1 USB port Connects to peripheral devices such as USB storage device keyboard and mouse 3 1 10 DH XVR1Bxx I DH XVR1BxxH I Figur...

Страница 39: ...ator glows blue when the power is connected normally Network status indicator The indicator is off when the network connection is correct The indicator glows blue when the network connection is abnorm...

Страница 40: ...tput public end Ground 2 Video input port Connects to analog camera to input video signal 3 Audio input port Receives audio signal output from the devices such as microphone It corresponds to video in...

Страница 41: ...from the devices such as microphone 3 Audio output port Outputs audio signal to the devices such as the sound box 4 HDMI port High definition audio and video signal output port The port outputs the un...

Страница 42: ...Group 2 port 5 to port 8 Group 3 port 9 to port 12 Group 4 port 13 to port 16 These ports receive the signal from the external alarm source There are two types NO Normally Open and NC Normally Closed...

Страница 43: ...S 485_A port is connected by the cable A and RS 485_B is connected to the cable B 10 Power input port Inputs 12 VDC power 11 VGA port Outputs analog video data to the connected display with VGA port 1...

Страница 44: ...to Ethernet port 9 HDMI port High definition audio and video signal output port The port outputs the uncompressed high definition video and multi channel audio data to the connected display with HDMI...

Страница 45: ...OUT Two way talk output port which outputs the analog audio signal to the devices such as the sound box 7 Audio output port Outputs the analog audio signal to the devices such as the sound box 8 Video...

Страница 46: ...off alarm relay output 12V power output port Provides power to external devices such as camera and alarm device Please note the supplying power shall be below 1A Ground 10 Video input port Connect to...

Страница 47: ...p 1 port 1 to port 4 Group 2 port 5 to port 8 Group 3 port 9 to port 12 Group 4 port 13 to port 16 These ports receive the signal from the external alarm source There are two types NO Normally Open an...

Страница 48: ...w analog video 9 Power button Turns on off the Device 10 Power input port Inputs power 11 Loop out Outputs the video signal of the corresponding video input port 12 Video input port Connect to analog...

Страница 49: ...description No Port Name Function 1 Audio output port MIC OUT Two way talk output port which outputs the analog audio signal to the devices such as the sound box 2 Audio input port MIC IN Two way tal...

Страница 50: ...o the external alarm device NO Normally open alarm output port C Alarm output public end NC Normally closed alarm output port RS 485 communication port You can connect to the control devices such as s...

Страница 51: ...ort Receives audio signal output from the devices such as microphone 3 Audio output port Outputs audio signal to the devices such as the sound box 4 GND Ground 5 Power cable fastener Use clamp to secu...

Страница 52: ...data to the connected display with VGA port 4 HDMI port High definition audio and video signal output port The port outputs the uncompressed high definition video and multi channel audio data to the...

Страница 53: ...ate press this button to play back the next video 6 Previous record In playback state press this button to play back the previous video 7 Play Pause In normal playback state press this button to pause...

Страница 54: ...and color setting functions Switch the PTZ control menu in PTZ control page In motion detection page press this button with direction keys to complete setup In text mode press and hold this button to...

Страница 55: ...click one item in the file list to play back the video In multiple window mode double click one channel to view in full window Double click current video again to go back to previous multiple window m...

Страница 56: ...omply with your national standards The input video signal shall have high SNR low distortion low interference natural color and suitable lightness Guarantee the stability and reliability of the camera...

Страница 57: ...ces Using TV as video output device is not a reliable substitution method You also need to reduce the working hour and control the interference from power supply and other devices The low quality TV m...

Страница 58: ...nd the load The next device connected to the port must meet the fire enclosure requirements How to connect PTZ decoder Ensure the decoder has the same grounding with DVR otherwise the PTZ might not be...

Страница 59: ...alarm inputs which includes NO Normally Open and NC Normally Closed type Parallel connect COM end and GND end of the alarm detector Provide external power to the alarm detector Parallel connect the Gr...

Страница 60: ...A 62 5 VA 30 W 250 VA 48 W 250 VA 48 W 125 VAC 60 VDC 125 VAC 60 VDC 125 VAC 60 VDC 2 A 2 A 2 A Insulation 400 VAC 1 minute 500 VAC 1 minute 500 VAC 1 minute 1000 VAC 1 minute 1000 VAC 1 minute 1000 V...

Страница 61: ...the Device connect the Device with the power cable first and then connect to the power source To ensure the stable work of the Device and the external devices connected to the Device and to prolong t...

Страница 62: ...and video standard Step 2 Select your location from the drop down list then language and video standard will match your location automatically You can change the language and video standard manually...

Страница 63: ...om 8 characters through 32 characters and contains at least two types from number letter and special characters excluding and Confirm Password Prompt Hint In the Prompt Hint box enter the information...

Страница 64: ...stions functions on the interface Table 5 2 Password protection parameters Password Protection Mode Description Reserved Email Enter the reserved email address In the Reserved Email box enter an email...

Страница 65: ...he Device to factory default For details see 5 1 3 3 Using Reset Button on the Mainboard The reset button is available on select models 5 1 3 1 Enabling Password Reset Function Procedure Step 1 Select...

Страница 66: ...lick Forgot Pattern the password login page is displayed If you did not configure unlock pattern the password login page is displayed Click to display the password with plaintext To log in from other...

Страница 67: ...il entering page is displayed See Step 3 Enter the email address and then click Next the Prompt message page is displayed Figure 5 9 Note Step 3 Click OK After clicking OK the system will collect your...

Страница 68: ...ss In the Security Code box enter the security code You can get the security code twice by scanning the same QR code If you need to get the security code once again refresh the page Use the security c...

Страница 69: ...enter the security code Security questions 1 For Reset Mode select Security Questions If you did not configure the security questions before in the Reset Type list there will be no Security Questions...

Страница 70: ...ord and enter it again in the Confirm Password box Step 7 Click Save The password resetting is started Step 8 Click OK A pop up message is displayed asking if you want to sync the password with the re...

Страница 71: ...User s Manual 55 Figure 5 14 Sync password This message appears only when there are digital channels instead of only analog channels Figure 5 15 Sync info...

Страница 72: ...over panel see 2 2 Installing HDD Step 2 Find the reset button on the mainboard and then press and hold the reset button for 5 seconds to 10 seconds Figure 5 16 Reset button Step 3 Restart the Device...

Страница 73: ...sion and device serial number The collected information is only used to verify the legality of the Device and push upgrade notices If you clear the Auto check for updates checkbox the system will not...

Страница 74: ...gth for playing back the recoded video On the live view control bar click the instant playback button to play back the recorded video within the configured time Logout Time In the Logout Time box ente...

Страница 75: ...neral settings on the General page click Next Figure 5 19 Date Time Step 2 Configure the settings for date and time parameters Table 5 4 Date and time parameters Parameter Description System Time In t...

Страница 76: ...s In the Server Address box enter the IP address or domain name of the corresponding NTP server Click Manual Update the Device starts syncing with the server immediately Port The system supports TCP p...

Страница 77: ...P Address box Subnet Mask box and Default Gateway box If not all values show 0 0 0 0 If you want manually configure the IP information disable the DHCP function first If PPPoE connection is successful...

Страница 78: ...VPN Test Click Test to test if the entered IP address and gateway are interworking 5 1 4 5 Configuring P2P Settings You can add the Device into your phone client or the platform to manage You can als...

Страница 79: ...this function this section uses adding device into Mobile Client as an example The following steps are for reference only Refer to the user s manual of the mobile client for detailed instructions 1 Us...

Страница 80: ...ttings on the Audio Video page click Next Figure 5 23 Encode Step 2 Configure the settings for the main sub streams parameters Table 5 6 Parameter description Parameter Description Channel In the Chan...

Страница 81: ...y cannot be configured if you select VBR the image quality can be configured Quality This function is available if you select VBR in the Bit Rate List The bigger the value is the better the image will...

Страница 82: ...od Event The snapshot is taken when there is an alarm event occurs such as motion detection event video loss and local alarms Face Snapshot The snapshot is taken when the face is detected The face det...

Страница 83: ...corded video files will not be overwritten Create Video Files Configure the time length and file length for each recorded video Delete Expired Files Configure whether to delete the old files and if ye...

Страница 84: ...er and then set a HDD as redundant HDD Select Main Menu STORAGE Schedule Record and then select the Redundancy checkbox If the selected channel is not recording the redundancy function takes effect ne...

Страница 85: ...e Define the period by drawing 1 Select the checkbox of event type Figure 5 27 Event type 2 Define a period The system supports maximum six periods 3 On the timeline drag to define a period The Device...

Страница 86: ...e following operations to start recording according to the defined schedule Enable the alarm event and configure the settings for the recording channel For details see 5 10 Alarm Events Settings You n...

Страница 87: ...shot setting is active For details about defining a period see 5 1 4 9 Configuring Recorded Video Storage Schedule Copy Click Copy to copy the settings to other channels Step 3 Click OK Step 4 Click O...

Страница 88: ...m time channel name and channel number are displayed on each channel window This setting can be configured by selecting Main Menu CAMERA Overlay Overlay The figure in the bottom right corner represent...

Страница 89: ...2 2 Live View Control bar The live view control bar provides you access to perform the operations such as playback zoom real time backup manual snapshot voice talk adding remote devices and streams s...

Страница 90: ...ded video By clicking the instant playback page is displayed The instant playback has the following features Move the slider to choose the time you want to start playing Play pause and close playback...

Страница 91: ...ge the area For some models when the image is enlarged in the first way described previously the selected area is zoomed proportionally according to the window When the image is in the enlarged status...

Страница 92: ...u can perform the voice interaction between the Device and the remote device to improve efficiency of emergency This function is supported only when the remotely connected IPC device supports bidirect...

Страница 93: ...n the CHANNEL INFO page to display the information of each channel Open the Camera List page For details see 5 6 1 Adding Remote Devices Open the Network page For details see 5 15 1 Configuring Networ...

Страница 94: ...ngle channel layout or multi channel layout Previous Screen Click Previous Screen to go to the previous screen For example if you are using 4 split mode the first screen is displaying the channel 1 4...

Страница 95: ...en the shortcut menu and then click Auto Focus Not all cameras support this function Image Open the Image page where you can adjust the video image color Camera Property Click to modify the camera pro...

Страница 96: ...y of detected non motor vehicles 0 A M to midnight Click this icon and then select the face attributes that you want to display on the AI preview mode Maximum four attributes are supported to display...

Страница 97: ...quence after restoring factory defaults Procedure Step 1 Right click on the live view page and select Sequence The system displays the maximum number of window splits supported by the DVR after select...

Страница 98: ...Step 2 Adjust channel sequence Drag a channel to the target window split Drag a window split to another to change the sequence You can view the channel sequence according to the channel number on the...

Страница 99: ...ness brightness and contrast The parameters are different according to the connected camera type Take analog channel as an example Parameters displayed on the page vary from different cameras In the l...

Страница 100: ...ore obvious the image edge and the noise is also greater The value ranges from 1 to 15 The default value is 1 Hue Adjust the hue of image The value ranges from 0 to 100 The default value is 50 Brightn...

Страница 101: ...ess hue brightness contrast and saturation will adjust automatically according to the selected color mode EQ Enhance the image effect Adjust the effect value Click image is adjusted to the optimized e...

Страница 102: ...Main Screen Output Port Indicates the main screen port Time Title Select the Time Title checkbox the current system time displays in each channel window in live view screen To hide the time clear the...

Страница 103: ...the resolution options might not be supported on the HDMI port Live Mode General No information is displayed on the channel window AI Mode Displays the detected face snapshots This function is availab...

Страница 104: ...ro channel function Compression In the Compression list select the video compression standard according to the device capability The default is H 265 Resolution In the Resolution list select the video...

Страница 105: ...45 TV adjust Step 2 Configure the parameters according to your actual situation Step 3 Click Apply to complete the settings 5 2 9 Configuring Tour Settings Background Information You can configure a t...

Страница 106: ...User s Manual 90 Figure 5 46 Main screen Figure 5 47 Sub screen Step 2 Configure the settings for the tour parameters for both Main Screen and Sub Screen...

Страница 107: ...then click Modify or double click on the group The Modify Channel Group dialog box is displayed You can regroup the channels Click Move up or Move down to adjust the position of channel group Step 3 C...

Страница 108: ...M page Figure 5 48 Alarm Table 5 19 Alarm parameters Icon Description Click to go to SEARCH page Click to go to ALARM page Click to go to AI page Click to go to POS page Click to go to NETWORK page Cl...

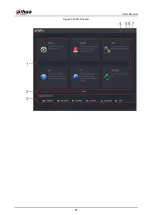
Страница 109: ...CAMERA page Click to go to NETWORK page Click to go to STORAGE page Click to go to SYSTEM page Click to go to SECURITY page Click to go to ACCOUNT page 5 3 Entering Main Menu Right click on the live v...

Страница 110: ...User s Manual 94 Figure 5 50 Main menu...

Страница 111: ...n test network and do other maintenance work BACKUP Search and back up the video files to the external storage device such as USB storage device DISPLAY Configure the display effect such as displaying...

Страница 112: ...anual You can also configure P2P function in the local configurations 5 4 Controlling PTZ Cameras PTZ is a mechanical platform that carries a camera and a protective cover and performs overall control...

Страница 113: ...elect SerialPort or HDCVI For HDCVI series product select HDCVI The control signal is sent to the PTZ through the coaxial cable For the serial mode the control signal is sent to the PTZ through the RS...

Страница 114: ...ns adjusting zoom focus and iris settings and quick positioning Basic PTZ Control Panel Right click on the live view screen and then select PTZ The PTZ control panel is displayed Figure 5 52 PTZ contr...

Страница 115: ...through mouse operations Click you can control the four directions left right up and down PTZ movement through mouse operation Click to open the expanded PTZ control panel Expanded PTZ Control Panel O...

Страница 116: ...nel click Figure 5 55 Preset Step 2 Click the direction arrows to the required position Step 3 In the Preset box enter the value to represent the required position Step 4 Click Setting to complete the...

Страница 117: ...k Add Preset Step 6 A preset will be added for this tour You can repeat adding more presets Click Delete Preset to delete the preset for this tour This operation can be repeated to delete more presets...

Страница 118: ...lso go to the PTZ Control Panel to perform the operations of adjusting zoom focus iris and directions Step 5 On the PTZ page click End to complete the settings 5 4 3 4 Configuring Scan Procedure Step...

Страница 119: ...ours Procedure Step 1 On the expanded PTZ control panel in the No box enter the value of the tour that you want to call Step 2 Click to call the tour Step 3 Click again to stop calling the tour 5 4 4...

Страница 120: ...Step 2 Click again to stop moving 5 4 4 6 Using AUX Button On the expanded PTZ control panel click In the Shortcut Aux list select the option that corresponds to the applied protocol In the Aux No box...

Страница 121: ...enu page click the arrow button to select the onscreen parameters Step 4 Click Enter to complete the settings 5 5 Configuring Camera Settings 5 5 1 Configuring Image Settings Background Information Yo...

Страница 122: ...User s Manual 106 connected camera Procedure Step 1 Select Main Menu CAMERA Image Figure 5 63 Analog channel...

Страница 123: ...ses This function is available on select models Period In the Period list select a time period for the image settings The image settings will be only used during the selected period Effective Time Ena...

Страница 124: ...the noise is also greater The value ranges from 1 to 15 The default value is 1 Image Enhance Adjusts the image definition The bigger the value is the clearer the image will become but there will be m...

Страница 125: ...y Night Configure the color and black white mode of the image This setting is not affected by the configuration files The default setting is Auto Color The camera outputs color image only Auto Depends...

Страница 126: ...video to maximize the storage space AI Codec Enables the AI codec function This function can reduce the video bit stream for non important recorded video to maximize the storage space Type Main Stream...

Страница 127: ...better the image will become I Frame Interval The interval between two reference frames Bit Rate Kb S In the Bit Rate list select a value or enter a customized value to change the image quality The b...

Страница 128: ...or Face Snapshot as the event type for which you want to take a snapshot Scheduled The snapshot is taken during the scheduled period Event The snapshot is taken when there is an alarm event occurs suc...

Страница 129: ...Configuring Encode Enhancement You can enable this function and get more FPS in encode settings see 5 5 2 Configuring Encode Settings In the meantime you will not be able to use extra screen function...

Страница 130: ...Overlay parameters Parameter Description Channel In the Channel list select the channel that you want to configure the settings for Time Title Select the Time Title checkbox to display the system tim...

Страница 131: ...ngs Procedure Step 1 Select Main Menu CAMERA Overlay Privacy Masking Figure 5 69 Privacy masking Step 2 Configure the settings for the covered area parameters Table 5 28 Covered area parameters Parame...

Страница 132: ...Live checkbox or the Record checkbox or select the both The 1 2 3 4 buttons are activated 2 Click the buttons to select blocks 3 A triangle solid black block is displayed 4 Drag the block to the area...

Страница 133: ...hanges dependent on the model you purchased The channel selection for analog camera or IP camera are in sequence for example if you want to select channels for IP camera you need to select from the la...

Страница 134: ...uccessful the system pops up a message indicating the upgrading is completed 5 6 Configuring Remote Devices 5 6 1 Adding Remote Devices This function is available after you have configured the channel...

Страница 135: ...vice list To adjust the display sequence in the title line you can click the IP address Type or Device Name text For example click the IP address text the sequence icon is displayed is displayed next...

Страница 136: ...User s Manual 120 Figure 5 73 Search result Step 2 Enable the Initialized function The uninitialized devices are displayed...

Страница 137: ...User s Manual 121 Figure 5 74 Uninitialized devices Step 3 Select the uninitialized device that you want to initialize Step 4 Click Initialize...

Страница 138: ...you select the Using current device password and email info checkbox the remote device automatically uses the current password and email information so you do not need to set the password and email ad...

Страница 139: ...s Parameter Description User The default is admin Password The password must consist of 8 32 non blank characters and contain at least two types of the following characters uppercase lowercase numbers...

Страница 140: ...4 Select the Email Address box and enter the email address that you want to reserve for password reset in the future If you do not want to set the reserved email address click Skip Step 6 Click Next F...

Страница 141: ...rogressively increasing the last part of the IP address when initializing devices in batches When configuring IP address for multiple remote devices which were not in the same network segment these re...

Страница 142: ...he device Step 3 Click Add The device is added into the Added Device area You can also double click the device to add it into the Added Device area You can add devices in batches 5 6 1 3 Adding Remote...

Страница 143: ...ote device The default is 192 168 0 0 which the system cannot connect to RTSP Port The default value setting is 554 You can enter the value according to your actual situation HTTP Port The default val...

Страница 144: ...ice is added through other manufacturers the system supports TCP and UDP Encryption If the remote device is added through ONVIF protocol enabling the Encryption checkbox will provide encryption protec...

Страница 145: ...s Click to delete one device Select the checkbox of the devices that you want to delete and then click Delete 5 6 1 5 Modifying IP Address You can modify a single IP address or multiple IP addresses o...

Страница 146: ...re the settings for IP address subnet mask default gateway username and password 3 Click OK to save the settings Modify IP address in batches 1 In the Searched Device list area select the devices that...

Страница 147: ...allocated in sequence subnet mask default gateway username and password 5 Click OK to save the settings 5 6 1 6 Exporting IP Address You can export the added IP address to the USB storage device The...

Страница 148: ...ile information includes IP address port channel number manufacturer username and password If you select the Backup Encryption checkbox the file format is backup If you clear the Backup Encryption che...

Страница 149: ...sting one Click Cancel to add it as a separate device in the Added Device area You can edit the exported csv file and be cautious not to change the file format otherwise the file cannot be imported as...

Страница 150: ...u can view the device firmware information such as channel number IP address manufacturer system version video input audio input and alarm in Select Main Menu CAMERA Camera List Firmware Figure 5 87 F...

Страница 151: ...iles and click Apply Online Update 1 Click Detect or select the checkbox the device that you want to upgrade and click Manual Check The system starts detecting if there is a new version on the online...

Страница 152: ...tings Check to ensure the HDD installed in the Device has been formatted properly Procedure Step 1 Right click on the live view screen the shortcut menu is displayed On the shortcut menu select Manual...

Страница 153: ...or details see 5 1 4 9 Configuring Recorded Video Storage Schedule 5 8 Configuring Snapshot Settings 5 8 1 Configuring Snapshot Trigger The snapshot is divided into scheduled snapshot event triggered...

Страница 154: ...parameters Figure 5 91 Type list Step 6 Click Apply to save the settings If you have configured the snapshot schedule the configuration has been completed If you have not configured the snapshot sche...

Страница 155: ...select the event type to configure for example select the Motion Detection tab Figure 5 93 Motion detection Step 4 Click Setting next to Picture Storage checkbox and select the corresponding channel S...

Страница 156: ...For details see 5 18 9 Configuring FTP Storage Settings The snapshots will be uploaded to FTP for backup 5 9 Playing Back Video 5 9 1 Enabling Record Control Manual recording operation requires the u...

Страница 157: ...Stream Sub Stream Auto Automatically record according to the record type and recording time as configured in the recording schedule Manual Keep general recording for 24 hours for the selected channel...

Страница 158: ...ption 1 Display Window Display the searched recorded video or picture Supports simultaneously playing in single channel 4 channel 9 channel and 16 channel When playing back in a single channel click a...

Страница 159: ...e next time point where there is a recorded video located Click and hold the time bar and the mouse pointer shall change to a hand icon and then you can drag to view the playback of the target time Yo...

Страница 160: ...on the searched recorded video list is displayed You can lock the files 12 Full Screen Click to display in full screen In the full screen mode point to the bottom of the screen the time bar is display...

Страница 161: ...layback as FastX2 FastX4 FastX8 or FastX16 During slow playback click to speed up slow playback Previous day and next day Click or click to play the previous day or next day of the current recorded vi...

Страница 162: ...Click on the time bar to select the start time and then click to start clipping Step 3 Click on the time bar to select the end time and then click to stop clipping Step 4 Click You can clip the video...

Страница 163: ...the recorded video This function is available on select models To use the Smart Search function you need to enable the motion detection for the channel by selecting Main Menu ALARM Video Detection Mo...

Страница 164: ...g area Unchecking Display the general motion alarm which includes both human and vehicle during selected time and searching area Step 7 Click Step 8 The screen starts playing back the motional splices...

Страница 165: ...d recording by searching time and mark name Marking a Video 1 Select Main Menu SEARCH 2 In the playback mode click Figure 5 104 Add tag 3 In theTag Name box enter a name 4 Click OK This marked video f...

Страница 166: ...igure to play N seconds of the tagged video before the tagged time 1 In the Tag Name box enter the name of a tagged video 2 In the Interval Before Tag box enter N seconds 3 Click The playback starts f...

Страница 167: ...he marked video select the tagged video and then click Delete After opening the Tag Management page the playback will pause until exiting this page If the marked video that was in playing back is dele...

Страница 168: ...ack splices Click the playback starts from the beginning Double click anywhere on the time bar the playback starts from where you click Figure 5 108 Time bar Every recorded video file must be at least...

Страница 169: ...User s Manual 153 Figure 5 109 File list Step 4 Start playback Click the playback starts from the first file by default Click any file the system plays back this file...

Страница 170: ...with intelligent vents Click to return to the page with calendar and CAM NAME list Related Operations To lock the recorded video on the File List page select the checkbox of the recorded video and th...

Страница 171: ...ge device Click to play the recorded video of alarm event Select an event and click Details to view the detailed information of the event 5 10 2 Alarm Input Settings Connect the alarm input and output...

Страница 172: ...Local alarm settings Parameter Description Alarm in Port Select the channel number Alarm Name Enter the customized alarm name Enable Enable or disable the local alarm function Device Type In the Devic...

Страница 173: ...nction make sure the email function is enabled in Main Menu NETWORK Email Record Channel Select the channel s that you want to record The selected channel s starts recording after an alarm event occur...

Страница 174: ...nnect a switch to the alarm input port for disarming control Step 3 Click Apply to complete the settings Click Default to restore the default setting Click Copy to in the Copy to dialog box select the...

Страница 175: ...the Alarm Box Step 3 In the Alarm in Port list select the alarm input port on the Alarm Box Step 4 Configure the settings for other parameters of the Alarm Box Step 5 Click Apply to complete the sett...

Страница 176: ...s Click Default to restore the default setting Click Copy to to copy the settings to other channels Click Refresh to refresh configured settings 5 10 2 4 Configuring Alarms for IP Camera Offline You c...

Страница 177: ...ings from the offline IPC Step 3 Click Apply to complete the settings Click Default to restore the default setting Click Copy to to copy the settings to other channels 5 10 2 5 Configuring Alarms from...

Страница 178: ...1 Configuring Alarm Output When the Device activates alarms the connected alarm device generates alarms in the way that you can configure in this section You can connect to the output port of the Devi...

Страница 179: ...s number configured by the DIP switch on the Alarm Box Alarm Type Select the alarm type for each alarm output ports Status Indicates the status of each alarm output port Alarm Reset Click OK to clear...

Страница 180: ...om 5 seconds to 30 seconds and the default value is 5 seconds Mode Set the alarm mode of warning light to be Always on or Flicker Flicker Frequency When setting the alarm mode of warning light to be F...

Страница 181: ...is 5 seconds Audio Clip Select the audio clip for the siren sound The default setting is Clip 1 Volume Select the volume for the audio clip You can select the flash frequency from Low Middle and High...

Страница 182: ...ter the event ends To use this function connect a camera that supports smart illumination Procedure Step 1 Select Main Menu ALARM Alarm out Port Smart Illumination Figure 5 121 Smart illumination Step...

Страница 183: ...hen the moving object appears and moves fast enough to reach the preset sensitivity value the system activates the alarm Procedure Step 1 Select Main Menu ALARM Video Detection Motion Detection Figure...

Страница 184: ...neral Alarm Enable alarm activation through the alarm devices connected to the selected output port External Alarm Enable alarm activation through the connected alarm box Wireless Siren Enable alarm a...

Страница 185: ...ra screen shall be enabled Video Matrix Select the checkbox to enable the function When an alarm event occurs the video output port outputs the settings configured in Main Menu DISPLAY Tour This funct...

Страница 186: ...ry channel has an individual sensitivity value The bigger the value is the easier the alarms can be activated Threshold Adjust the threshold for motion detect Every region of every channel has an indi...

Страница 187: ...od by editing Take Sunday as an example 1 Click Figure 5 125 Period 2 Enter the time frame for the period and then select the checkbox to enable the settings 3 Click OK to save the settings Step 3 On...

Страница 188: ...pply to complete the settings Click Default to restore the default setting Click Copy to in the Copy to dialog box select the additional channel s that you want to copy the motion detection settings t...

Страница 189: ...he settings Click Default to restore the default setting Click Copy to in the Copy to dialog box select the additional channel s that you want to copy the motion detection settings to and then click A...

Страница 190: ...utput port Extension Alarm Enable alarm activation through the connected alarm box Wireless Siren Enable alarm activation through devices connected by USB gateway or camera gateway Post Alarm Set a le...

Страница 191: ...evice to record a local alarm log Alarm Tone Select to enable audio broadcast alarm tone in response to an HDD alarm event Step 3 Click Apply to complete the settings 5 10 5 2 Configuring Network Even...

Страница 192: ...enable a pop up message in your local host PC Send Email Select the Send Email checkbox to enable the system to send an email notification when an alarm event occurs To use this function make sure the...

Страница 193: ...ill not be pushed to the clients including the mobile app platform and cloud platform Step 4 Select alarm linkage actions to disarm All alarm linkage actions will be disarmed when you select All Step...

Страница 194: ...e and then link the configured alarms IVS The IVS function processes and analyzes the human and vehicle images to extract the key information to match with the preset rules When the detected behaviors...

Страница 195: ...do all the AI analysis and then give the results to the DVR AI by Device The camera only transmits normal video stream to the DVR and then the DVR will do all the AI analysis Step 4 Click Setting next...

Страница 196: ...nter when an alarm event occurs This function is available on select models The corresponding parameters in the alarm center should be configured Send Email Select the Send Email checkbox to enable th...

Страница 197: ...activate a buzzer noise at the Device Log Select the checkbox to enable the Device to record a local alarm log Alarm Tone Select to enable audio broadcast in response to a face detection event Warning...

Страница 198: ...User s Manual 182 beard and mask Step 3 Click Smart Search The results are displayed Figure 5 134 Search results Step 4 Select the face that you want to play back...

Страница 199: ...ween full screen playing and thumbnail playing You can also do the following operations to the recorded files To export the database file csv to the external storage device select files click Export a...

Страница 200: ...rts faces searching by faces attributes or portraits If you select AI by device then among face detection and recognition IVS function and video structuring you can use one of them at the same time fo...

Страница 201: ...can select Local or Remote Local Viewing the existing face databases or adding new one on the DVR Remote If you have face recognition camera you can select this to view the existing face databases or...

Страница 202: ...arison Select the database and then click Delete to delete the database Figure 5 139 Configure database 5 11 2 2 2 Adding Face Pictures You can add face pictures to the existing databases one by one o...

Страница 203: ...User s Manual 187 2 Click of the database that you want to configure Figure 5 140 Details 3 Click Register ID...

Страница 204: ...User s Manual 188 Figure 5 141 Register ID 4 Click to add a face picture Figure 5 142 Browse 5 Select a face picture and enter the registration information...

Страница 205: ...n is successful 7 On the Details page click Search The system prompts modeling is successful If the system prompts the message indicating modeling is in process wait a while and then click Search agai...

Страница 206: ...the name Gender Enter 1 or 2 1 represents male and 2 represents female Birthday Enter numbers in the format of yyyy mm dd Country Enter the abbreviation of country For example CN for China ID Type 1 r...

Страница 207: ...h time or Select a folder to import face pictures 4 Click OK to complete batch registration Adding the Detected Faces 1 Right click on the live view screen and then select Live Mode AI Mode Figure 5 1...

Страница 208: ...User s Manual 192 Figure 5 147 Playback 3 Click Add to Human Face Database Figure 5 148 Register ID 4 Select the face database and enter the ID information 5 Click OK to complete registration...

Страница 209: ...d on the AI mode live view screen and smart search page and link the alarms Procedure Step 1 Select Main Menu AI Parameters Face Recognition Figure 5 149 Face recognition Step 2 In the Channel list se...

Страница 210: ...ted Figure 5 151 Selected face database Step 5 Configure the added face database Click to modify the similarity The lower the number is the easier the alarm linkage will trigger Click to delete the fa...

Страница 211: ...de If the detected face belongs to the enabled face database the similarity result is displayed If the detected face does not belong to the enabled face database the face will be remarked as Stranger...

Страница 212: ...ual 196 Figure 5 153 Search by attributes 2 Select the channel and set the parameters such as start time end time gender age glasses beard mask and similarity according to your requirement 3 Click Sma...

Страница 213: ...User s Manual 197 Figure 5 154 Smart search 4 Click the picture that you want to play back...

Страница 214: ...playing and thumbnail playing You can also do the following operations to the recorded files To export the database file csv to the external storage device select files click Export and then select t...

Страница 215: ...written select the files and then click Lock To add a mark to the file select the files and then click Add Tag Search by Picture 1 Select Main Menu AI AI Search Face Recognition Search by Picture Figu...

Страница 216: ...Click Face Database Figure 5 158 Face database b Set the searching parameters by selecting the face database and gender and entering name and ID No according to your actual requirement c Click Search...

Страница 217: ...ce and then click Local Upload Then select the picture from the USB storage device and then click OK The selected face pictures are uploaded 3 After the face pictures are uploaded continue to configur...

Страница 218: ...User s Manual 202 Figure 5 160 Search results...

Страница 219: ...and thumbnail playing You can also do the following operations to the recorded files To add a mark to the file select the files and then click Add Tag To lock the files to make it unable to be overwri...

Страница 220: ...5 11 2 3 1 Configuring IVS Parameters The alarms are generated according to the configured parameters Procedure Step 1 Select Main Menu AI Parameters IVS Figure 5 163 IVS Step 2 In the Channel list s...

Страница 221: ...enable it Step 7 Click Apply to complete the settings 5 11 2 3 2 Configuring Tripwire Rules When the target object crosses the tripwire in the defined direction the system activates alarms The tripwir...

Страница 222: ...t to configure the rules for 2 Click The monitoring screen to configure the tripwire rules is displayed Figure 5 166 Tripwire rule 3 Click to draw the minimum size or maximum size to filter the target...

Страница 223: ...rate Target Filter Click and then select effective target With Human and Motor Vehicle selected by default the system automatically identifies the person and motor vehicle appeared within the monitori...

Страница 224: ...ct the Report Alarm checkbox to enable the system to upload the alarm signal to the network including alarm center when an alarm event occurs This function is available on select models The correspond...

Страница 225: ...vice to record a local alarm log Alarm Tone Select to enable audio broadcast in response to a face detection event Warning Light Select the checkbox to enable the warning light alarm of the camera Sir...

Страница 226: ...in the Type list select Intrusion Figure 5 168 Intrusion Step 2 Draw an area 1 In the Channel list select the channel that you want to configure the rules for 2 Click Figure 5 169 Intrusion rule 3 Co...

Страница 227: ...e monitoring range Effective Target 4 Drag to draw an area 5 Click OK to save the settings Step 3 Click to set the actions to be triggered Step 4 Select the Enable checkbox and then click Apply The in...

Страница 228: ...5 172 Playback Step 5 Click to play back the recorded video Double click on the playing page to switch between full screen playing and thumbnail playing You can also do the following operations to th...

Страница 229: ...uctured database You can search any target you need with these features 5 11 2 4 1 Configuring Video Structuring Procedure Step 1 Select Main Menu AI Parameters Video Structuring Figure 5 174 Video st...

Страница 230: ...sses Expression Mask and Beard You can search the target you need with these features Non motor Vehicle Select this option and then the device will analyze all the non motor vehicle features in the vi...

Страница 231: ...ultiple results and then you can Click Export to export them to the USB device Click Backup to make backup in the DVR Click Lock so that they don t get overwritten or deleted Click Add Tag to name the...

Страница 232: ...nel at the same time SMD The device can detect and classify humans and vehicles in the image IVS The IVS function processes and analyzes the human and vehicle images to extract the key information to...

Страница 233: ...l list select a channel that you want to configure face detection function and then enable it Step 3 Set the sensitivity for smart motion detection and then select human or motor vehicle or both as th...

Страница 234: ...ct the Report Alarm checkbox to enable the system to upload the alarm signal to the network including alarm center when an alarm event occurs This function is available on select models The correspond...

Страница 235: ...le on select models The extra screen must be enabled to support this function Buzzer Select the checkbox to activate a buzzer noise at the Device Log Select the checkbox to enable the Device to record...

Страница 236: ...AI Parameters IVS Figure 5 180 IVS You can enable the AI Mode and then the detection accuracy would be improved but the video stream quantity that the DVR can process will reduce Step 2 In the Channel...

Страница 237: ...I AI Search IVS Figure 5 181 IVS Step 2 In the Channel list select the channel that you want to search for the events and then set other parameters such as start time end time event type and alarm obj...

Страница 238: ...u can also do the following operations to the recorded files To back up the recorded files to the external storage device select files click Backup select the save path and file type and then click St...

Страница 239: ...ction and recognition IVS function you can use one of them at the same time for the same channel 5 11 3 4 Face Recognition For XVR7X I series only Face recognition applies to AI preview mode and smart...

Страница 240: ...nctions General mode Only one AI function can be enabled for the designated channel during different periods on each day in the week Schedule mode The system can activate different AI functions for th...

Страница 241: ...le mode are independent The changes you make in one mode does not affect the configurations in the other mode Step 3 Select one channel and then click Step 4 Define the periods for AI functions Define...

Страница 242: ...cific days that you want to apply the settings to 3 Click OK Step 5 Click Apply 5 12 IoT Function 5 12 1 Configuring Sensor Settings You can connect external sensors wirelessly through the Device with...

Страница 243: ...User s Manual 227 Figure 5 189 Sensor pairing Step 2 In the Access Type list select USB Gateway Step 3 Click Add Figure 5 190 Add USB gateway Step 4 Click Pair...

Страница 244: ...Click Back to exit the pairing page Click to modify the sensor name click to delete sensor information Figure 5 192 Sensor pairing 5 12 1 2 Connecting Sensor through Camera with Gateway Only the came...

Страница 245: ...airing Figure 5 193 Sensor pairing Step 2 In the Access Type list select Camera Gateway Step 3 In the Channel list select the channel that is connected to the camera Step 4 Click Add Figure 5 194 Add...

Страница 246: ...User s Manual 230 Figure 5 195 Pair Step 6 Click Back to exit the pairing page Click to modify the sensor name click to delete sensor information...

Страница 247: ...User s Manual 231 Figure 5 196 Sensor pairing 5 12 1 3 Configuring Alarm Linkage Procedure Step 1 Select Main Menu IoT Management Wireless Detector...

Страница 248: ...era Gateway or All When Access Type is Camera Gateway you can select Channel to filter the status of present wireless detector Step 3 Click Figure 5 198 Setting Step 4 Configure the settings for alarm...

Страница 249: ...led The value ranges from 0 seconds to 300 seconds and the default value is 10 seconds Post Record Set a length of time for the Device to delay turning off recording after the alarm is cancelled The v...

Страница 250: ...creen Select the checkbox to enable the function When an alarm event occurs the extra screen outputs the settings configured in Main Menu DISPLAY Tour Sub Screen This function is available on select m...

Страница 251: ...ng mode When Show F Fahrenheit Degree is selected the temperature will be displayed by Fahrenheit degree in Realtime Display tab 5 12 2 2 Viewing Temperature and Humidity Data You can view the tempera...

Страница 252: ...orting Temperature and Humidity Data You can export the temperature and humidity data in bmp format This section uses exporting humidity data as an example Procedure Step 1 Prepare a USB device and pl...

Страница 253: ...tarts exporting the data Step 5 Click OK You can find the exported data on your USB device 5 12 2 4 Configuring Alarm Linkage You can configure alarm linkage settings for temperature and humidity data...

Страница 254: ...Access Point Indicates the channel that the camera is connected to Type Temperature by default Detect Position Name Set the detect position name Preview Channel Select the channel that you want to pre...

Страница 255: ...t a length of time for the Device to delay turning off alarm after the external alarm is cancelled The value ranges from 0 seconds to 300 seconds and the default value is 10 seconds Post Record Set a...

Страница 256: ...en an alarm event occurs To use this function make sure the email function is enabled in Main Menu NETWORK Email Log Select the checkbox to enable the Device to record a local alarm log Extra screen S...

Страница 257: ...n Access Point Indicates the channel that the camera is connected to Type Humidity by default Detect Position Name Set the detect position name Preview Channel Select the channel that you want to prev...

Страница 258: ...st Alarm Set a length of time for the Device to delay turning off alarm after the external alarm is cancelled The value ranges from 0 seconds to 300 seconds and the default value is 10 seconds Post Re...

Страница 259: ...Tour This function is available on select models Send Email Enable the system to send an email notification when an alarm event occurs To use this function make sure the email function is enabled in M...

Страница 260: ...that you want to search You can select Humidity or Temperature Status Select the information state that you want to search This option is available when you select List in the Display Type list Start...

Страница 261: ...ou can find the exported data on your USB device 5 12 3 Configuring Wireless Siren You can connect the wireless siren to the Device when there is an alarm event activated on the Device the wireless si...

Страница 262: ...POS You can connect the Device to the POS Point of Sale machine and receive the information from it This function applies to the scenarios such as supermarket POS machine After connection is establis...

Страница 263: ...on your receipt amount or product name Step 3 In the Start Time box and End Time box enter the time period that you want to search the POS transaction information Step 4 Click Search The searched tra...

Страница 264: ...The selected channel s starts recording after an alarm occurs The recording for POS alarms and auto recording function must be enabled For details see 5 1 4 9 Configuring Recorded Video Storage Schedu...

Страница 265: ...e text size of POS information Font Color In the color bar click to select the color for the text size of POS information POS Info Enable the POS Info function the POS information displays in the live...

Страница 266: ...recorded videos and snapshots Procedure Step 1 Select Main Menu Backup Figure 5 214 Backup Step 2 Configure the settings for the backup parameters Table 5 55 Backup parameters Parameter Description De...

Страница 267: ...ist select the file type that you want to search Start Time Enter the start time and end time for the files that you want to search End Time File Format In the File Format list select the file format...

Страница 268: ...n you can configure the settings for the Device such as IP address DNS according to the networking plan For details see 5 1 4 4 Configuring Network Settings 5 15 1 2 Configuring Port Settings You can...

Страница 269: ...e IP address when logging in the Device by browser RTSP Port The default value setting is 554 You can enter the value according to your actual situation POS Port Data transmission The value range is f...

Страница 270: ...e settings for the Wi Fi connection parameters Table 5 57 Wi Fi connection parameters Parameter Description Connect Automatically Enable Connect Automatically After the Device is restarted it will aut...

Страница 271: ...isconnect Step 3 Optional Click Firmware Update select related firmware file and then click OK Step 4 Click Apply to complete the settings After the Device is connected to a Wi Fi hotspot in the Wi Fi...

Страница 272: ...plays the recognized information for the parameters in Area 2 Table 5 58 Recognized information Parameter Description NIC Name Displays the name of Ethernet card Network Type Displays the network type...

Страница 273: ...Step 6 Click Apply to complete the settings 5 15 1 4 2 Through the External Drive You can connect the 3G 4G through an external drive Procedure Step 1 Connect the external drive to the USB port of th...

Страница 274: ...and then click OK Figure 5 222 Firmware upgrade Step 5 Click Apply and then waiting for the firmware to be installed 5 15 1 5 Configuring PPPoE Settings PPPoE is another way for the Device to access...

Страница 275: ...IP address to access the Device When the PPPoE function is enabled the IP address on the TCP IP page cannot be modified 5 15 1 6 Configuring DDNS Settings When the IP address of the Device changes fre...

Страница 276: ...ate no ip com Type CN99 DDNS address members 3322 org Server Address Domain Name The domain name for registering on the website of DDNS service provider Username Enter the username and password obtain...

Страница 277: ...is enabled SMTP Server Enter the address of SMTP server of sender s email account Port Enter the port value of SMTP server The default value setting is 25 You can enter the value according to your ac...

Страница 278: ...mail to check the connection Sending Interval Min This is the interval that the system sends a health test email The value ranges from 30 to 1440 0 means that there is no interval Test Click Test to t...

Страница 279: ...shall be mapped to extranet proceed with caution Status Indicates the status of UPnP function Offline Failed Online Succeeded LAN IP Enter IP address of router on the LAN After mapping succeeded the...

Страница 280: ...establishing a mapping relationship ensure the mapping ports are not occupied or limited The internal and external ports of TCP and UDP must be the same and cannot be modified Click to modify the exte...

Страница 281: ...send the Trap information Trap Port Indicates the destination port for the agent program to send the Trap information Read Only Username Enter the username that is allowed to access the Device and has...

Страница 282: ...on to group the IP to solve the problem Procedure Step 1 Select Main Menu NETWORK Multicast Figure 5 228 Multicast Step 2 Configure the settings for the multicast parameters Table 5 63 Multicast param...

Страница 283: ...ou can register the Device into the specified proxy server which acts as the transit to make it easier for the client software to access the Device Procedure Step 1 Select Main Menu NETWORK Register F...

Страница 284: ...1 12 Configuring Alarm Center Settings You can configure the alarm center server to receive the uploaded alarm information To use this function the Report Alarm checkbox must be selected For details a...

Страница 285: ...P technology to download the application and register the devices For details see 5 1 4 5 Configuring P2P Settings 5 15 2 Configuring Network Testing Settings 5 15 2 1 Testing the Network You can test...

Страница 286: ...ng resending and editing data that are sent and received during network transmission When there is network abnormality you can perform packet capturing and back up into the USB storage device This dat...

Страница 287: ...ice Step 3 Click Refresh The Device starts detecting the USB storage device and displays its name in the Device Name box Step 4 Select the route of the data that you want to capture and back up 1 In t...

Страница 288: ...LAN can be captured at one time After capturing starts you can exit the Test page to perform other operations such as web login and monitoring Step 6 Click to stop capturing The backup data is saved...

Страница 289: ...nnot be set randomly You can manage the account by user and group and the name cannot be repeated Every user must belong to a group and one user only belongs to one group 5 16 1 Configuring User Accou...

Страница 290: ...st be within the group permission Period Click Setting to configure the parameters Define a period during which the new account can log in to the device The new account cannot log in to the device dur...

Страница 291: ...ick before each day the icon switches to On the timeline of any selected day click the half hour blocks to select the active periods all the days with will take the same settings Define for all days o...

Страница 292: ...s of a week or select specific day s that you want to apply the settings to c Click OK to save the settings 3 Click OK 5 16 1 2 Modifying a User Account Procedure Step 1 Select Main Menu ACCOUNT User...

Страница 293: ...from number letter and special characters excluding and For the admin account you enable disable the unlock pattern and modify password hint To use the unlock pattern enable Unlock Pattern click draw...

Страница 294: ...gure 5 243 User Step 2 Click for the user account that you want to delete Step 3 Click OK to delete a user account 5 16 2 Configuring Group Account 5 16 2 1 Adding a Group Procedure Step 1 Select Main...

Страница 295: ...eters of adding a group Table 5 67 Parameters of adding a group Parameter Description Group Name Enter a name for the group Remarks Optional Enter a description of the account Permission In the Permis...

Страница 296: ...rocedure Step 1 Select Main Menu ACCOUNT Group Figure 5 246 Group Step 2 Click for the group account that you want to modify Figure 5 247 Modify Step 3 Change the settings for group name memo and auth...

Страница 297: ...t you want to delete Step 3 Click OK to delete a group 5 16 3 Configuring ONVIF Users The device manufactured by other company can connect to the Device through ONVIF protocol by an authorized ONVIF a...

Страница 298: ...and select the group that you want this account to belong to Step 4 Click OK to save the settings Click to modify the account Click to delete the account 5 17 Audio Management Audio management functio...

Страница 299: ...files listen to audio files rename and delete audio files and configure the audio volume Procedure Step 1 Select Main Menu AUDIO File Management Figure 5 251 File management Step 2 Click Add Figure 5...

Страница 300: ...ht 5 17 2 Configuring Playing Schedule for Audio Files You can configure the settings to play the audio files during the defined time period Procedure Step 1 Select Main Menu AUDIO Audio Play Figure 5...

Страница 301: ...al Playing priority Alarm event Talkback Audio file Trial listening Step 3 Click Apply to complete the settings 5 18 Storage Management Storage management function manages the stored resources such as...

Страница 302: ...p 3 Click Apply to complete the settings 5 18 2 Configuring the Recording and Snapshot Schedule The system starts recording and taking snapshot according to the configured schedule For details see 5 1...

Страница 303: ...l data on the disk proceed with caution Figure 5 257 Note 5 18 4 Configuring Record Record type includes auto and manual record You can configure record type of main stream and sub stream See 5 7 Conf...

Страница 304: ...en click Apply to complete the settings Step 3 After configuring HDD group click Main Stream Sub Stream and Snapshot tabs respectively to configure the saving of main stream sub stream and snapshot in...

Страница 305: ...Figure 5 260 Sub stream Figure 5 261 Snapshot Step 4 Click Apply to complete the settings 5 18 6 Configuring Disk Quota By configuring quota allocate fixed storage capacity to each channel and distri...

Страница 306: ...AGE Disk Quota Step 2 Configure the disk quota For one HDD devices click select a channel and then configure the parameters including recording duration bit rate storage capacity of pictures Figure 5...

Страница 307: ...User s Manual 291 Figure 5 263 Version 1 Figure 5 264 Version 2 Step 3 Click Apply...

Страница 308: ...matting If there are no files in HDD the system cannot detect the bad track Global detect Detect the whole HDD through Windows which takes time and might affect the HDD that is recording the video Pro...

Страница 309: ...tecting is completed you can view the detecting reports to find out the problem and replace the defective HDD to avoid data loss Procedure Step 1 Select Main Menu STORAGE Disk Check Check Report Figur...

Страница 310: ...5 18 8 Configuring Record Estimate Record estimate function can calculate how long you can record video according to the HDD capacity and calculate the required HDD capacity according to the record p...

Страница 311: ...ulate the time period that can be used for storage according to the channels settings and HDD capacity Click Copy to to copy the settings to other channels Related Operations Calculate recording time...

Страница 312: ...the required HDD capacity is displayed Figure 5 274 Total space 5 18 9 Configuring FTP Storage Settings You can store and view the recorded videos and snapshots on the FTP server Prerequisites Purchas...

Страница 313: ...Anonymous Enter the username and password to log in to the FTP server Enable the anonymity function and then you can login anonymously without entering the username and password Username Password Sto...

Страница 314: ...ot the system uploads the snapshot every 10 seconds To configure the snapshot interval select Main Menu CAMERA Encode Snapshot Channel Select the channel that you want to apply the FTP settings Day Se...

Страница 315: ...will be in orange to warn risk You can click Details to see the detailed risk description Figure 5 276 Security status Scanning Security Modules This area shows the running status of security modules...

Страница 316: ...s function is enabled by default There might be safety risk if this service is enabled Disable this function when it is not in use CGI If this function is enabled the remote devices can be added throu...

Страница 317: ...enabling this function the device can be searched by other devices Private Protocol Authentication Mode Security Mode Recommended Uses Digest access authentication when connecting to DVR Compatible M...

Страница 318: ...ee 5 19 4 CA Certificate Username The username shall be authorized at server Password Password of the corresponding username Step 4 Click Apply 5 19 2 3 HTTPS We recommend that you enable HTTPS functi...

Страница 319: ...ork Access you can configure IP Address IP Segment and MAC Address Type You can select IP address IP segment and MAC address IP Address Enter IP Address Start Port and End Port that is allowed or forb...

Страница 320: ...for Value range 5 120 minutes Default value 5 minutes Step 3 Click Apply 5 19 3 3 Anti Dos Attack You can enable SYN Flood Attack Defense and ICMP Flood Attack Defense to defend the device against Do...

Страница 321: ...sted hosts When Type is IP Segment it can be configured End Address Input the end IP address of trusted hosts When Type is IP Segment it can be configured Step 4 Click Apply 5 19 4 CA Certificate You...

Страница 322: ...user defined City Name This parameter is user defined Valid Period Enter a valid period for the certificate Organization This parameter is user defined Organization Unit This parameter is user defined...

Страница 323: ...sh drive with third party certificate before importing 1 Select Import Third party Certificate Figure 5 283 Import third party certificate 2 Configure the parameters Table 5 77 Import third party cert...

Страница 324: ...ick Create 5 19 4 2 Trusted CA Certificate Procedure Step 1 Select Main Menu SECURITY CA Certificate Trusted Certificate Step 2 Click Install Trusted Certificate Figure 5 284 Install certificate Step...

Страница 325: ...pe Use the default setting Update Period of Secret Key Secret key update period Value range 0 720 hours 0 means never update the secret key Default value 12 RTSP over TLS Enable Enables RTSP stream en...

Страница 326: ...When an alarm occurs the DVR device transmits the alarm information to the alarm device Post Alarm When the alarm ends the alarm extended for a period of time The time range is from 0 seconds to 300...

Страница 327: ...Email Security Event monitoring explanation It indicates the type of attacks that can trigger security exception Unauthorized executable program trying to run Web URL brute force attack Session connec...

Страница 328: ...ck the box and then select the corresponding audio file from the dropdown list System plays the audio file when the alarm occurs Log Select the checkbox the device records the alarm information in the...

Страница 329: ...liday Step 2 Click Add Figure 5 289 Add holiday Step 3 Configure the holiday name repeat mode time range according to your actual situation Step 4 Click Add Enable the Add More function so you can con...

Страница 330: ...290 Added holiday 5 20 2 Configuring RS 232 Settings Select Main Menu SYSTEM RS232 and then you can configure serial port function baud rate and other parameters Only some series products support this...

Страница 331: ...l COM in order to overlay card number PTZ Matrix Connect matrix control Baud Rate Select baud rate which is 115200 by default Data Bits It ranges from 5 to 8 which is 8 by default Stop Bits It include...

Страница 332: ...ice temperature This function is available on select models and it is only supported on the local configuration page Step 3 Click Apply to complete the settings 5 20 4 Exporting and Importing System S...

Страница 333: ...ect Main Menu MAINTAIN Manager Import Export Figure 5 293 Import Export 2 Insert a USB storage device into one of the USB ports on the Device 3 Click Refresh to refresh the page Figure 5 294 Connected...

Страница 334: ...the page 4 Click on the configuration folder under the name style of Config_ YYYYMMDDhhmmss that you want to import 5 Click Import The Device will reboot after the imported is succeeded 5 20 5 Restor...

Страница 335: ...log box to completely recover device parameters to factory default 5 20 6 Updating the Device 5 20 6 1 Updating File Procedure Step 1 Insert a USB storage device containing the upgrade files into the...

Страница 336: ...efore using this function you need to check whether there is any new version by auto check or manual check Auto check The Device checks if there is any new version available at intervals Manual check...

Страница 337: ...ot be performed When starting the Device the system automatically checks whether there is a USB storage device connected and if there is any upgrade file and if yes and the check result of the upgrade...

Страница 338: ...21 2 Viewing Log Information Background Information You can view and search the log information If there is HDD installed the logs about system operations are saved in the memory of the Device and oth...

Страница 339: ...m Config Storage Record Account Clear Playback and Connection or select All to view all logs Step 3 In the Start Time box and End Time box enter the time period to search and then click Search Figure...

Страница 340: ...logs 5 21 3 Viewing Event Information You can view the event information of the Device and channel Select Main Menu INFO EVENT Figure 5 302 Event 5 21 4 Viewing Network Information You can view the on...

Страница 341: ...5 The system detects every 5 seconds to check whether there is any user added or deleted and update the user list timely 5 21 4 2 Viewing the Network Load Network load means the data flow which measur...

Страница 342: ...The system displays the information of data sending speed and receiving speed The default display is LAN1 load Only one LAN load can be displayed at one time 5 21 5 Viewing HDD Information You can vie...

Страница 343: ...sition Indicates installation position of HDD Type Indicates HDD type Total Space Indicates the total capacity of HDD Free Space Indicates the usable capacity of HDD Status Indicates the status of the...

Страница 344: ...s Manual 328 Figure 5 306 Channel information 5 21 7 Viewing Data Stream Information You can view the real time data stream rate and resolution of each channel Select Main Menu INFO BPS Figure 5 307...

Страница 345: ...vice On the upper right corner of the Main Menu page or on any page after you have entered the Main Menu click Select Logout you will log out of the device Select Reboot the Device will be rebooted Se...

Страница 346: ...ser s manual 6 1 Connecting to Network The factory default IP of the Device is 192 168 1 108 The Device supports monitoring on different browsers such as Safari fire fox Google on Apple PC to perform...

Страница 347: ...The password is the one that was configured during initial settings To security your account it is recommended to keep the password properly and change it regularly Click to display the password Step...

Страница 348: ...our actual situation 5 Displays Cell Phone Client and Device SN QR Code Cell Phone Client Use your mobile phone to scan the QR code to add the device into the Cell Phone Client and then you can start...

Страница 349: ...ection face recognition and IVS functions IoT You can view search and export the temperature and humidity data of camera and configure the alarm event settings BACKUP Search and back up the video file...

Страница 350: ...User s Manual 334 Figure 6 3 Legal information...

Страница 351: ...Hardware malfunction 3 Hard disk cannot be detected There are following possibilities HDD is broken HDD jumper is damaged HDD cable connection is loose Main board SATA port is broken 4 There is no vid...

Страница 352: ...rrect Please enable audio function Corresponding channel has no video input Playback is not continuous when the screen is blue 10 System time is not correct There are following possibilities Setup is...

Страница 353: ...mosaic Usually we do not recommend this mode There is privacy mask or channel protection setup Current user has no right to monitor DVR local video output quality is not good 15 Network connection is...

Страница 354: ...when you play the file transformed to AVI via media player No DivX503Bundle exe or ffdshow 2004 1012 exe in Windows XP OS 23 Forgot local menu operation password or network password Please contact yo...

Страница 355: ...m type of the camera is H 264 or not Check the device supports camera main stream resolution or not such as 960H D1 and HD1 Check camera network transmission has reached the threshold or not Check the...

Страница 356: ...hannel to the IP channel to connect to the IP camera From Main Menu CAMERA CHANNEL TYPE select the last channel to switch to the IP channel Some series product products support IP channel extension it...

Страница 357: ...ia Interface HTTP Hyper Text Transfer Protocol IoT Internet of Things IP Internet Protocol IVS Intelligent Video System LAN Local Area Network MAC Media Access Control MTU Maximum Transmission Unit NT...

Страница 358: ...il Transfer Protocol SNMP Simple Network Management Protocol TCP Transmission Control Protocol TFTP Trivial File Transfer Protocol UDP User Datagram Protocol UPnP Universal Plug and Play VBR Variable...

Страница 359: ...city accumulation that is needed for all channels in the DVR during scheduled video recording In the formula means total number of channels in one DVR Step 4 According to Formula 4 to calculate total...

Страница 360: ...ston DataTravelerII 1 GB Kingston DataTravelerII 2 GB Kingston DataTraveler 1 GB Kingston DataTraveler 2 GB Maxell USB Flash Stick 128 MB Maxell USB Flash Stick 256 MB Maxell USB Flash Stick 512 MB Ma...

Страница 361: ...GB Appendix 3 2 Compatible SD Card List Appendix Table 3 2 Compatible SD card Manufacturer Standard Capacity Card type Transcend SDHC6 16 GB Big Kingston SDHC4 4 GB Big Kingston SD 2 GB Big Kingston...

Страница 362: ...ung TS H653 Ver F Samsung SH 224BB CHXH SONY DRU V200S SONY DRU 845S SONY AW G170S Pioneer DVR 217CH Appendix 3 6 Compatible SATA HDD List Please upgrade the DVR firmware to latest version to ensure t...

Страница 363: ...SATA Seagate SkyHawk HDD ST2000VX008 2 TB SATA Seagate SkyHawk HDD ST3000VX006 3 TB SATA Seagate SkyHawk HDD ST3000VX010 3 TB SATA Seagate SkyHawk HDD ST4000VX000 4 TB SATA Seagate SkyHawk HDD ST4000V...

Страница 364: ...T6000VX0011 6 TB SATA Seagate SkyHawk HDD Support HDD data recovery offered by Seagate ST8000VX0012 8 TB SATA WD WD Green WD10EURX EOL 1 TB SATA WD WD Green WD20EURX EOL 2 TB SATA WD WD Green WD30EURX...

Страница 365: ...B SATA Seagate Constellation ES series SATA interface ST1000NM0033 1 TB SATA Seagate Constellation ES series SATA interface ST2000NM0033 2 TB SATA Seagate Constellation ES series SATA interface ST3000...

Страница 366: ...terface ST3000NM0023 3 TB SATA Seagate Constellation ES series SAS interface ST4000NM0023 4 TB SATA Seagate Constellation ES series SAS interface ST6000NM0014 6 TB SATA Seagate Constellation ES series...

Страница 367: ...terface WD4000F9YZ 4 TB SATA WD WD SATA interface WD4002FYYZ 4 TB SATA WD WD SATA interface WD6001FSYZ 6 TB SATA WD WD SATA interface WD6002FRYZ 6 TB SATA WD WD SATA interface WD8002FRYZ 8 TB SATA HIT...

Страница 368: ...Seagate Pipeline HD Mini ST2000LM003 EOL 2 TB SATA TOSHIBA 2 5 inch PC series MQ01ABD050V 500 GB SATA TOSHIBA 2 5 inch PC series MQ01ABD100V 1 TB SATA SAMSUNG HN M101MBB HN M101MBB EOL 1 TB SATA Seaga...

Страница 369: ...ow And you can use the USB cable with the model recommended to set USB burner Appendix Table 4 1 Compatible CD DVD burner Manufacturer Model Port Type Type Sony DRX S50U USB DVD RW Sony DRX S70U USB D...

Страница 370: ...een HFNOVO CRT LXB FD17069HB 17 inch HFNOVO CRT LXB HF769A 17 inch HFNOVO CRT LX GJ556D 17 inch Samsung LCD 2494HS 24 inch Samsung LCD P2350 23 inch Samsung LCD P2250 22 inch Samsung LCD P2370G 23 inc...

Страница 371: ...el network working mode D LinK DES 1016D 10 100M self adaptive D LinK DES 1008D 10 100M self adaptive Ruijie RG S1926S Five network modes AUTO HALF 10M FULL 10M HALF 100M FULL 100M H3C H3C S1024 10 10...

Страница 372: ...und and etc There shall be comprehensive management and the measures shall be scientific reliable practical and economic Considering the high voltage during the inductive thundering the International...

Страница 373: ...ssfully experience from our past work One point ground In the following figure you can see there is a one point ground This connection provides common point to allow signal to be transmitted in many c...

Страница 374: ...nd When connecting devices of huge size the device physical dimension and connection cable is big comparing with the wave path of existed interference then there is possibility of interference when th...

Страница 375: ...3 pin socket in the monitor system to the ground port of the system protection ground cable Appendix 7 4 The Shortcut Way to Check the Electric System by Digital Multimeter For 220 VAC socket from the...

Страница 376: ...e hand to hold the metal end and then the other hand inserts the pen to the L port of the socket See the following figure If the multimeter shows 125 then you can see current live cable connection is...

Страница 377: ...her hand inserts the pen to the N port of the socket See the following figure If the multimeter shows 0 then you can see current N cable connection is standard If the value is more than 10 then you ca...

Страница 378: ...User s Manual 362 Appendix Figure 7 7 Check neutral cable connection...

Страница 379: ...r to the following figure for RJ 45 cable definition Appendix Figure 8 1 RJ 45 Refer to the following figure for RS 232 pin definition Appendix Figure 8 2 RS 232 Cross Connection Refer to the followin...

Страница 380: ...5 White and blue 3 TXD 3 White and green 5 GND Straight Connection Please refer to the following figure for straight cable connection information Appendix Figure 8 4 Straight cable connection Refer t...

Страница 381: ...ormation of firmware updates released by the manufacturer We suggest that you download and use the latest version of client software Nice to have recommendations to improve your device network securit...

Страница 382: ...dio and video data being stolen during transmission Reminder encrypted transmission will cause some loss in transmission efficiency 11 Secure Auditing Check online users we suggest that you check onli...

Страница 383: ...User s Manual 367 device More information Please visit Dahua official website security emergency response center for security announcements and the latest security recommendations...

Страница 384: ...User s Manual...

Отзывы: