9.8.2. Troubleshooting Certificates
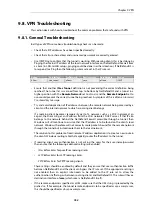
If certificates have been used in a VPN solution then the following should be looked at as a
source of potential problems:
•
Check that the correct certificates have been used for the right purposes.
•
Check that the certificate
.cer
and
.key
files have the same filename. For example,
my_cert.key
and
my_cert.cer
.
•
Check that the certificates have not expired. Certificates have a specific lifetime and when
this expires they cannot be used and new certificates must be issued.
•
Check that the NetDefendOS date and time is set correctly. If the system time and date is
wrong then certificates can appear as being expired when, in fact, they are not.
•
Consider time-zone issues with newly generated certificates. The NetDefend Firewall's time
zone may not be the same as the CA server's time zone and the certificate may not yet be
valid in the local zone.
•
Disable CRL (revocation list) checking to see if CA server access could be the problem. CA
Server issues are discussed further in
Section 3.9.4, “CA Server Access”
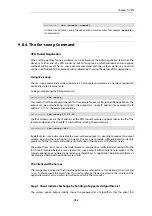
9.8.3. The ike -stat Command
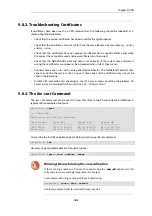
The
ipsec
CLI command can be used to show that IPsec tunnels have correctly established. A
representative example of output is:
gw-world:/> ipsec
--- IPsec SAs:
Displaying one line per SA-bundle
IPsec Tunnel
Local Net
Remote Net
Remote GW
------------
--------------
------------
-------------
L2TP_IPSec
214.237.225.43
84.13.193.179
84.13.193.179
IPsec_Tun1
192.168.0.0/24
172.16.1.0/24
82.242.91.203
To examine the first IKE negotiation phase of tunnel setup use the
ike
command:
gw-world:/> ike
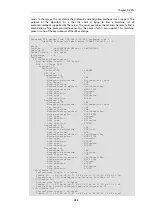
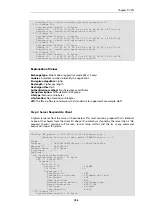
However, to get complete details of tunnel setup use:
gw-world:/> ipsec -show -verbose -usage
Warning: Be careful using the -num=all option
If there are large numbers of tunnels then avoid using the
-num=all
option since this
will generate correspondingly large amounts of output.
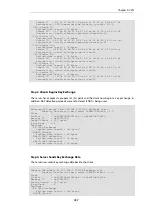
For example, with a large number of tunnels avoid using:
gw-world:/> ipsec -show -num=all
Another example of what to avoid with many tunnels is:
Chapter 9: VPN
763
Содержание NetDefendOS
Страница 30: ...Figure 1 3 Packet Flow Schematic Part III Chapter 1 NetDefendOS Overview 30 ...
Страница 32: ...Chapter 1 NetDefendOS Overview 32 ...
Страница 144: ...Chapter 2 Management and Maintenance 144 ...
Страница 220: ... Enable DHCP passthrough Enable L2 passthrough for non IP protocols 4 Click OK Chapter 3 Fundamentals 220 ...
Страница 267: ... SourceNetwork lannet DestinationInterface any DestinationNetwork all nets 4 Click OK Chapter 3 Fundamentals 267 ...
Страница 284: ...Chapter 3 Fundamentals 284 ...
Страница 360: ...The ospf command options are fully described in the separate NetDefendOS CLI Reference Guide Chapter 4 Routing 360 ...
Страница 392: ...Chapter 4 Routing 392 ...
Страница 396: ...Web Interface 1 Go to Network Ethernet If1 2 Select Enable DHCP 3 Click OK Chapter 5 DHCP Services 396 ...
Страница 419: ... Host 2001 DB8 1 MAC 00 90 12 13 14 15 5 Click OK Chapter 5 DHCP Services 419 ...
Страница 420: ...Chapter 5 DHCP Services 420 ...
Страница 424: ...2 Now enter Name lan_Access Action Expect Interface lan Network lannet 3 Click OK Chapter 6 Security Mechanisms 424 ...
Страница 573: ...Chapter 6 Security Mechanisms 573 ...
Страница 575: ...This section describes and provides examples of configuring NAT and SAT rules Chapter 7 Address Translation 575 ...
Страница 607: ...Chapter 7 Address Translation 607 ...
Страница 666: ...Chapter 8 User Authentication 666 ...
Страница 775: ...Chapter 9 VPN 775 ...
Страница 819: ...Chapter 10 Traffic Management 819 ...
Страница 842: ...Chapter 11 High Availability 842 ...
Страница 866: ...Default Enabled Chapter 13 Advanced Settings 866 ...
Страница 879: ...Chapter 13 Advanced Settings 879 ...

