1.
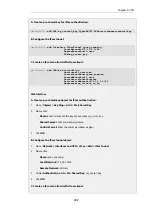
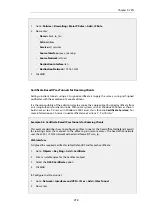
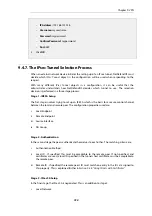
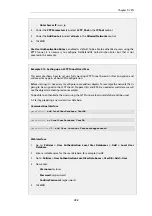
Go to: Network > Interfaces and VPN > IPsec
2.
Select the tunnel
my_ipsec_tunnel1
3.
Enter the following under
Tunnel Monitor
:
•
Enable the Tunnel Monitor option
•
Monitored IP: 203.0.11.5
•
Max Loss: 5
4.
Click OK
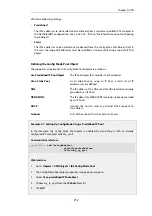
9.4.9. IPsec Advanced Settings
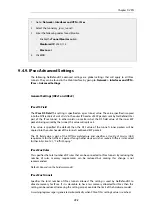
The following NetDefendOS advanced settings are global settings that will apply to all IPsec
tunnels. They can be found in the Web Interface by going to: Network > Interfaces and VPN >
IPsec > Advanced Settings.
General Settings (IKEv1 and IKEv2)
IPsec DS Field
The IPsec DS Field This setting is specified on a per tunnel value. The value specified is copied
into the
Differentiated Service Field
in the outer IP header of ESP packets sent by NetDefendOS as
part of the IPsec tunnel. In other words, no matter what the DS field value of the inner ESP
packets being carried by the tunnel, this value will replace it.
If no value is specified (the default) then the DSF value of the tunnel's inner packets will be
copied into the outer header of the tunnel's outbound ESP packets.
The DS field value is part of the
DiffServ
architecture and specifies a
Quality of Service
(QoS)
requirement for the traffic as it passes through other devices such as routers. Diffserv is discussed
further in
Section 10.1, “Traffic Shaping”
.
IPsec Max Rules
This specifies the total number of IP rules that can be connected to IPsec tunnels. By reducing the
number of rules, memory requirements can be reduced but making this change is not
recommended.
Default:
Depends on the hardware model
IPsec Max Tunnels
Specifies the total number of IPsec tunnels allowed. The setting is used by NetDefendOS to
allocate memory for IPsec. If it is desirable to have less memory allocated for IPsec then this
setting can be reduced. Increasing the setting cannot override the limit of the hardware model.
A warning log message is generated automatically when 90% of this setting's value is reached.
Chapter 9: VPN
723
Содержание NetDefendOS
Страница 30: ...Figure 1 3 Packet Flow Schematic Part III Chapter 1 NetDefendOS Overview 30 ...
Страница 32: ...Chapter 1 NetDefendOS Overview 32 ...
Страница 144: ...Chapter 2 Management and Maintenance 144 ...
Страница 220: ... Enable DHCP passthrough Enable L2 passthrough for non IP protocols 4 Click OK Chapter 3 Fundamentals 220 ...
Страница 267: ... SourceNetwork lannet DestinationInterface any DestinationNetwork all nets 4 Click OK Chapter 3 Fundamentals 267 ...
Страница 284: ...Chapter 3 Fundamentals 284 ...
Страница 360: ...The ospf command options are fully described in the separate NetDefendOS CLI Reference Guide Chapter 4 Routing 360 ...
Страница 392: ...Chapter 4 Routing 392 ...
Страница 396: ...Web Interface 1 Go to Network Ethernet If1 2 Select Enable DHCP 3 Click OK Chapter 5 DHCP Services 396 ...
Страница 419: ... Host 2001 DB8 1 MAC 00 90 12 13 14 15 5 Click OK Chapter 5 DHCP Services 419 ...
Страница 420: ...Chapter 5 DHCP Services 420 ...
Страница 424: ...2 Now enter Name lan_Access Action Expect Interface lan Network lannet 3 Click OK Chapter 6 Security Mechanisms 424 ...
Страница 573: ...Chapter 6 Security Mechanisms 573 ...
Страница 575: ...This section describes and provides examples of configuring NAT and SAT rules Chapter 7 Address Translation 575 ...
Страница 607: ...Chapter 7 Address Translation 607 ...
Страница 666: ...Chapter 8 User Authentication 666 ...
Страница 775: ...Chapter 9 VPN 775 ...
Страница 819: ...Chapter 10 Traffic Management 819 ...
Страница 842: ...Chapter 11 High Availability 842 ...
Страница 866: ...Default Enabled Chapter 13 Advanced Settings 866 ...
Страница 879: ...Chapter 13 Advanced Settings 879 ...

