3.
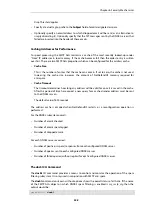
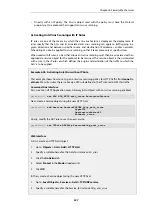
Select the TCP in the Type dropdown list
4.
Enter 80 in the Destination Port textbox
5.
Select the HTTP ALG just created in the ALG dropdown list
6.
Click OK
C. Finally, modify the
NAT
rule (called NATHttp in this example) to use the new service:
1.
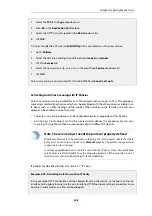
Go to: Policies
2.
Select the
NAT
rule handling the traffic between lannet and all-nets
3.
Click the Service tab
4.
Select the new service,
http_anti_virus
, in the predefined Service dropdown list
5.
Click OK
Anti-virus scanning is now activated for all web traffic from lannet to all-nets.
Activating Anti-Virus Scanning with IP Policies
Anti-virus scanning can be enabled for an
IP Policy
object without using an ALG. This provides a
more direct method of activation which can be combined with the other options available in an
IP policy such as traffic shaping and file control. When setting up the IP policy, the anti-virus
option can be enabled in one of two ways:
•
The anti-virus scanning options can be configured directly as properties of the IP policy.
•
An
Anti-Virus Profile
object can first be created which defines the properties for anti-virus
scanning. This profile can then be used repeatedly with different IP policies.
Note: The service object needs the protocol property defined
Whenever anti-virus is to be used with an IP policy, the service object selected for the IP
policy must have a value assigned to its
Protocol
property. The protocol assigned must
support anti-virus scanning.
A custom or predefined service could be used with the IP policy. Only some predefined
service objects in NetDefendOS have this property already set. If this property is not set,
the anti-virus controls will be disabled in the Web Interface.
IP policies are described further in
.
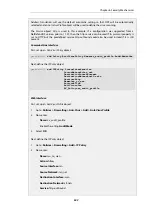
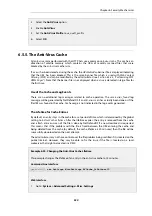
Example 6.29. Activating Anti-Virus with an IP Policy
In this example, HTTP connections will be allowed from the internal
lan_net
network on the
lan
interface to the public Internet via the
wan
interface. HTTP downloads will be scanned for viruses
but only in audit mode so no files will be dropped.
Chapter 6: Security Mechanisms
548
Содержание NetDefendOS
Страница 30: ...Figure 1 3 Packet Flow Schematic Part III Chapter 1 NetDefendOS Overview 30 ...
Страница 32: ...Chapter 1 NetDefendOS Overview 32 ...
Страница 144: ...Chapter 2 Management and Maintenance 144 ...
Страница 220: ... Enable DHCP passthrough Enable L2 passthrough for non IP protocols 4 Click OK Chapter 3 Fundamentals 220 ...
Страница 267: ... SourceNetwork lannet DestinationInterface any DestinationNetwork all nets 4 Click OK Chapter 3 Fundamentals 267 ...
Страница 284: ...Chapter 3 Fundamentals 284 ...
Страница 360: ...The ospf command options are fully described in the separate NetDefendOS CLI Reference Guide Chapter 4 Routing 360 ...
Страница 392: ...Chapter 4 Routing 392 ...
Страница 396: ...Web Interface 1 Go to Network Ethernet If1 2 Select Enable DHCP 3 Click OK Chapter 5 DHCP Services 396 ...
Страница 419: ... Host 2001 DB8 1 MAC 00 90 12 13 14 15 5 Click OK Chapter 5 DHCP Services 419 ...
Страница 420: ...Chapter 5 DHCP Services 420 ...
Страница 424: ...2 Now enter Name lan_Access Action Expect Interface lan Network lannet 3 Click OK Chapter 6 Security Mechanisms 424 ...
Страница 573: ...Chapter 6 Security Mechanisms 573 ...
Страница 575: ...This section describes and provides examples of configuring NAT and SAT rules Chapter 7 Address Translation 575 ...
Страница 607: ...Chapter 7 Address Translation 607 ...
Страница 666: ...Chapter 8 User Authentication 666 ...
Страница 775: ...Chapter 9 VPN 775 ...
Страница 819: ...Chapter 10 Traffic Management 819 ...
Страница 842: ...Chapter 11 High Availability 842 ...
Страница 866: ...Default Enabled Chapter 13 Advanced Settings 866 ...
Страница 879: ...Chapter 13 Advanced Settings 879 ...

