•
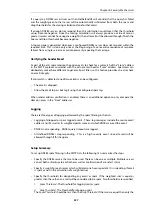
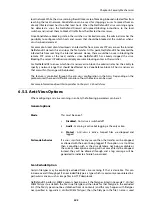
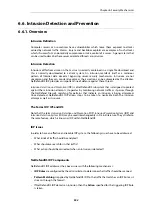
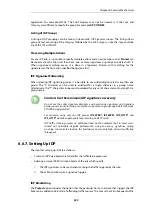
Directly with an IP policy. The
Service
object used with the policy must have the
Protocol
property set to a protocol that supports anti-virus scanning.
Activating Anti-Virus Scanning with IP Rules
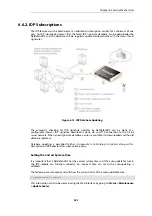
IP rules are one of the means by which the anti-virus feature is deployed, the deployment. IP
rules specify that the ALG and its associated anti-virus scanning can apply to traffic going in a
given direction and between specific source and destination IP addresses and/or networks.
Scheduling can also be applied to virus scanning so that it takes place only at specific times.
When used with IP rules, an ALG that allows anti-virus scanning must then be associated with an
appropriate service object for the protocol to be scanned. The service object is then associated
with a rule in the IP rule set which defines the origin and destination of the traffic to which the
ALG is to be applied.
Example 6.28. Activating Anti-Virus with an IP Rule
This example shows how to set up an anti-virus scanning policy for HTTP traffic from lannet to
all-nets. We will assume there is already a
NAT
rule defined in the IP rule set to NAT this traffic.
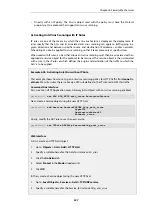
Command-Line Interface
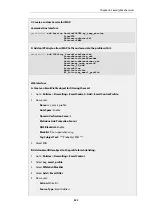
First, create an HTTP Application Layer Gateway (ALG) Object with anti-virus scanning enabled:
gw-world:/> set ALG ALG_HTTP anti_virus Antivirus=Protect
Next, create a Service object using the new HTTP ALG:
gw-world:/> add Service ServiceTCPUDP http_anti_virus
Type=TCP
DestinationPorts=80
ALG=anti_virus
Finally, modify the
NAT
rule to use the new service:
gw-world:/> set IPRule NATHttp Service=http_anti_virus
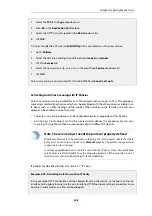
Web Interface
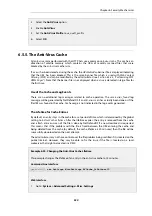
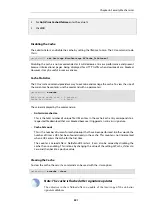
A. First, create an HTTP ALG Object:
1.
Go to: Objects > ALG > Add > HTTP ALG
2.
Specify a suitable name for the ALG, for instance
anti_virus
3.
Click the Antivirus tab
4.
Select Protect in the Mode dropdown list
5.
Click OK
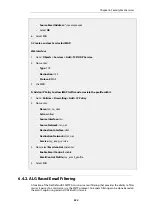
B. Then, create a Service object using the new HTTP ALG:
1.
Go to: Local Objects > Services > Add > TCP/UDP service
2.
Specify a suitable name for the Service, for instance http_anti_virus
Chapter 6: Security Mechanisms
547
Содержание NetDefendOS
Страница 30: ...Figure 1 3 Packet Flow Schematic Part III Chapter 1 NetDefendOS Overview 30 ...
Страница 32: ...Chapter 1 NetDefendOS Overview 32 ...
Страница 144: ...Chapter 2 Management and Maintenance 144 ...
Страница 220: ... Enable DHCP passthrough Enable L2 passthrough for non IP protocols 4 Click OK Chapter 3 Fundamentals 220 ...
Страница 267: ... SourceNetwork lannet DestinationInterface any DestinationNetwork all nets 4 Click OK Chapter 3 Fundamentals 267 ...
Страница 284: ...Chapter 3 Fundamentals 284 ...
Страница 360: ...The ospf command options are fully described in the separate NetDefendOS CLI Reference Guide Chapter 4 Routing 360 ...
Страница 392: ...Chapter 4 Routing 392 ...
Страница 396: ...Web Interface 1 Go to Network Ethernet If1 2 Select Enable DHCP 3 Click OK Chapter 5 DHCP Services 396 ...
Страница 419: ... Host 2001 DB8 1 MAC 00 90 12 13 14 15 5 Click OK Chapter 5 DHCP Services 419 ...
Страница 420: ...Chapter 5 DHCP Services 420 ...
Страница 424: ...2 Now enter Name lan_Access Action Expect Interface lan Network lannet 3 Click OK Chapter 6 Security Mechanisms 424 ...
Страница 573: ...Chapter 6 Security Mechanisms 573 ...
Страница 575: ...This section describes and provides examples of configuring NAT and SAT rules Chapter 7 Address Translation 575 ...
Страница 607: ...Chapter 7 Address Translation 607 ...
Страница 666: ...Chapter 8 User Authentication 666 ...
Страница 775: ...Chapter 9 VPN 775 ...
Страница 819: ...Chapter 10 Traffic Management 819 ...
Страница 842: ...Chapter 11 High Availability 842 ...
Страница 866: ...Default Enabled Chapter 13 Advanced Settings 866 ...
Страница 879: ...Chapter 13 Advanced Settings 879 ...

